So, you have some code running in a Windows Azure Worker role on Azure (not on the Azure Compute Emulator) and you need to debug what is going on. In this blog post I will show you how you can use Azure Connect, the remote desktop and the remote debugger to look inside your worker role.
WARNING: this process can be a strain on your patience, since the debugger will work very slowly! But this is the only way to look inside a running worker role using the debugger…
Step 1: Install your worker role on Azure, enabling remote desktop and Azure Connect
First we need to install the worker role in an Azure instance, not forgetting to enable remote desktop and Azure Connect.
To install Azure Connect, right-click on the worker role and select Properties. The Worker Role configuration window will open. Select the Virtual Network tab:

Check the “Activate Windows Azure Connect” checkbox and copy-paste your activation token in the textbox. To get the activation token, go to the Windows Azure Portal, select the Virtual Network tab and select your subscription (you may need to request access to Windows Azure Connect because it is still in CTP).
Click on the Get Activation Token button:

Copy the activation token and paste in the project’s properties.
If you have never done so before, click on the Install Local Endpoint button to get the local software installed on your computer.

To install Remove Desktop, you need to first install a certificate on your Hosted Service, containing both private and public key pairs. This is easy to do using Visual Studio:
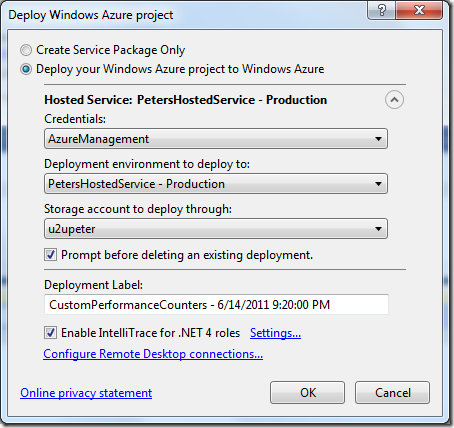
Right-click your Azure project and select Publish… The Deploy Windows Azure project dialog will open.

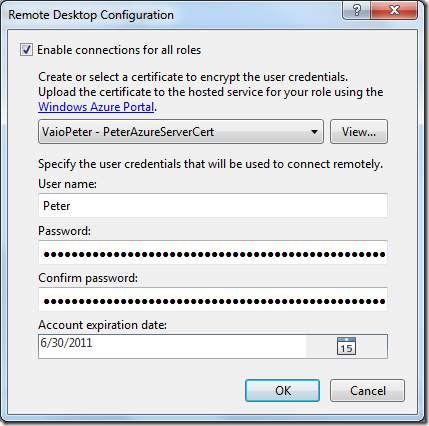
Click on the Configure Remote Desktop connection link, which opens the Remote Desktop Configuration dialog:

Select a certificate from the drop-down, or create a new certificate using the <Create…> entry (the last entry in the dropdown combobox).
To export the certificate (so you can install it using the Azure Portal) click on the View… button.
Click on the Details tab, then on the Copy to File… button. The Certificate Export wizard will open… Click Next.
Select Yes, export the private key option. Press Next.

Keep the default .pfx option, press Next again. Enter a password and press Next.
Select a file name, press Next then Finish. Now we’re ready to import the certificate in the Azure portal.
Go to your hosted services, select the service of your choice and then select the Certificate folder. Click on the Add Certificate button:

Open the previously created .pfx file, enter your password and press Create. This should add the certificate to the hosted service.
Go back to Visual Studio (the Remote Desktop Configuration dialog should still be waiting for you). Select the certificate, enter your username and password.
WARNING: You want to use your real username and password, this way you can authenticate to the remote server from Visual Studio. Otherwise you will get authentication errors!
Enter some appropriate expiration date and click Ok to start publishing. Wait for Visual Studio to complete…

This is step 1. In the next post I will show you how to copy the remote debugger to your worker role instance…