Getting started with Python in Microsoft Azure - Machine Learning Service
In my last blogpost I tried to convince you, as a Python programmer, that Microsoft Azure has plenty to offer you. Even though more and more ETL and machine learning products in Azure are based on a fully visual experience, there are also quite a few products in which (Python) coding skills are extremely useful or even required.
As an example, in the last blog I showed how to get started with Azure Databricks, a big data and machine-learning platform built on top of Apache Spark. The idea is that you can use Databricks to easily set up a Spark cluster, with which you interact through notebooks. One of the languages that can be used inside a notebook is Python.
Azure Machine Learning Service
In this blog, I will show you a second Azure product in which Python can be useful: Azure Machine Learning Service. This is a cloud service that you can use to train, deploy, automate, and manage machine learning models at a broad scale.
You may wonder now what makes Machine Learning Service different from Databricks. Databricks allows you to significantly spead up your Machine Learning activities by running them on a Spark Cluster. But what if you want to use another type of compute resource to train your models? What if you want to keep track of the results of different model comparisons? What if you want to deploy your model? These things may not be straightforward with Databricks, but they are with Machine Learning Service. Another interesting feature is that you can incorporate your DataBricks notebook in a Machine Learning Service pipeline.
Three Ways of using Machine Learning Service
There are basically three ways in which you can use Azure Machine Learning Services. With the first way, AutoML, you just provide the data and specify the type of problem that you try to solve (classification, regression or forecasting). Automated ML then uses a trial-and-error approach to solve your problem in a 'reasonably good' way. The second approach, consists of a visual interface in which you can create a model by dragging and dropping modules to create a Machine Learning flow (like Machine Learning Studio). The third possibility is to use the Azure Machine Learning SDK for Python to build and run your own machine learning workflows. You can interact with this service in any Python environment, including Jupyter Notebooks. You can train models either locally or by using cloud compute resources. Let's dive a bit deeper into this last approach!
Getting started with the Azure Machine Learning SDK for Python
Creating a Machine Learning Workspace
Let's create a new Machine Learning resource. Currently, there are two editions: Basic and Enterprice (in preview). The basic workspace is for free, the resources that you create within a workspace will be charged. Check this link for more pricing details. For now, let's go for a basic workspace.
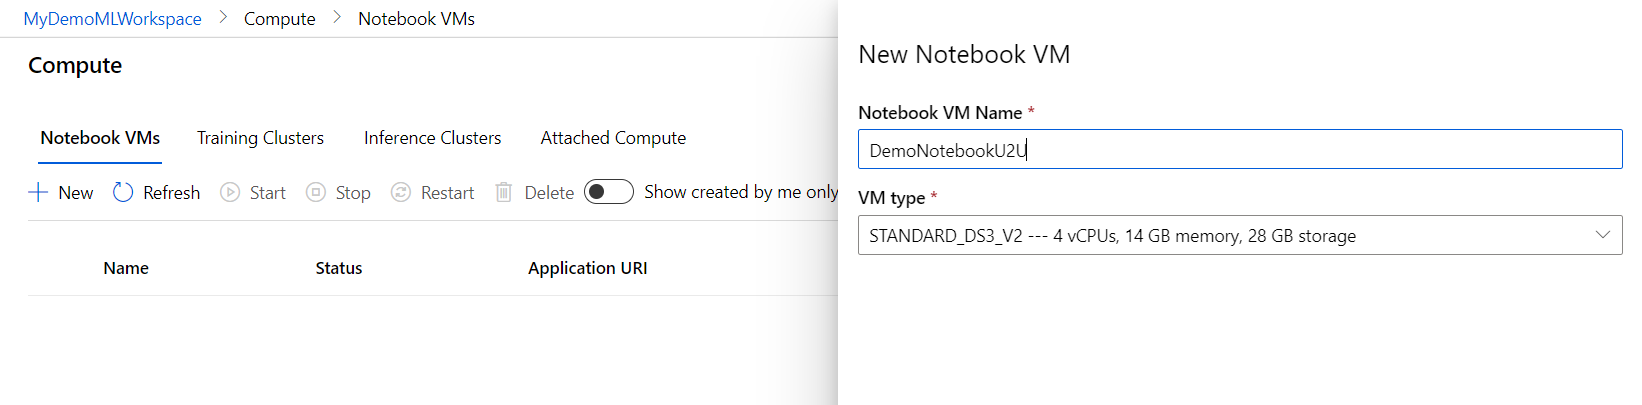
Creating a Notebook VM
In the Notebook VM tab of the compute section, click 'New' to create a new notebook VM. You can choose a VM Type that fits your computational needs. Let's just create the default notebook VM for this demonstration.
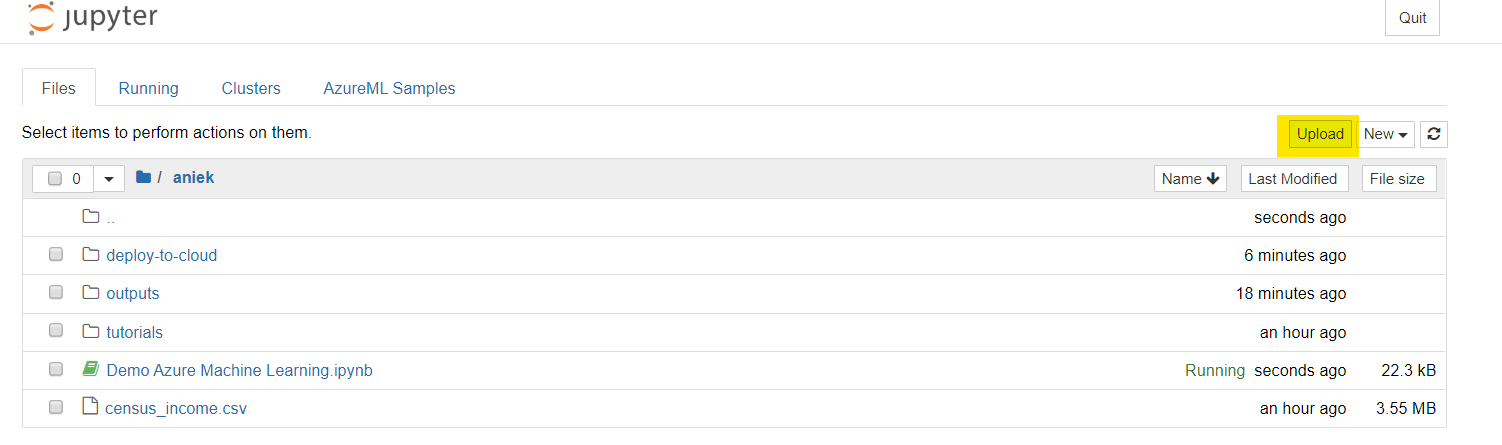
Creating or Importing a Notebook
When the notebook is created, a link to Jupyter notebooks appears behind it. If you click on this link, you will find a lot of useful tutorials and how-to notebooks in the AzureML Samples tab to get you started. For this blog, I created a notebook that you can download from here; upload it to Jupter Notebooks on your Notebook VM.
Training the model and logging the results in an experiment
Once we are in the notebook, we can start writing Python code to train our model. We can keep track of the results of training and testing models in the Machine learning workspace that we created before.
- Connect to the workspace and create an experiment
The first thing we need to do is connect to our Machine Learning Workspace on Azure. To do so, we will import the Workspace class and load our subscription information from the config.json file in our current directory using the from_config() function. Next, we will create an experiment in this workspace. In the experiment, we will keep track of our results.

- Loading and transforming data
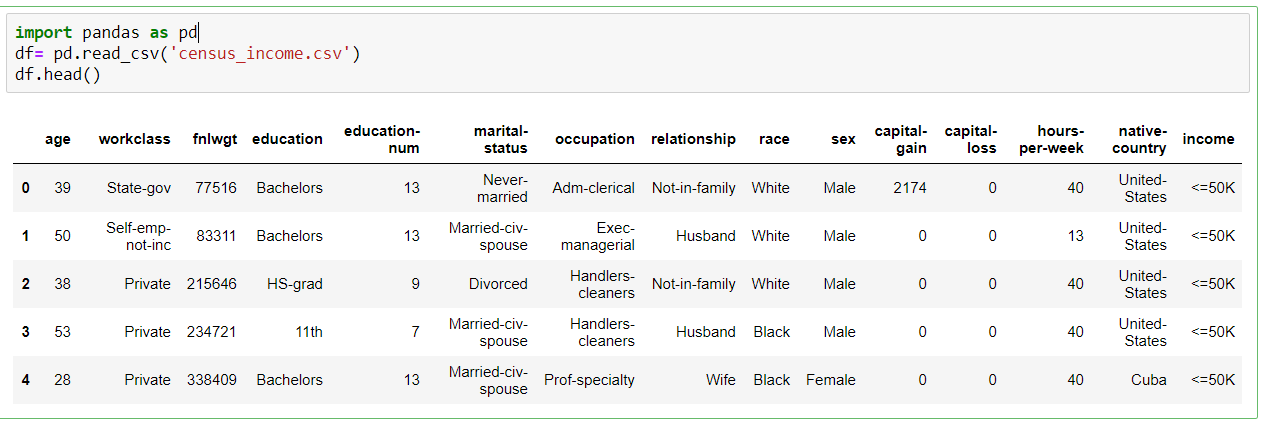
In this demo, we will use the census dataset again. This data set contains information about adults; the goal is to predict whether a person earns less or more than 50K. You can download the dataset from here. Upload it to Jupyter notebooks (in the same folder as the current notebook) so that you can easily load it using pandas.
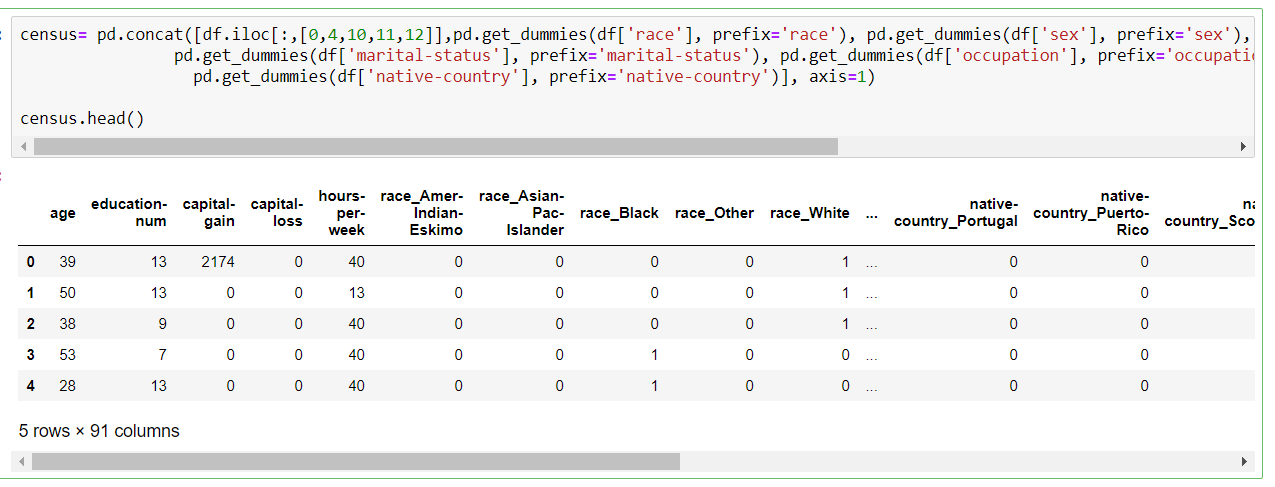
Before we can apply a machine learning model to this dataset, we need to do some preprocessing. Let's transform all categorical columns to numerical ones.
Next, we will divide the data into a training and test set

- Training the model
In this demonstration, we will train an easy scikit-learn model without extensive hyperparameter tuning or comparing many different models. We can simply do this on our Notebook VM. It is possible however, to attach a more powerful compute target, and to train your model over there. In the img-classification-part1-training sample notebook (in the tutorials section of the AzureML Samples tab of Jupyter Notebooks), it is explained how to attach a compute resource, and how to train your model on this remote compute.
Let's train a number of decision trees with different maximum tree depths. We will log the results and save the models as pickle files in the experiment that we created in our Machine Learning Workspace.
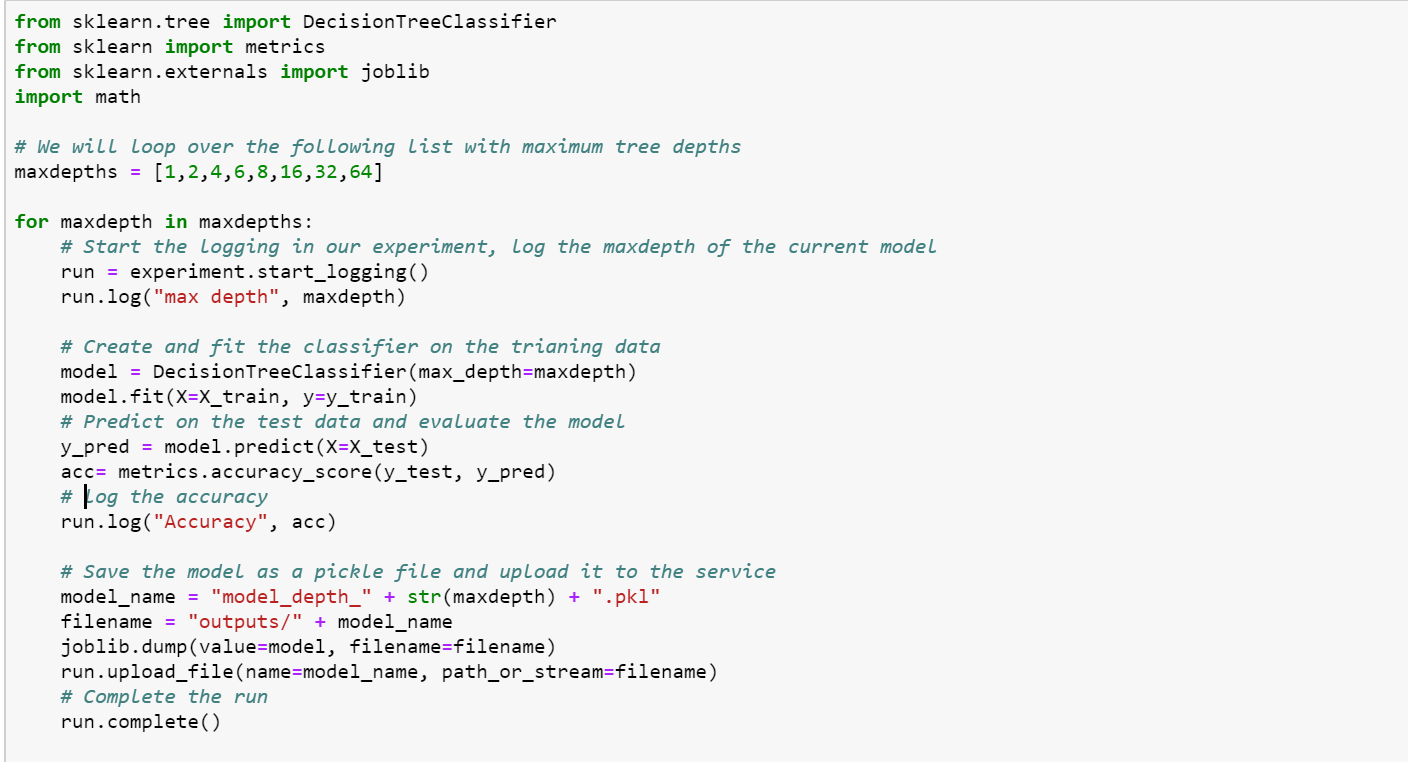
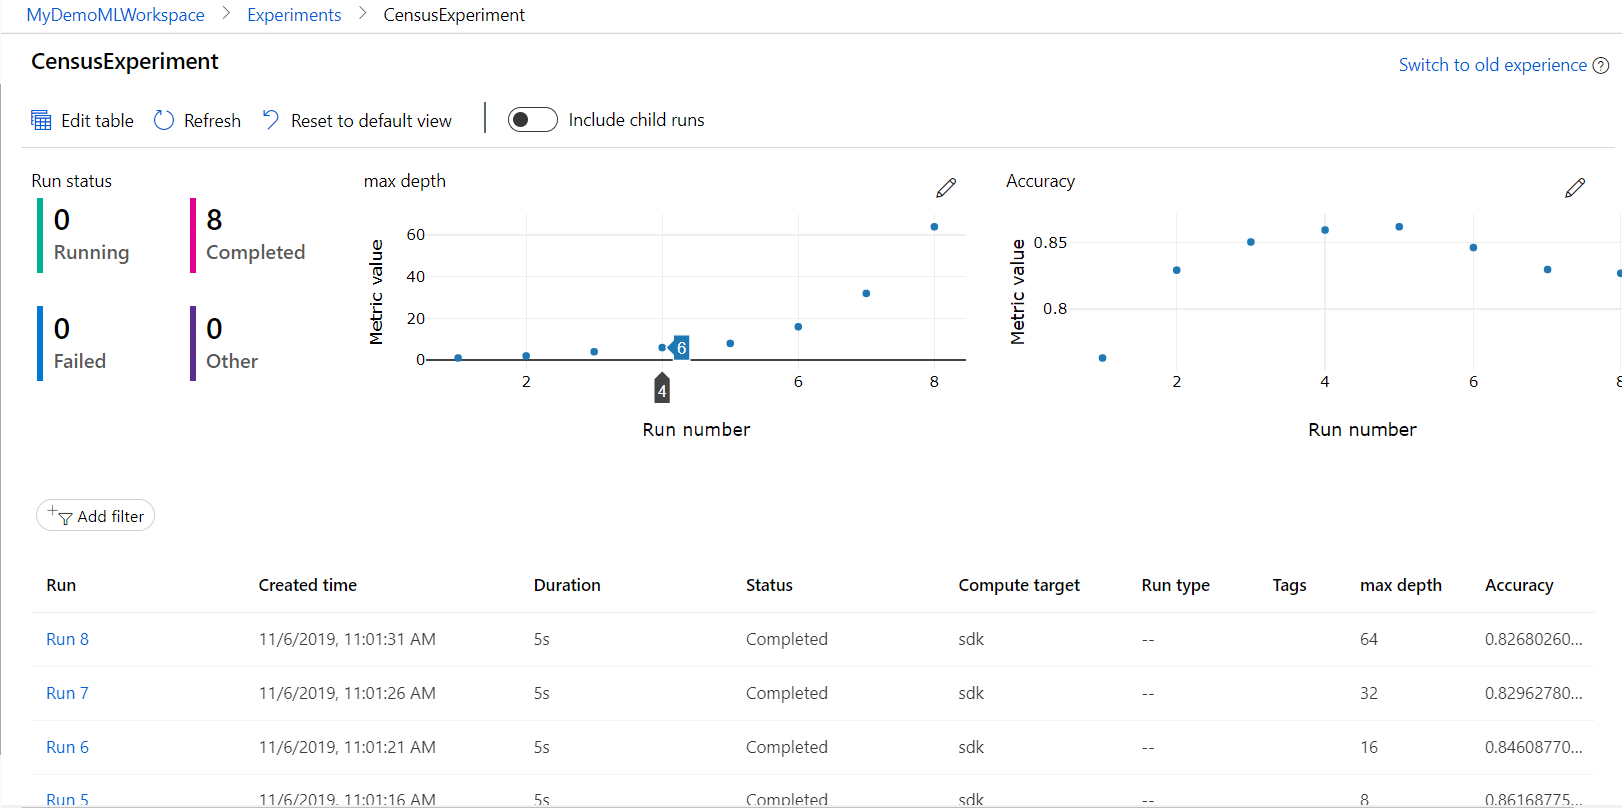
The results of these different models are logged in the experiment in your Machine Learning workspace. Which model has the best accuracy? You can click on a run to get more details and to download the pickle files.
Let's register the best performing model.

Deploying the best model
Now that we have our model, we can deploy it as a web service hosted in ACI.
To do so, we need:
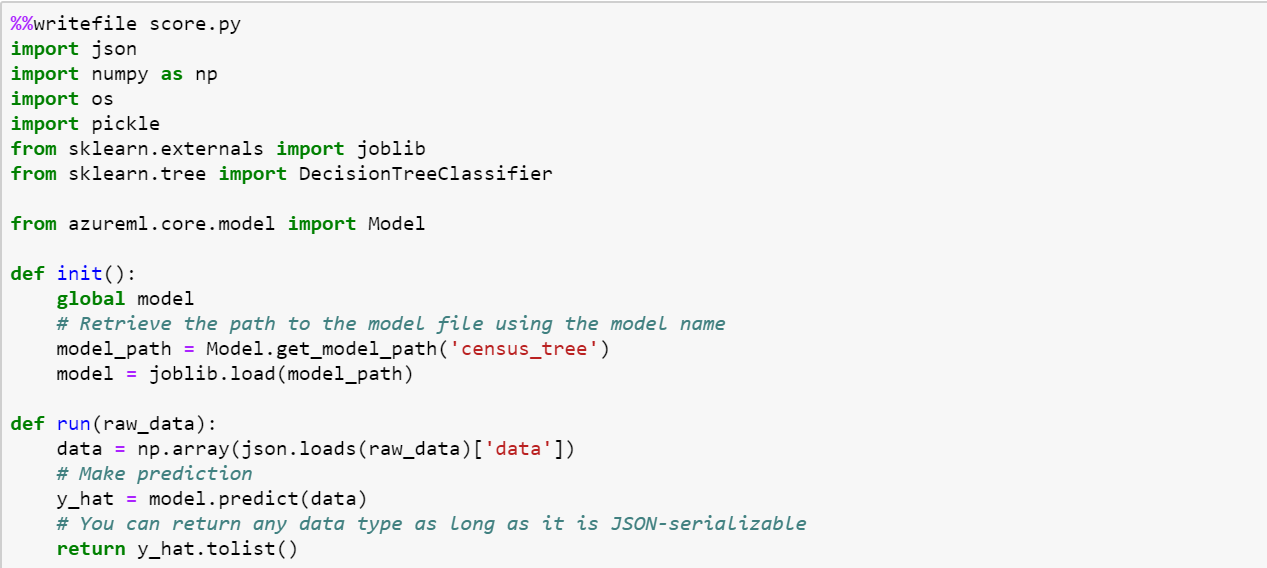
- A scoring script to show how to use the model
- An environment file to show what packages need to be installed
- A configuration file to build the ACI
- The model we trained before
Let's start with creating a scoring file:
Next, we create an environment file.

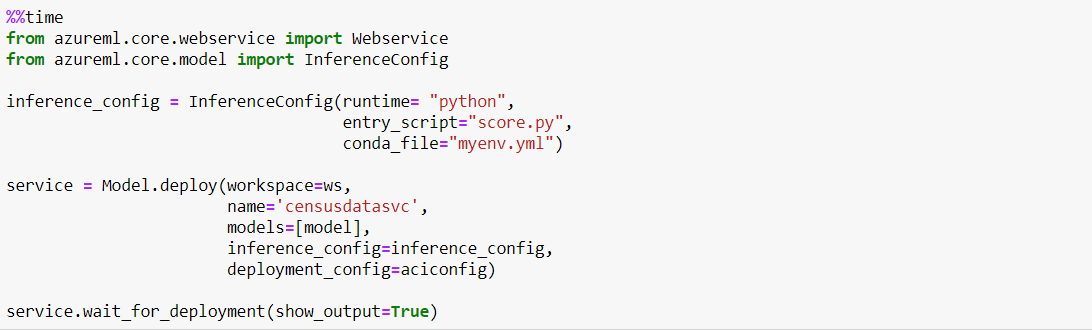
The final thing we need to do before deploying is creating a configuration file for the ACI container.

Now we can finally deploy our model! This may take a while...
Once the deployment is done, we can test the webservice using new data. Let's use the first two rows of our test data for this:

That worked well!
I hope that with this blogpost I showed you that Azure Machine Learning Service can be very useful for you if you want to create your machine learning models with Python. More about Python and Azure in my next blogpost!