This is the next post on Getting Started developing on Azure with Visual Studio 2010.
Starting to develop on Azure with Visual Studio can be a lot to eat the first time. Getting Visual Studio ready, including installing the Management Certificates and so on is not a simple task (the first time anyway). So that is why I made this little walk-through series on starting to develop on Azure… In the first part you’ll build and run your first project on the Azure Compute Emulator, which is the local test version of the cloud. In this part you’ll get Visual Studio ready to directly publish your solution in the cloud by installing the management certificates and in part 3 you will create the Hosted Service and storage account to actually deploy from Visual Studio.
1.2 Deploying your solution to the cloud
Now we’re ready to deploy to the actual cloud environment. Start by logging on to the Azure Management Portal, which is at http://windows.azure.com . Open the Hosted Services tab, and select Management Certificates:
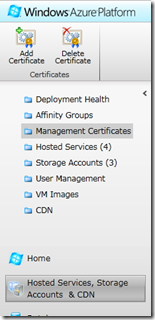
If you just started with Azure development you will not have any certificate here. To make Visual Studio integrate better with the management portal (actually with the management API’s) we need to upload a certificate here so your Visual Studio can publish projects to the cloud. This is easily done with Visual Studio.
1.1.3 Installing the Management Certificate:
Go back to Visual Studio with the cloud project open. Right-click the cloud project and select Publish…
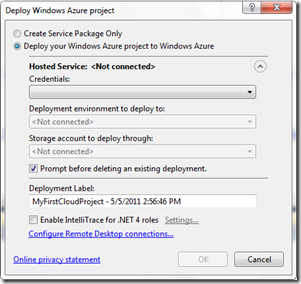
The Deploy Windows Azure project dialog should open:
With this dialog you can publish your project. The first option will create the package, but then you have to deploy it using the Management Portal. The second option will do this for you. In the first drop-down you need to select a Management Certificate, or create a new one.
Select Add… from the Credentials drop-down. The Windows Azure Project Management Authentication dialog opens:
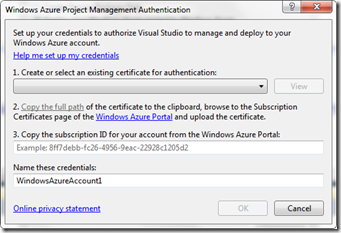
Select <Create…> from the first drop-down. Enter a friendly name for your certificate. I call mine AzureManagment.
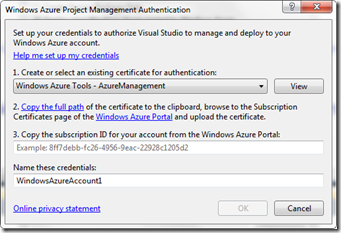
Now click the View button. This will allow use to export the certificate’s public key using the Details… tab:
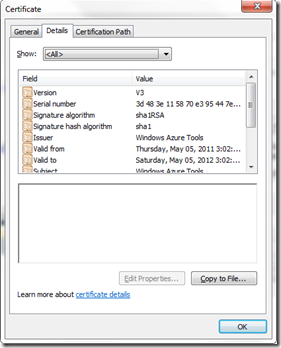
Click on the Copy to File button. This opens the Certificate Export wizard. Click next. Choose “Do not export the private key”:

Click Next> twice, then choose a filename for the certificate. Hit Next> then Finish. Your certificate should be exported now.
Go back to the management portal (windows.azure.com), to the Management Certificates. Click on the Add Certificate button and select your previously exported file. Click Ok and wait for the import to complete. Your certificate should be added, and now you need to copy the subscription-id back to Visual Studio. It is right there in the properties window of the certificate:
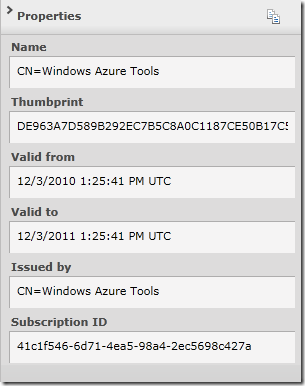
So copy it, go to Visual Studio to where the Windows Azure Project Management Authentication is waiting. Copy the subscription-id and name it:
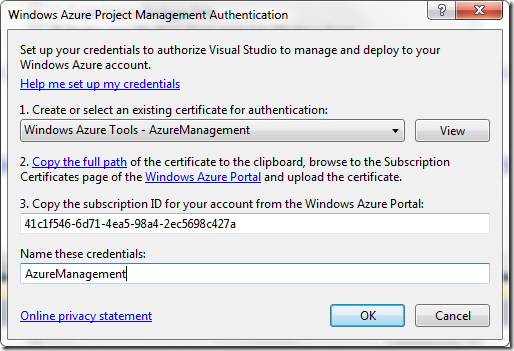
Click OK.
In the next blog post we will add a hosted service and storage account and deploy the solution…