This is the next post on Getting Started developing on Azure with Visual Studio 2010 and Installing the Azure Management Certificates.
Starting to develop on Azure with Visual Studio can be a lot to eat the first time. Getting Visual Studio ready, including installing the Management Certificates and so on is not a simple task (the first time anyway). So that is why I made this little walk-through series on starting to develop on Azure… In the first part you’ll build and run your first project on the Azure Compute Emulator, which is the local test version of the cloud. In the second part you’ll get Visual Studio ready to directly publish your solution in the cloud by installing the management certificates and in this part you will create the Hosted Service and storage account to actually deploy from Visual Studio.
1.3 Creating the Hosted Service
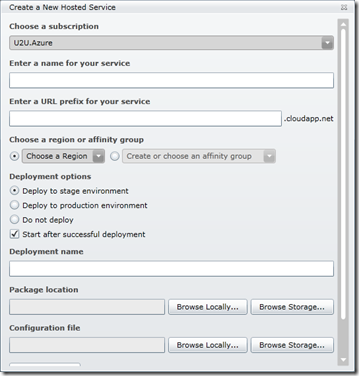
Go back to the Azure Management Portal (windows.azure.com), and now click on the Hosted Services tab. To deploy we also need a hosted service, so click the New Hosted Service button to create one. This opens the Create a New Hosted Service dialog:

Enter a name for your service and URL prefix. The prefix should be world-wide unique, so try adding your company name or something unique to you in it.
If the chosen name is already taken you will be notified like this:

Now we need to choose in which data-center the service should be deployed. We can also do this using an affinity group. An affinity group is an easy way to keep everything together (services can communicate with one another more efficiently (and less cost) if they are running in the same data center) so choose affinity group and select Create a new affinity group… from the dropdown list.
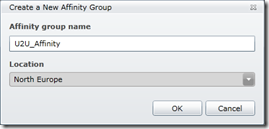
Enter a name and datacenter; best take one near to your expected customers:

North Europe is the datacenter in Amsterdam, which is closest to where I live, so I took that one. Feel free to take another…
Click OK.
We’ll deploy using Visual Studio, so before you click OK, select Do not deploy. Now click OK.
1.1.5 Creating the Storage Account
Finally, before we can deploy we also need to create a Storage Account. Visual Studio will upload the package to storage and then instruct Azure to deploy it from storage.
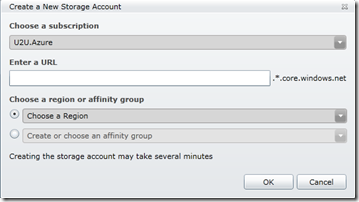
Go back to the Management Portal (windows.azure.com)l. Now go the the Storage Accounts tab. Click on the New Storage Account button. This will open the Create a New Storage Account dialog:

Enter a unique (lowercase only) URL and use the same affinity group you used in the previous step. Hit OK.
1.1.6 Ready to deploy the web site
Now we are ready to deploy!
First we need to remove the local development trace listener from web.config configuration because it is not available in the cloud, but leave the diagnostic monitor listener:
Code Snippet
- <listeners>
- <add type="Microsoft.WindowsAzure.Diagnostics.DiagnosticMonitorTraceListener, Microsoft.WindowsAzure.Diagnostics, Version=1.0.0.0, Culture=neutral, PublicKeyToken=31bf3856ad364e35"
- name="AzureDiagnostics">
- <filter type="" />
- </add>
- </listeners>
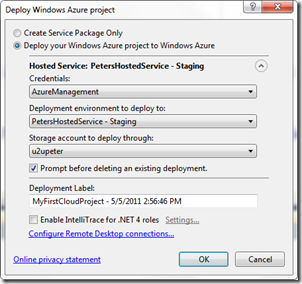
Go back to Visual Studio, right click your azure project, and select Publish… Now select your hosted service and storage account, and hit OK (you might need to cancel and re-open this window to refresh it).

Deployment should start and after a little while you should see the Windows Azure Activity Log:

Wait until this is complete, it may take several minutes or longer depending on bandwidth…

Click on the WebSite URL, the site should open.
1.1.7 Using Server Explorer
Open Server Explorer. With the Azure SDK tools installed, you can look here at Azure Compute and Azure Storage. Click on the Windows Azure Compute tree item, then select Add Deployment Environment…

Select your management certificate to list all hosted services there. Open the tree item and select Staging or Production. Click OK. From now on you can look at this environment from Visual Studio Server Explorer:

You can try the same for storage.
Later we will look at how we can use this to debug applications with Intelli-Trace.
The end. My Next post (next Wednesday) is going to be on remote debugging worker roles running in the cloud…