In a previous blog I showed you how to create a startup task to install certain requirements in Azure Compute. In this blog post I will show you how you can easily turn this startup task into a re-usable plugin. This post continues with the startup post.
Open the UsingStartupTasks lab solution. Right-click on the HelloMVC3 project and select “Open Folder in Windows Explorer”.

Right-click the StartupTasks folder and select Copy.
Open File Explorer and navigate to the Windows Azure SDK folder in Program files (at time of writing this is located on my machine at C:\Program Files\Windows Azure SDK\v1.4). Open the bin folder, then the plugins folder. Paste the StartupTasks folder here. Rename it to MVC3. You should end up with something like this:

As you can see, other Azure features also use this plugin model, for example Azure Connect uses this to install the proper network components in your azure role instance.
Open the folder you just created. Inside it create a new file called MVC3.csplugin (using notepad again, and take care that you use the right extension). Add following content to it (you can copy-paste most of it from the service definition file):
<?xml version="1.0" ?>
<RoleModule  xmlns="http://schemas.microsoft.com/ServiceHosting/2008/10/ServiceDefinition"
 namespace="U2U.WindowsAzure.Plugins.MVC3">
  <Startup>
    <Task commandLine="installmvc3.cmd" executionContext="elevated" />
  </Startup>
  <ConfigurationSettings>
    <!-- None -->
  </ConfigurationSettings>
  <Endpoints>
    <!-- None -->
  </Endpoints>
  <Certificates>
    <!-- None -->
  </Certificates>
</RoleModule>
Go back to the service definition file. Remove your startup task, and add your plugin to the modules section:
<?xml version="1.0" encoding="utf-8"?>
<ServiceDefinition name="UsingStartupTasks" xmlns="http://schemas.microsoft.com/ServiceHosting/2008/10/ServiceDefinition">
  <WebRole name="HelloMVC3">
    <Sites>
      <Site name="Web">
        <Bindings>
          <Binding name="Endpoint1" endpointName="Endpoint1" />
        </Bindings>
      </Site>
    </Sites>
    <Endpoints>
      <InputEndpoint name="Endpoint1" protocol="http" port="80" />
    </Endpoints>
    <Imports>
      <Import moduleName="Diagnostics" />
      <Import moduleName="RemoteAccess" />
      <Import moduleName="RemoteForwarder" />
      <Import moduleName="MVC3" />
    </Imports>
    <!--<Startup>
      <Task commandLine="StartupTasks\installmvc.cmd"
            executionContext="elevated"
            taskType="simple"
      />
    </Startup>-->
  </WebRole>
</ServiceDefinition>
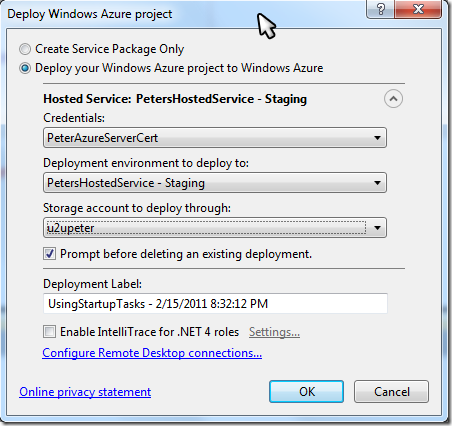
Right-click on the Cloud project and select Publish… The Deploy Windows Azure project dialog opens:

Select your credentials, environment and storage account.
Optionally you can configure remote desktop connections in case something went wrong, this will make it easier to see if MVC 3 was indeed installed.
Click on Ok and wait…
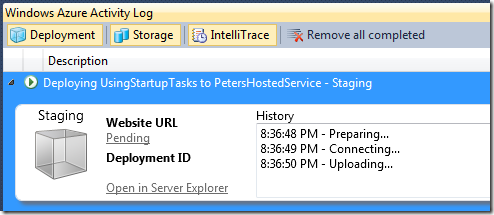
Deployment in Visual Studio should start:

Wait some more till complete (because the startup tasks are executing this will take a long time):

Click on the Url. You should now see the MVC 3 screen!