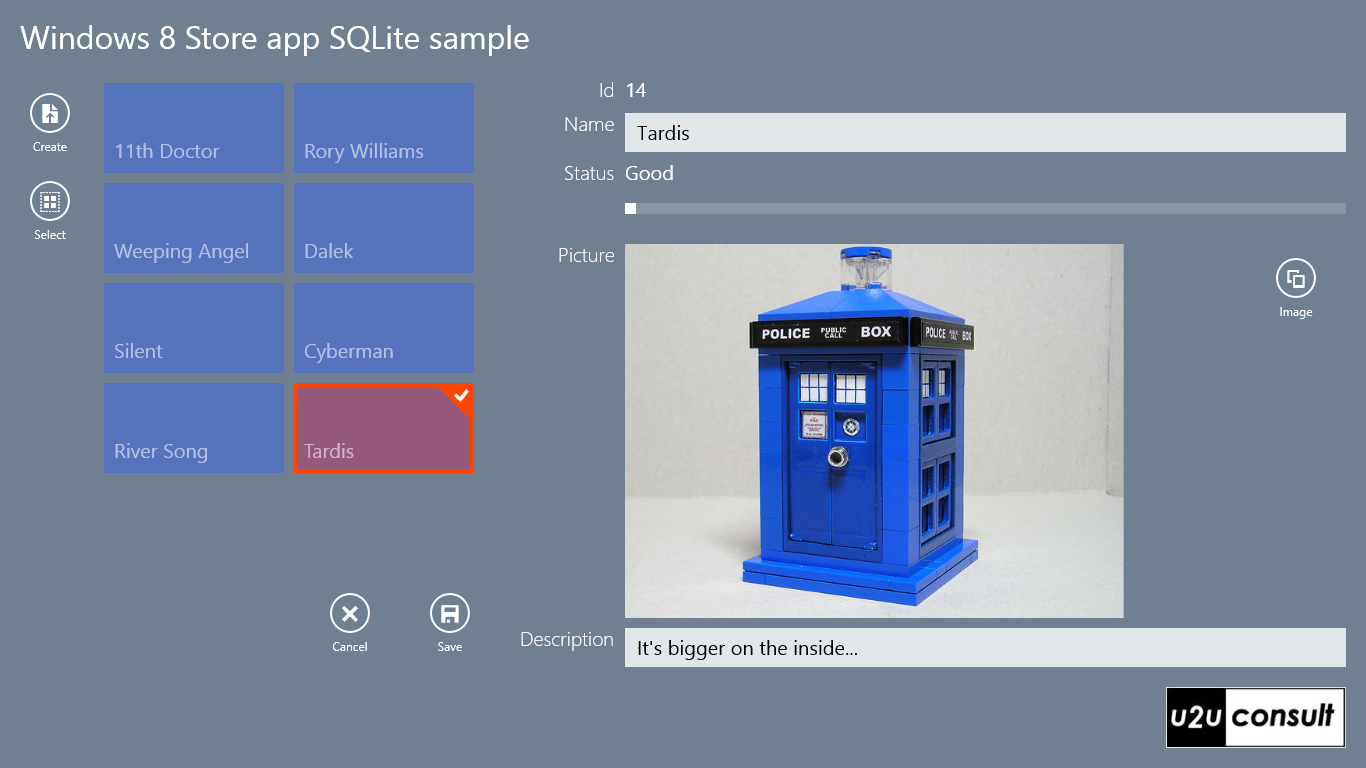
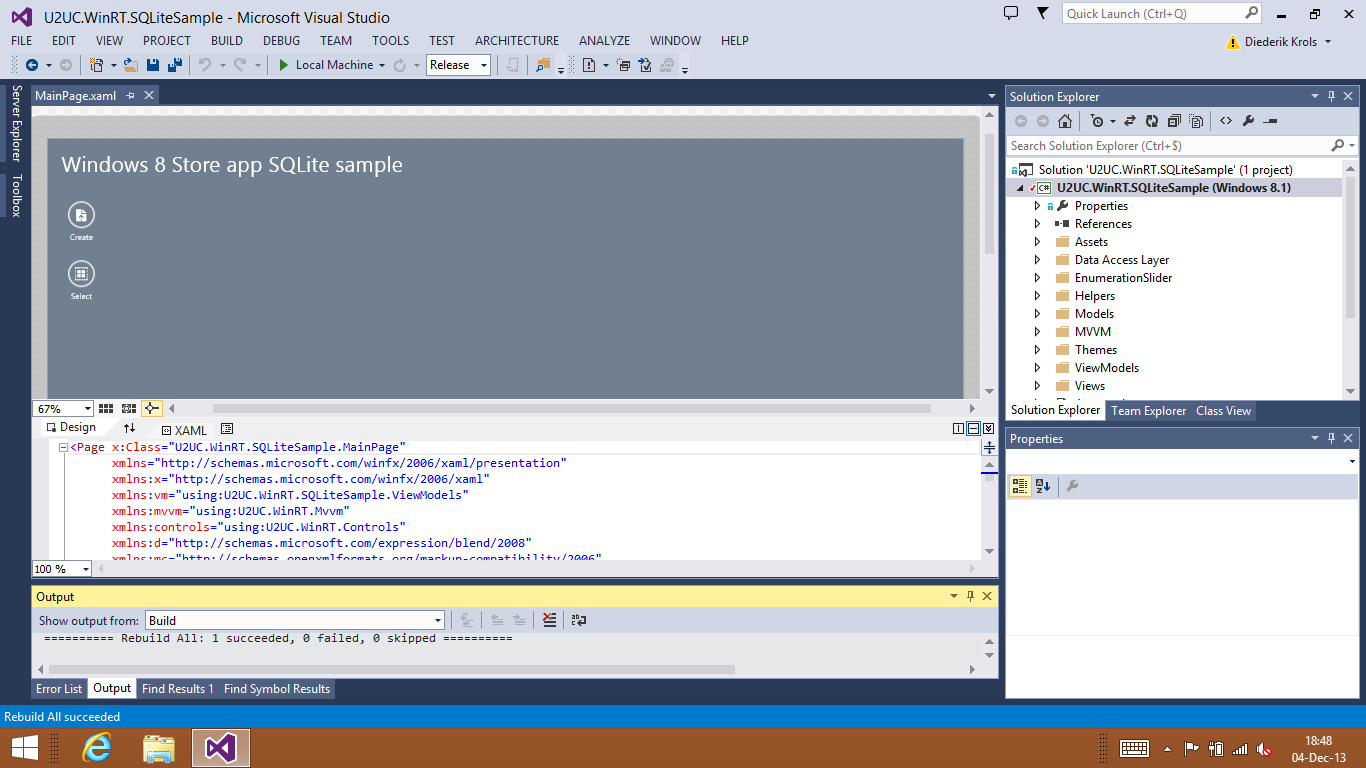
Some of my Windows Store Apps are desperately seeking for a local database. I was getting tired of waiting on Microsoft to release a SQL Express for WinRT - which as far as I know, was never planned. So I decided to test-drive SQLite: a free, technology neutral, self-contained, zero-configuration, transactional SQL database engine. I created a small but representative Windows 8.1 MVVM Store app that creates a database and executes the common CRUD operations against a list of business objects. The business object not only has common properties of the integer and string data types, but it also hosts an enumeration and a picture. Here’s how the sample app looks like:
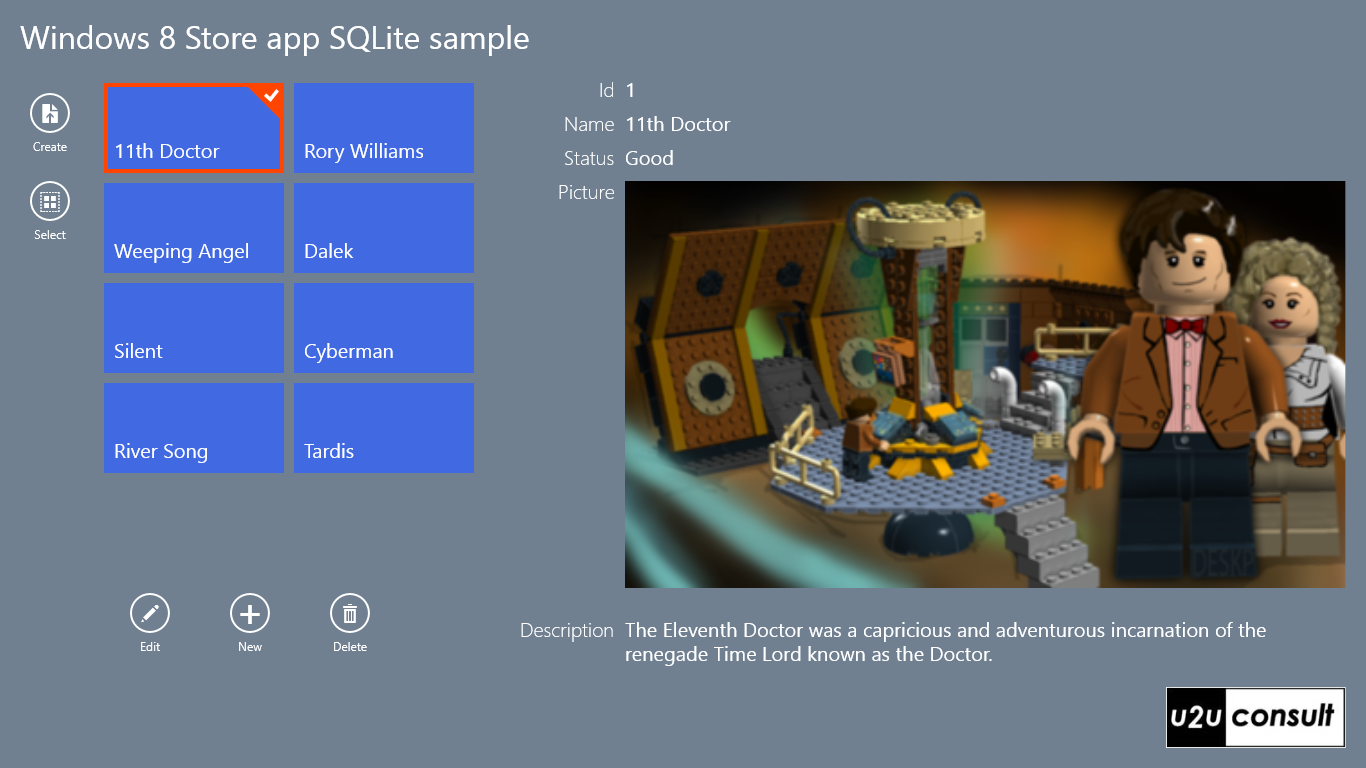
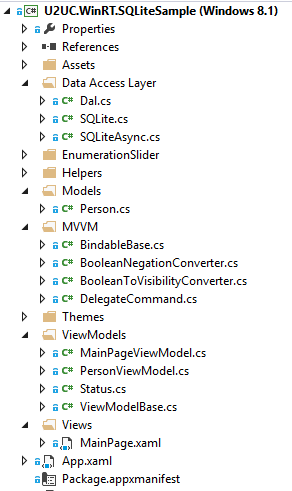
Although it's a single project, the app is structured like a full-fledged layered MVVM application. It contains the mandatory MVVM infrastructure that is still missing in the .NET framework: a base class to propagate changes, and a delegatecommand a.k.a. relaycommand. [Redmont: you may take this as a hint.] On top of that, the app strictly separates data access, models, viewmodels, and views:
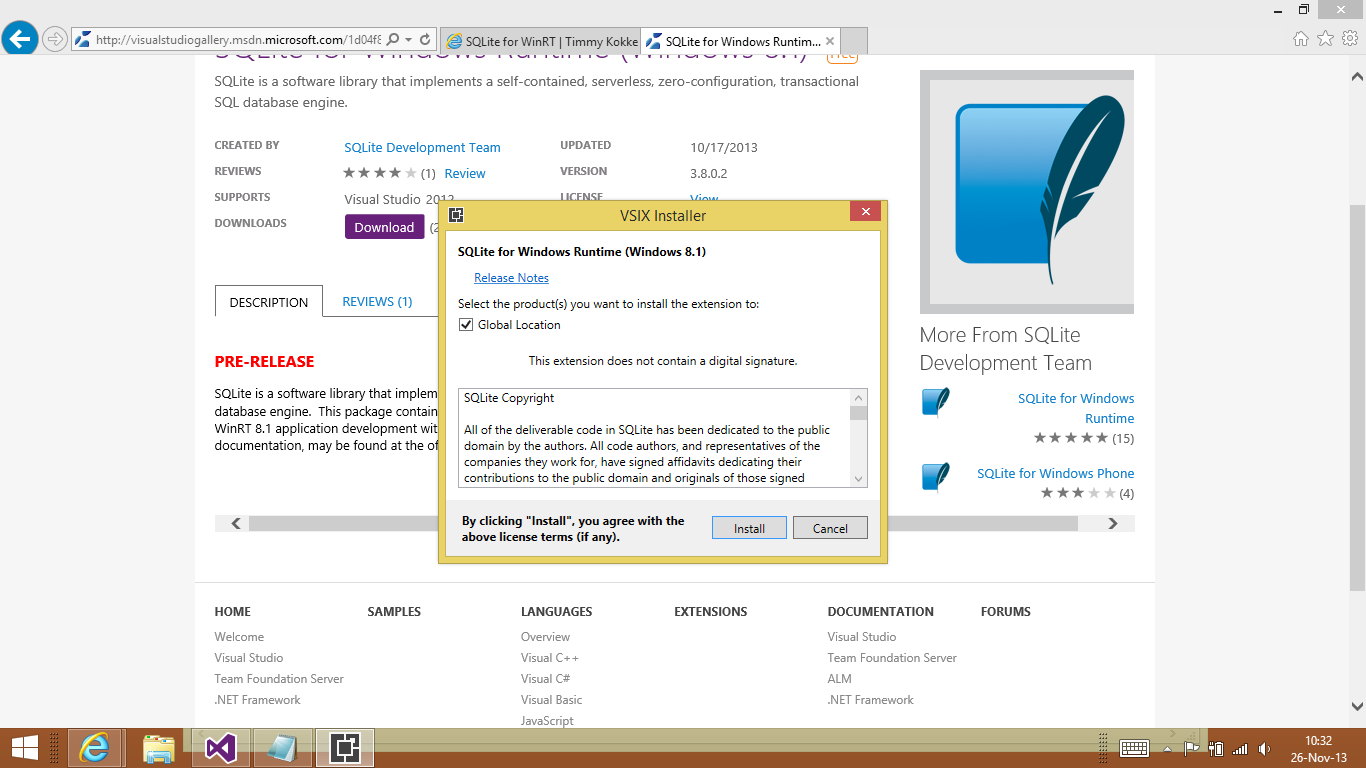
Let's get our hands dirty. Before you can start using SQLite, you have to install the engine and SDK. I installed the prerelease of SQLite for Windows Runtime 8.1 which comes as a Visual Studio Extension:
To use the SDK, you have to reference it in your Visual Studio project, together with the C++ Runtime Package:
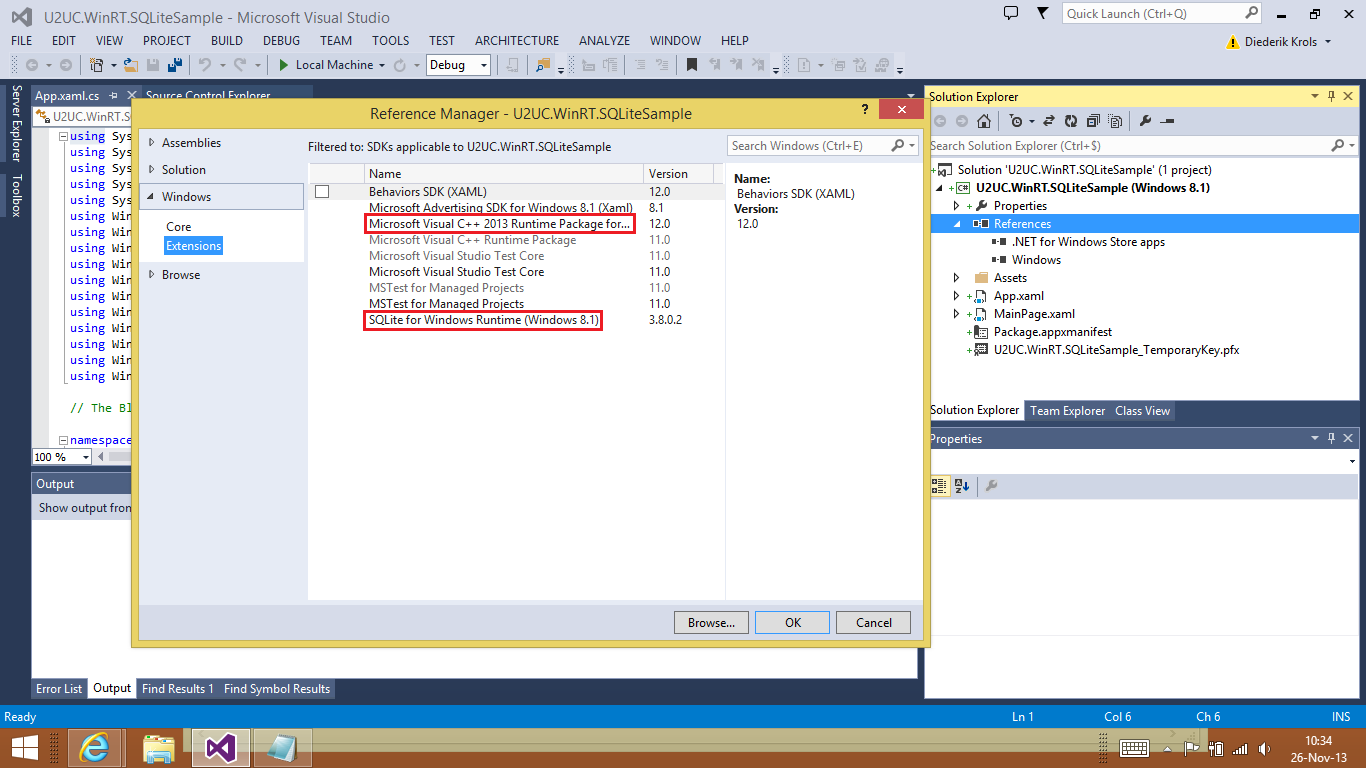
Unfortunately you will now have to select a target platform in your Visual Studio to build against. ‘Any CPU’ is not allowed anymore. I’ll come back to that later...

Next to the SDK you also have to install a .NET wrapper to talk to it. I went for SQLite.NET and installed it through Tim Heuer’s NuGet package:
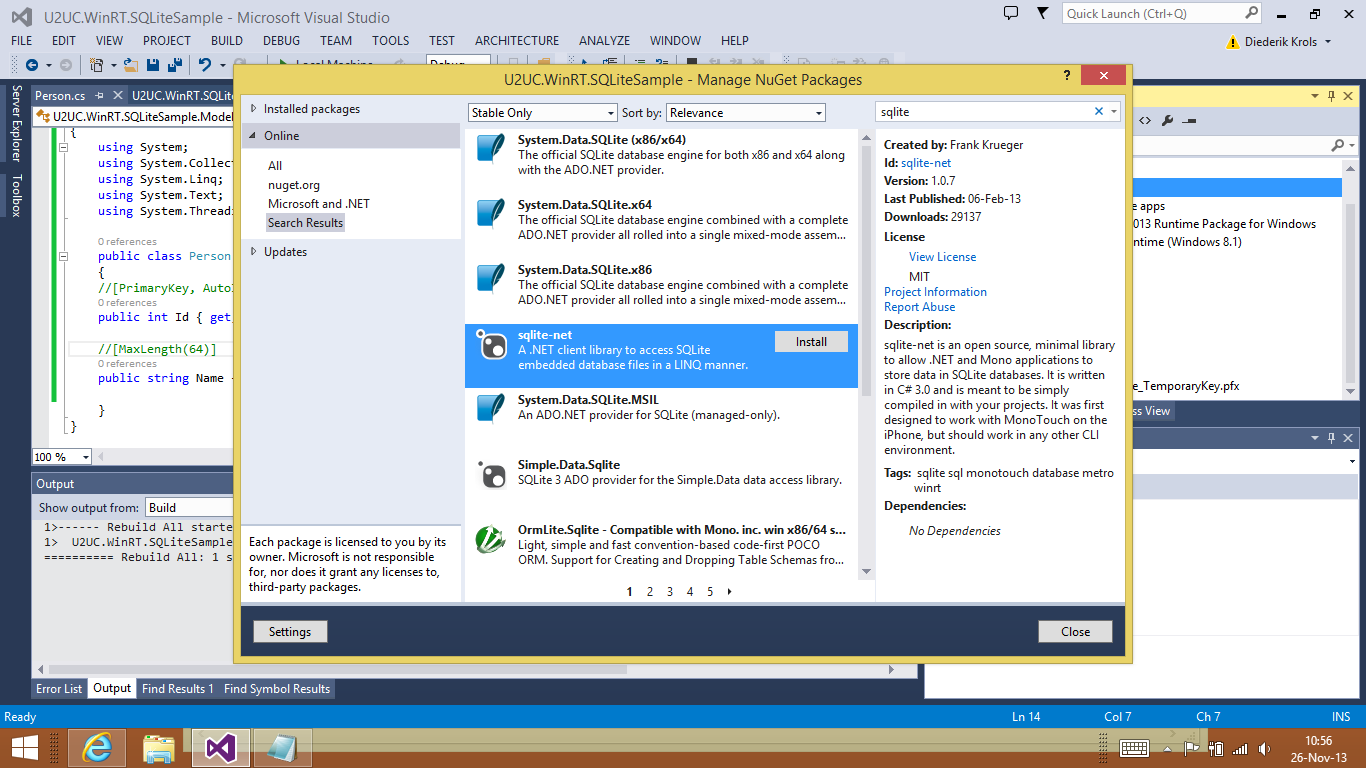
SQLite-Net adds two C# files to your project: SQLite.cs and SQLiteAsync.cs. I love that source code approach: it allows you to see and tweak the code (e.g. change the namespace), and place breakpoints during debugging. By the way: there are more wrappers available, such as sqlite-winrt on CodePlex.
A SQLite database is just a flat file. All you have to do is decide where to store it, and then access it through an IDisposable connection – as if it were any other ADO.NET store:
string dbPath = Path.Combine(ApplicationData.Current.LocalFolder.Path, "Storage.sqlite");
using (var db = new SQLiteConnection(dbPath))
{
    // ...
}
The easiest way to create a table is the code-first approach that we know from entity framework. All you need to do is decorating a model class with the appropriate attributes. SQLite supports declarative … hmm … declarations for primary keys, identities (auto increment), constraints, etcetera. There’s a full list in the SQLite.cs class. Here’s the model class from the sample project:
/// <summary>
/// Represents a person.
/// </summary>
internal class Person
{
    /// <summary>
    /// Gets or sets the identifier.
    /// </summary>
    [PrimaryKey, AutoIncrement]
    public int Id { get; set; }

    /// <summary>
    /// Gets or sets the name.
    /// </summary>
    [MaxLength(64)]
    public string Name { get; set; }

    /// <summary>
    /// Gets or sets the description.
    /// </summary>
    public string Description { get; set; }

    /// <summary>
    /// Gets or sets the status.
    /// </summary>
    /// <remarks>Is an enum in the viewmodel.</remarks>
    public int Status { get; set; }

    /// <summary>
    /// Gets or sets the picture.
    /// </summary>
    /// <remarks>Is a blob in the database.</remarks>
    public byte[] Picture { get; set; }
}
The Status field –an integer- actually comes from an enumeration. SQLite does support foreign key relationships but that would be overkill in this simple scenario. The person’s Picture will be stored inside the table, as a byte array.
To create the table you don’t need to know the syntax. The SQLite attributes will be used to define and configure the fields of the table. This is all it takes to create the Person table:
public static void CreateDatabase()
{
    // Create a new connection
    using (var db = new SQLiteConnection(DbPath))
    {
        // Create the table if it does not exist
        var c = db.CreateTable<Person>();
    }
}
Later on, you can call GetMapping to verify the mappings between table fields and class properties:
var info = db.GetMapping(typeof(Person));
To (re-)populate the table with some records, I created some instances of the Person class. To create a new record, or modify an existing one, all you have to do is this:
var i = db.InsertOrReplace(person);
This call conveniently returns the primary key value of the record. In the sample app, I don't really need this because the Model stays referenced by the ViewModel while it is inserted in the database. This is the kind of shortcuts you can take in a single-tier app.
InsertOrReplace will use the primary key you provide. To force the insertion of a new record with auto-generation of a new primary key, you have to call the Insert method. So here’s how the SavePerson method in my data access layer looks like:
public static void SavePerson(Person person)
{
    using (var db = new SQLiteConnection(DbPath))
    {
        // Activate Tracing
        db.Trace = true;

        if (person.Id == 0)
        {
            // New
            db.Insert(person);
        }
        else
        {
            // Update
            db.Update(person);
        }
    }
}
For selecting the list of persons in the table, LINQ is your friend:
public static List<Person> GetAllPersons()
{
    List<Person> models;

    using (var db = new SQLiteConnection(DbPath))
    {
        // Activate Tracing
        db.Trace = true;

        models = (from p in db.Table<Person>()
                    select p).ToList();
    }

    return models;
}
The same is true when you want to seek a specific person:
public static Person GetPersonById(int Id)
{
    using (var db = new SQLiteConnection(DbPath))
    {
        Person m = (from p in db.Table<Person>()
                    where p.Id == Id
                    select p).FirstOrDefault();
        return m;
    }
}
By the way, SQLite allows you to place an index on columns that you use frequently in the WHERE-clause: just decorate these with the Indexed attribute.
The following delete statement should not come as a surprise:
db.Delete(person);
But you could also use the underlying SQL language to do the trick:
db.Execute("DELETE FROM Person WHERE Id = ?", person.Id);
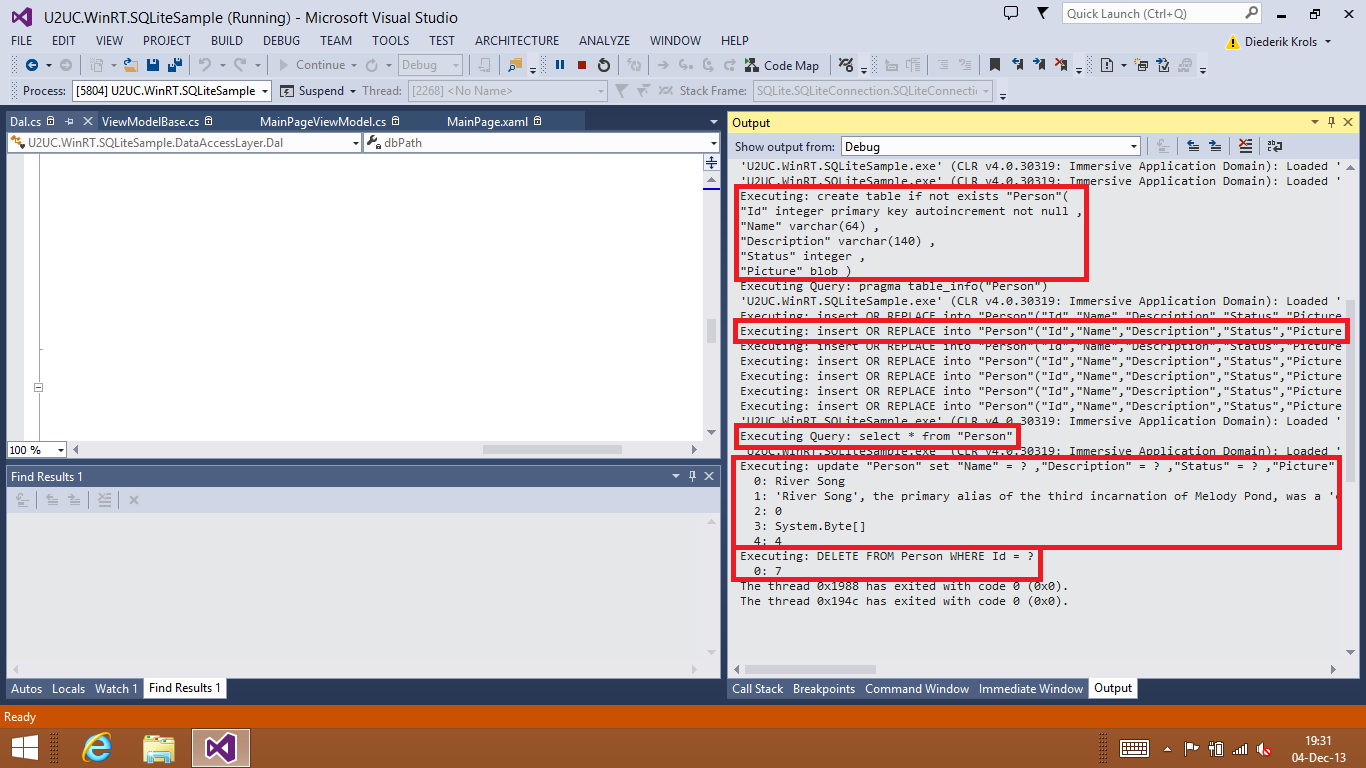
If you activate the tracing (the "db.Trace = true;" statement) during debugging, then you can nicely follow what the SQLite engine is doing - and learn the syntax at the same time:
So far for the Model and the Data Access Layer. Let’s take a look at the ViewModels. The PersonViewModel wraps most of the Model’s properties in a very straightforward way:
public string Description
{
    get
    {
        if (this.model == null)
        {
            return string.Empty;
        }

        return this.model.Description;
    }

    set
    {
        if (this.model != null)
        {
            this.model.Description = value;
            this.OnPropertyChanged();
        }
    }
}
Of course, there are a couple of exceptions. As I already mentioned, the Status property in the Person Model –and hence in the SQLite table- is an integer. Its value will come from an enumeration:
internal enum Status
{
    Good,
    Neutral,
    Evil
}
So in the ViewModel we’ll implement a small conversion:
public Status Status
{
    get
    {
        if (this.model == null)
        {
            return Status.Neutral;
        }

        return (Status)this.model.Status;
    }

    set
    {
        if (this.model != null)
        {
            this.model.Status = (int)value;
        }
    }
}
In the View however, we’re interested in the string representation. So the ViewModel has an extra property to which the View can two-way-bind:
public string StatusString
{
    get { return this.Status.ToString(); }
    set { this.Status = (Status)System.Enum.Parse(typeof(Status), value); }
}
I’m using an EnumerationSlider to allow the user to modify the value:
<controls:EnumerationSlider Enumeration="U2UC.WinRT.SQLiteSample.ViewModels.Status"
                            Value="{Binding StatusString, Mode=TwoWay}" />
Another less straightforward wrapper in the ViewModel is the one for the picture. When the value of the picture is loaded into the ViewModel (from the Model when it is read from the database, or from a file when the user uploads it in Edit mode) it will be as an array of bytes. However, when the picture needs to be displayed in a View, it needs to be an ImageSource. This means we end up with an asymmetric property, with a getter and a setter of a different type. That’s not allowed in .NET, so we need to define two separate properties:
public ImageSource ImageSource
{
    get
    {
        if (this.model != null && this.picture == null)
        {
            this.picture = this.model.Picture.AsBitmapImage();
        }

        return this.picture;
    }
}

public byte[] Picture
{
    set
    {
        this.picture = null;
        this.model.Picture = value;
        this.OnPropertyChanged("ImageSource");
    }
}
Further, we need a couple of methods to translate a storage file into a byte array, and a byte array into a bitmap. I implemented these as extension methods:
public static async Task<byte[]> AsByteArray(this StorageFile file)
{
    IRandomAccessStream fileStream = await file.OpenAsync(FileAccessMode.Read);
    var reader = new Windows.Storage.Streams.DataReader(fileStream.GetInputStreamAt(0));
    await reader.LoadAsync((uint)fileStream.Size);

    byte[] pixels = new byte[fileStream.Size];

    reader.ReadBytes(pixels);

    return pixels;
}

public static BitmapImage AsBitmapImage(this byte[] byteArray)
{
    if (byteArray != null)
    {
        using (var stream = new InMemoryRandomAccessStream())
        {
            stream.WriteAsync(byteArray.AsBuffer()).GetResults(); // I made this one synchronous on the UI thread; this is not a best practice.
            var image = new BitmapImage();
            stream.Seek(0);
            image.SetSource(stream);
            return image;
        }
    }

    return null;
}
Here’s how the sample app looks like in Edit/Insert mode, showing an EnumerationSlider and an Image Upload button:
Here’s the full source code. It was written in Visual Studio 2013 and is targeting Windows 8.1: U2UC.WinRT.SQLiteSample.zip (1.18 mb)
Enjoy,
Diederik
P.S.
I promised to come back to the target processor selection. If your development machine is a 64bit machine (which it most probably is) then you have bad luck. If you target x64, then your Visual Studio XAML Designer will give up on you:
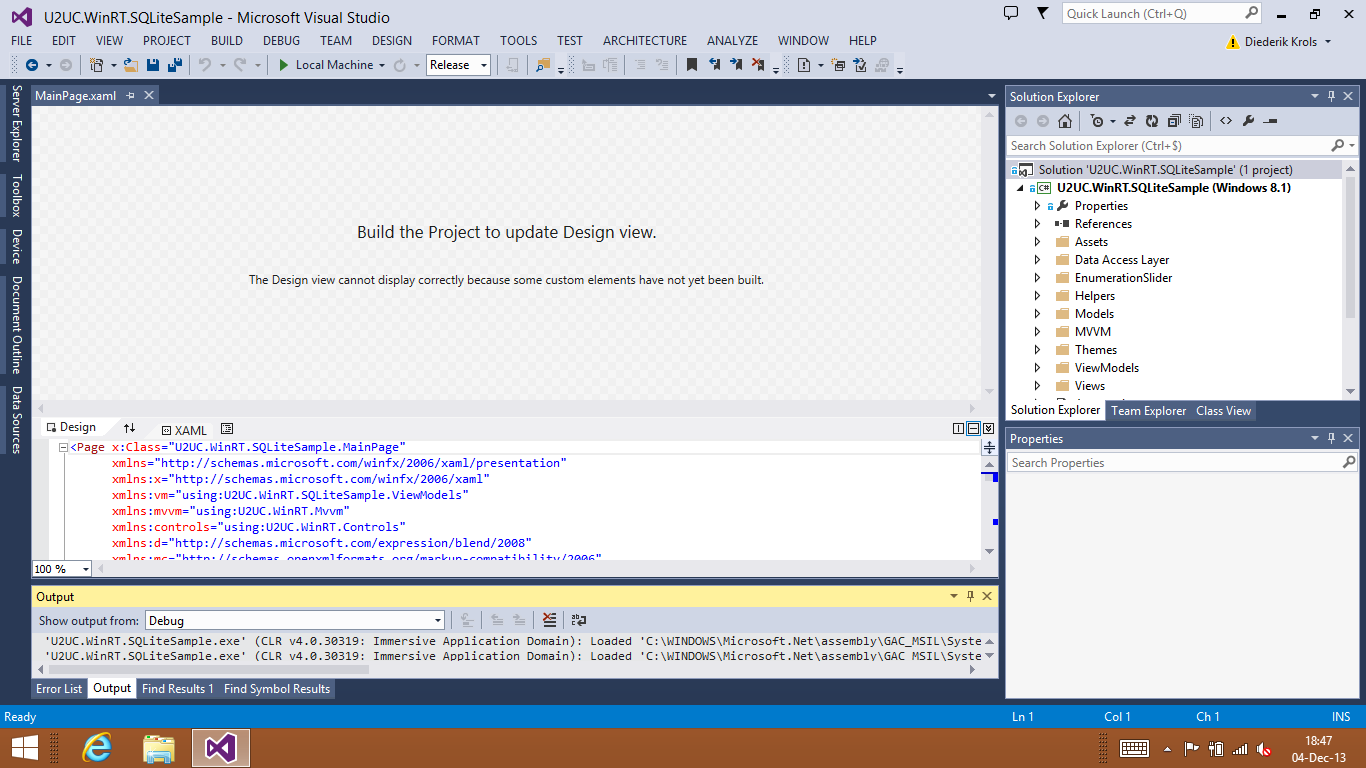
If you target x86, the Designer will work:
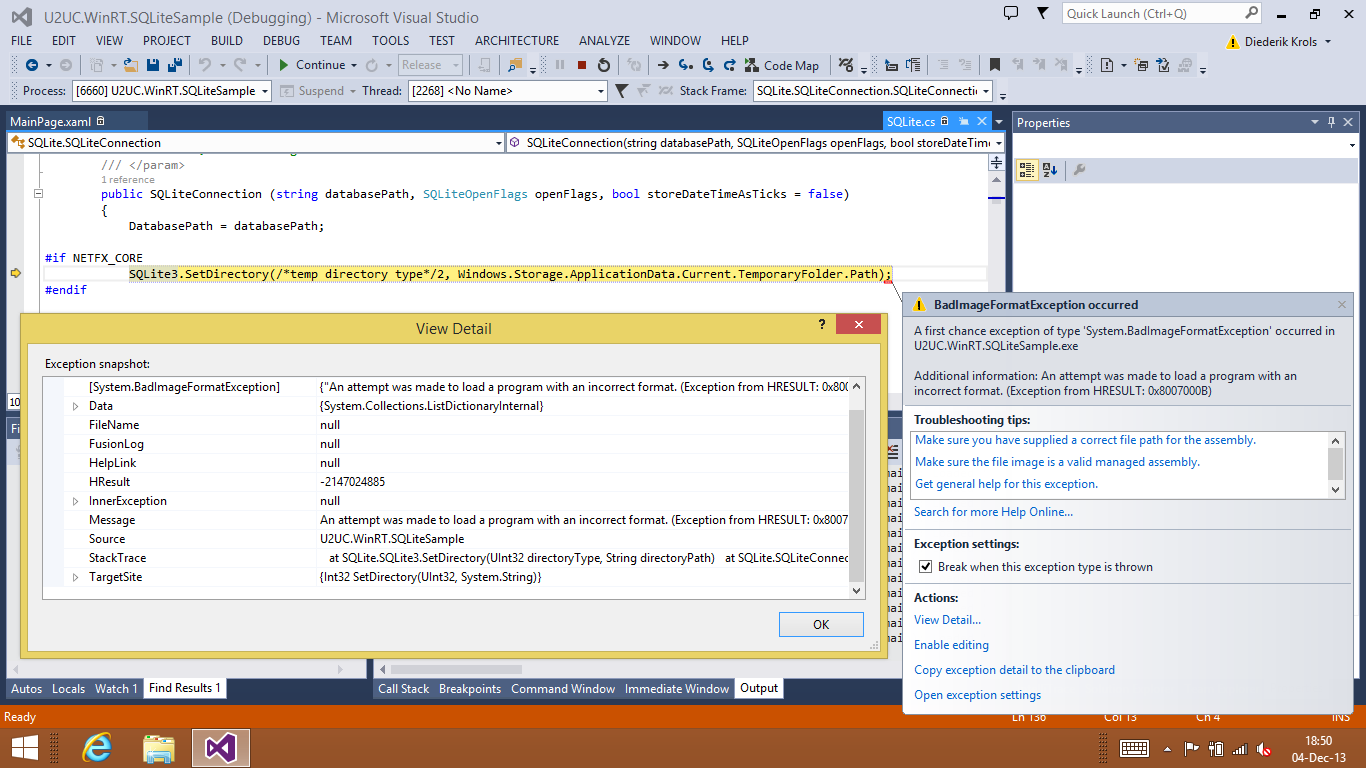
… but you can’t run the solution anymore:
So if you need the XAML Designer, you just have to temporarily switch to x86 mode. It's uncomfortable, but it works.