When you’re building a XAML app for the Universal Windows Platform (UWP) you’ll end up with just one package to be deployed to all the different Windows 10 devices. They’re all served with the same C# and the same XAML views. Fortunately XAML has been extended with a load of features to support adaptive/responsive design:
- Native controls that adapt to the device,
- the new RelativePanel control,
- a new common navigation UI with the SplitView control,
- extensions to the Visual State infrastructure with Adaptive Triggers and Property Setters, and as a last resort
- XAML views per device.
I already covered the RelativePanel and SplitView controls, so let’s dive into Adaptive Triggers.
The new AdaptiveTrigger class is used in XAML to describe the conditions to move to a visual state. At runtime, the adaptive triggers are evaluated, and the most appropriate will determine the visual state. All of this happens without any code behind from your part.
An adaptive trigger comes with two properties: the minimum width and height of the app’s window to trigger the state change: MinWindowHeight and MinWindowWidth.
Here’s the list of trigger declarations from the small sample app that I wrote. I defined four visual states:
- Wide: larger than 900 effective pixels,
- Square: between 720 and 899 effective pixels,
- Narrow: between 548 and 719 effective pixels, and
- Snapped: less than 548 effective pixels.
<!-- Responsive Visual States -->
<VisualStateManager.VisualStateGroups>
    <VisualStateGroup>

        <!-- VisualState to be triggered when window width is >=900 effective pixels -->
        <VisualState x:Name="Wide">
            <VisualState.StateTriggers>
                <AdaptiveTrigger MinWindowWidth="900" />
            </VisualState.StateTriggers>

            <!-- Setters and Storyboards come here -->
            <!-- ... -->

        </VisualState>

        <!-- VisualState to be triggered when window width is >=720 and <900 effective pixels -->
        <VisualState x:Name="Square">
            <VisualState.StateTriggers>
                <AdaptiveTrigger MinWindowWidth="720" />
            </VisualState.StateTriggers>

            <!-- Setters and Storyboards come here -->
            <!-- ... -->

        </VisualState>

        <!-- VisualState to be triggered when window width is >=548 and <720 effective pixels -->
        <VisualState x:Name="Narrow">
            <VisualState.StateTriggers>
                <AdaptiveTrigger MinWindowWidth="548" />
            </VisualState.StateTriggers>

            <!-- Setters and Storyboards come here -->
            <!-- ... -->

        </VisualState>

        <!-- VisualState to be triggered when window width is >=0 and <548 effective pixels -->
        <VisualState x:Name="Snapped">
            <VisualState.StateTriggers>
                <AdaptiveTrigger MinWindowWidth="0" />
            </VisualState.StateTriggers>

            <!-- Setters and Storyboards come here -->
            <!-- ... -->

        </VisualState>
    </VisualStateGroup>
</VisualStateManager.VisualStateGroups>
Of course it’s up to you to define your own boundaries. These depend on your app and on the devices that you target with it.
In the pre-UWP world, the content of a Visual State was one Storyboard that was executed when the control entered the corresponding state - generally through a call to VisualStateManager.GoToState in code behind. The UWP Visual State also comes with an optional storyboard, but also with a list of setters. That’s the same Setter that you know from within a Style definition. Basically it modifies the value of a property, without animation. The Setter is extended with a new property -Target- that contains the path to the property that you want to update, including the target element. It also works for any type of property, including attached properties.
If you had a hamburger button in your UI and wanted to hide it in a particular visual state, then this would do the trick:
<Setter Target="HamburgerButton.Visibility" Value="Collapsed" />
Which brings us to the sample app, which has a Shell with a SplitView, and a MainPage – reused from my SplitView sample.
Applying Visual States to a SplitView control
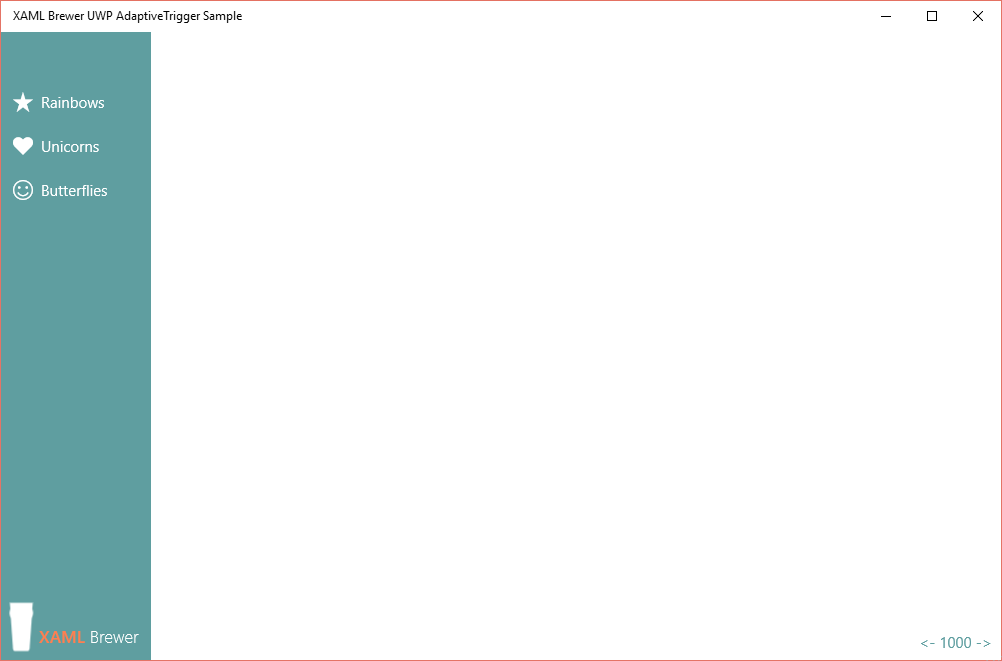
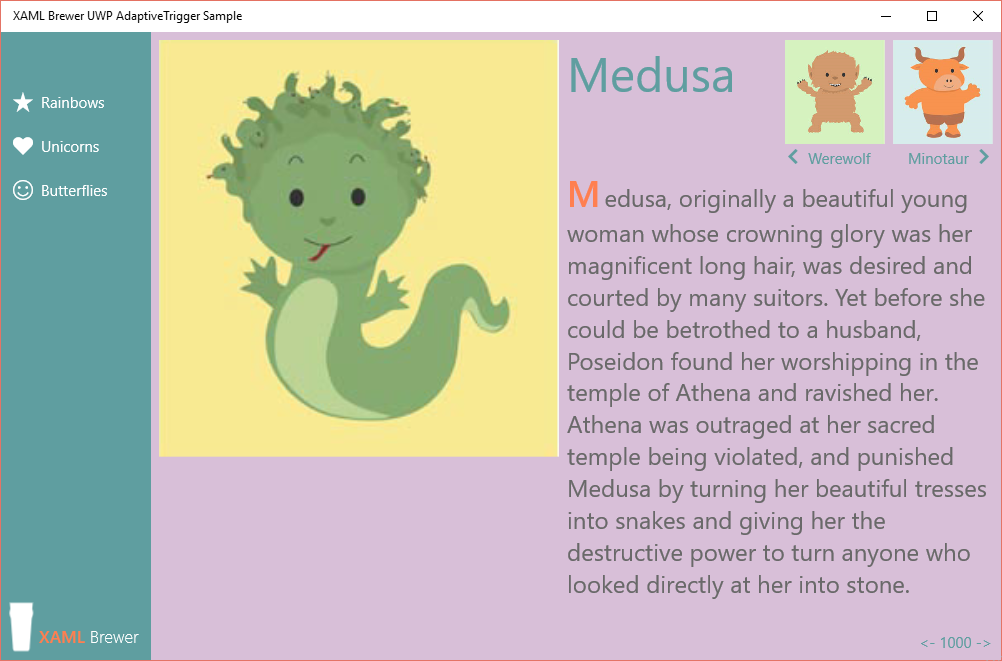
In the Wide state, I’m showing the splitview panel in full width and in Inline mode – not overlapping the content. The hamburger button does not add any value in that case, so I’m hiding it:
<!-- VisualState to be triggered when window width is >=900 effective pixels -->
<VisualState x:Name="Wide">
    <VisualState.StateTriggers>
        <AdaptiveTrigger MinWindowWidth="900" />
    </VisualState.StateTriggers>
    <VisualState.Setters>
        <!-- Keep SplitView pane always showing inline -->
        <!-- Hide the Hamburger, it's useless here -->
        <Setter Target="MySplitView.DisplayMode"
                Value="Inline" />
        <Setter Target="MySplitView.IsPaneOpen"
                Value="True" />
        <Setter Target="HamburgerButton.Visibility"
                Value="Collapsed" />
    </VisualState.Setters>
</VisualState>
The shell looks like this in Wide mode:
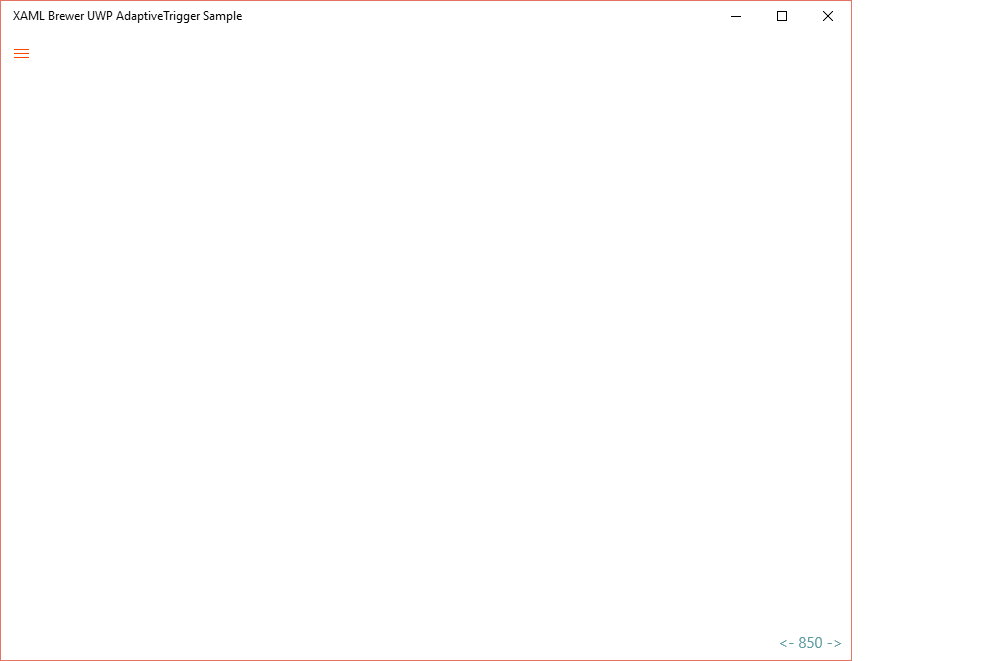
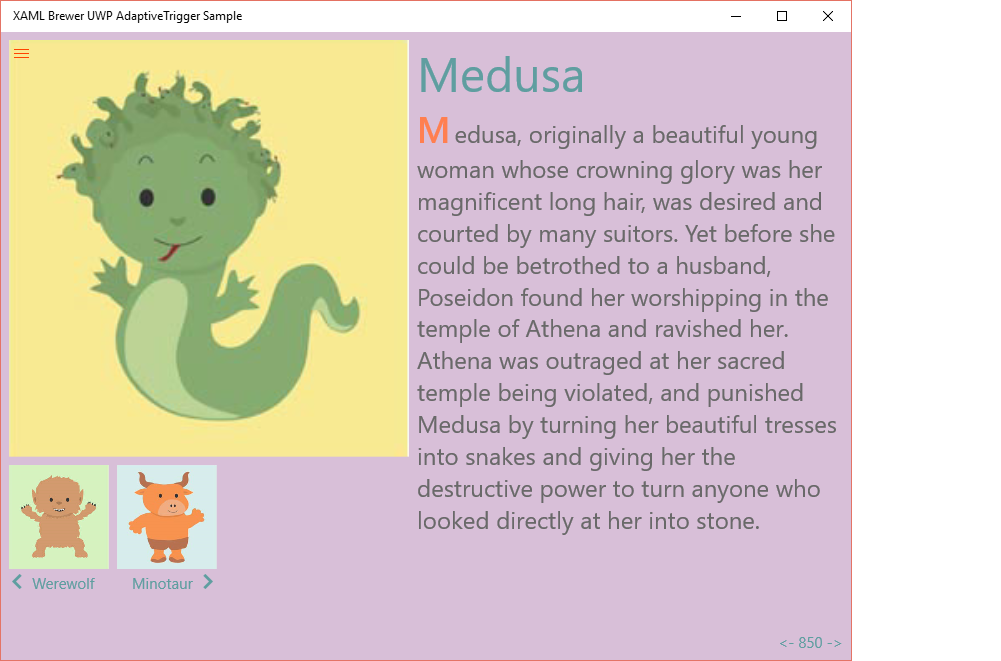
For the Square state, we just switch to Overlay mode. That saves 150 effective pixels. I also try to keep the pane open, but it collapses automatically on any screen resize, and there does not seem to be a way to keep it sticky. In overlay mode the user would want to close and reopen the menu, so we bring the hamburger button back. We don’t have to do anything for that: the adaptive trigger nicely undoes all the setters it executed. So we only need to update the splitview:
<VisualState.Setters>
    <!-- SplitView pane shows as overlay -->
    <!-- Splitview pane will close however :-( -->
    <Setter Target="MySplitView.DisplayMode"
            Value="Overlay" />
    <Setter Target="MySplitView.IsPaneOpen"
            Value="True" />
</VisualState.Setters>
And here’s the result:
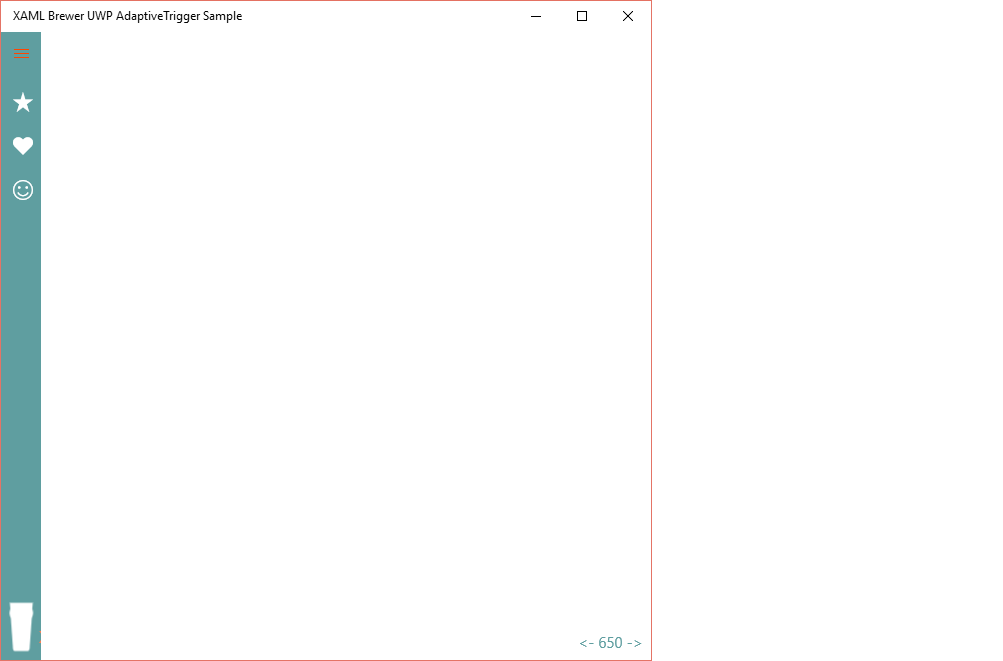
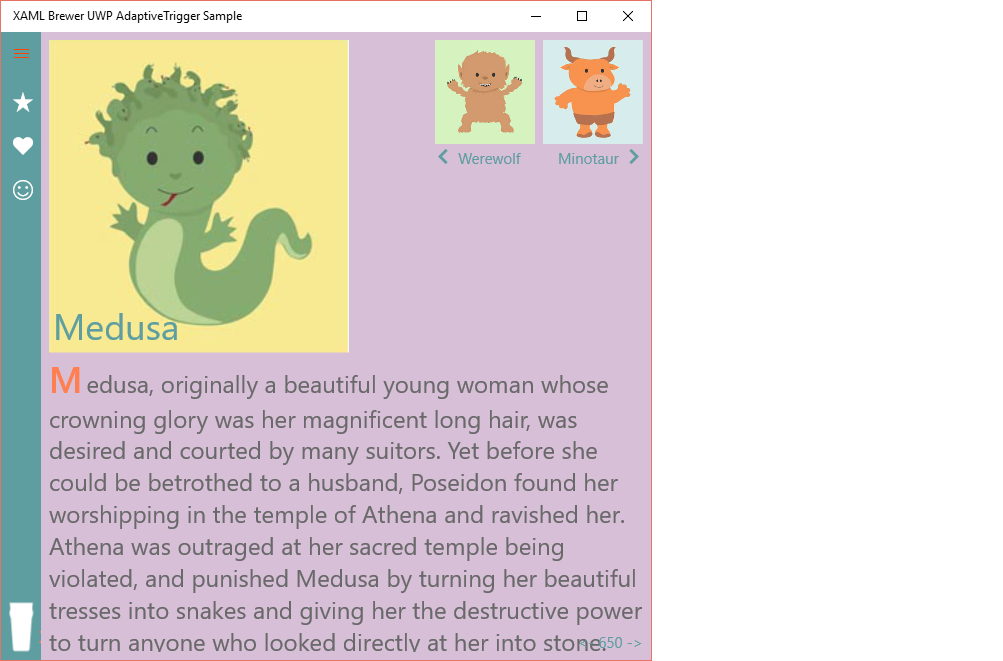
Here are the setters for Narrow mode, we switch to Compact Inline mode, and keep the pane open:
<Setter Target="MySplitView.DisplayMode"
        Value="CompactInline" />
<Setter Target="MySplitView.IsPaneOpen"
        Value="False" />
Unsurprisingly, this is the result:
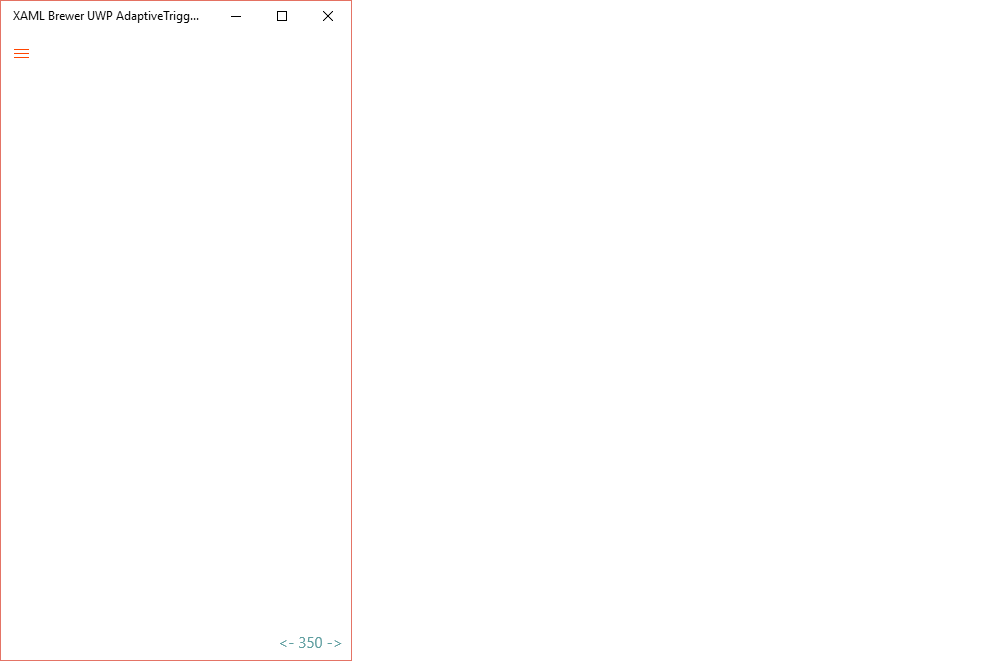
Al last we switch to back to Overlay mode, but we close the pane. I guess you have an idea now how the setters look like.
To allow the window to be resized to such a small size, I’ve overridden the minimum size in App.cs:
protected override void OnLaunched(LaunchActivatedEventArgs e)
{
    // Override default minimum size.
    var view = ApplicationView.GetForCurrentView();
    view.SetPreferredMinSize(new Size { Width = 320, Height = 320 });

    // ...
}
Here’s the narrow screen:
Applying Visual States to a Relative Panel control
In the MainPage of the sample app I defined the same visual states and adaptive triggers as in the Shell. I’m using Setters to update regular properties:
<Setter Target="LinksPanel.Visibility"
        Value="Collapsed" />
<Setter Target="Title.FontSize"
        Value="36" />
<Setter Target="Title.Padding"
        Value="4" />
But I’m also moving elements around by updating the properties that were attached to them by the RelativePanel, using the parentheses syntax:
<Setter Target="Title.(RelativePanel.AlignLeftWith)"
        Value="Illustration" />
<Setter Target="Title.(RelativePanel.AlignBottomWith)"
        Value="Illustration" />
<Setter Target="Title.(RelativePanel.RightOf)"
        Value="" />
<Setter Target="Title.(RelativePanel.AlignTopWith)"
        Value="" />
The last two setters actually remove attached properties. That’s to avoid circular references in the elements’ positioning and to avoid concurrent alignments (more details in my Relative panel sample).
You’re not just stuck to the new setters inside a visual state, there’s still an optional storyboard available for the property changes that can be animated. Here’s an example of a full visual state from the sample app:
<VisualState x:Name="Narrow">
  <VisualState.StateTriggers>
    <AdaptiveTrigger MinWindowWidth="548" />
  </VisualState.StateTriggers>
  <VisualState.Setters>
    <!-- Make illustration smaller, place title in it, and description at the bottom. -->
    <!--<Setter Target="Illustration.MaxWidth"
                        Value="300" />-->
    <Setter Target="Illustration.Margin"
            Value="0" />
    <Setter Target="Title.(RelativePanel.AlignLeftWith)"
            Value="Illustration" />
    <Setter Target="Title.(RelativePanel.AlignBottomWith)"
            Value="Illustration" />
    <Setter Target="Title.(RelativePanel.RightOf)"
            Value="" />
    <Setter Target="Title.(RelativePanel.AlignTopWith)"
            Value="" />
    <Setter Target="Title.FontSize"
            Value="36" />
    <Setter Target="Title.Padding"
            Value="4" />
    <Setter Target="Description.(RelativePanel.Below)"
            Value="Illustration" />
  </VisualState.Setters>
  <Storyboard>
    <DoubleAnimation Storyboard.TargetProperty="(FrameworkElement.MaxWidth)"
                      Storyboard.TargetName="Illustration"
                      Duration="0:0:0.5"
                      To="300"
                      EnableDependentAnimation="True" />
  </Storyboard>
</VisualState>
Defining Visual States in Blend
The new Blend 2015 will be an excellent tool for previewing and recording visual states. On the left you can see and modify the list the states, the center is a preview of the state, and at the right you can modify the properties that define the state:
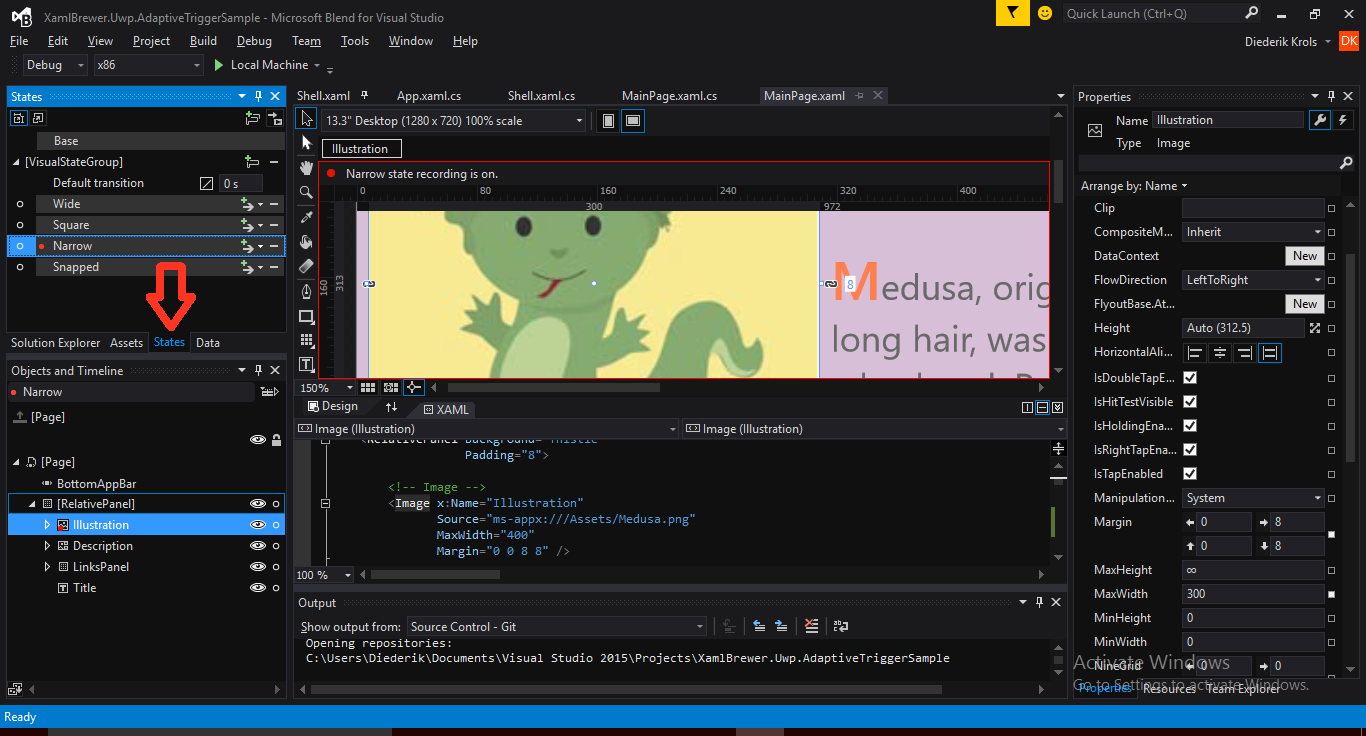
At the time of writing this article, Blend 2015 RC is not yet entirely ready for this. All property changes are recorded in the storyboard (not in setters), the attached properties don’t show up in the properties to the right. And if you already had setters in a visual state, they will be ruined. Blend apparently has an other idea of the Setter class than Visual Studio: it will remove your Target properties, and add an empty PropertyPath property. I’m assuming that this problem will disappear in –literally- just a couple of days from now.
The final results
Here’s how the sample app elegantly scales down.
Wide mode:
Square mode:
Narrow mode:
Snapped mode:
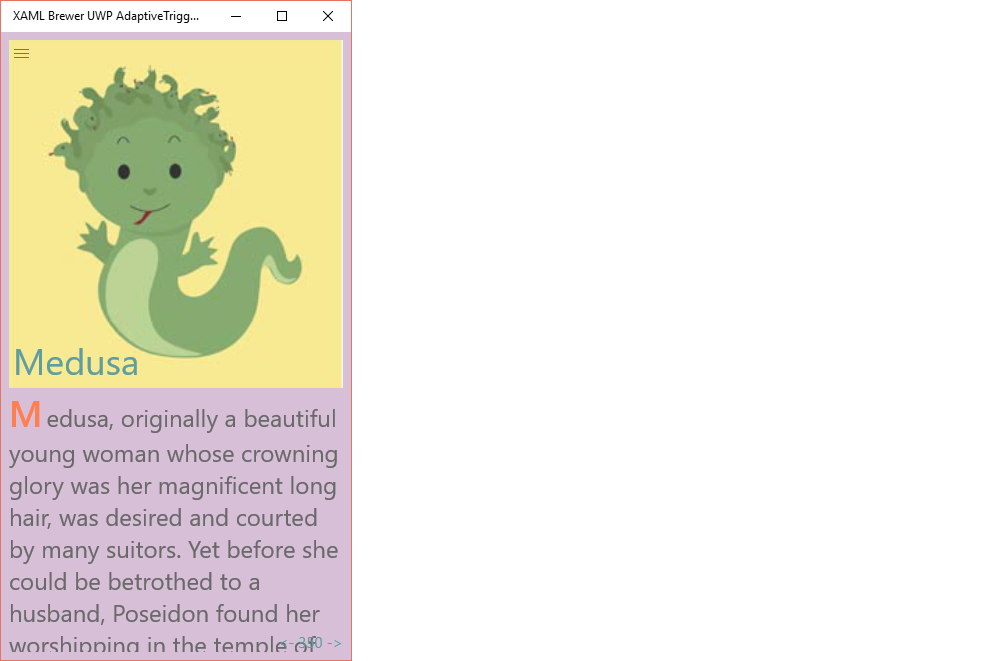
In case you didn’t notice: I didn’t have to write a single line of C# for this, it’s all in the XAML.
What’s next ?
The current adaptive triggers only define a visual state by the height and width of the app’s window. Microsoft has promised to enhance the class or release more trigger types. If you can’t wait for this, take a look at the rich collection of Custom Visual State Triggers by Morten Nielsen or start rolling your own. After all, it’s just a matter of inheriting from StateTriggerBase and implementing its SetActive method.
Code
The source of the sample app is on GitHub. It was written with Visual Studio 2015 RC and Blend 2015 RC on a Windows 10 fast ring tablet.
Enjoy!
XAML Brewer