In this blog I'm going to show you how the Power Apps visual for Power BI can be used to add writeback functionality into a Power BI Report. The Power Apps visual for Power BI allows you to embed a Power App directly into a Power BI report and update the data. These changes can then be immediately reflected back in the report itself. Since this gives users the possibility to edit data directly in a Power BI Report, this brings some extra functionality to a Power BI report that was not previously possible.
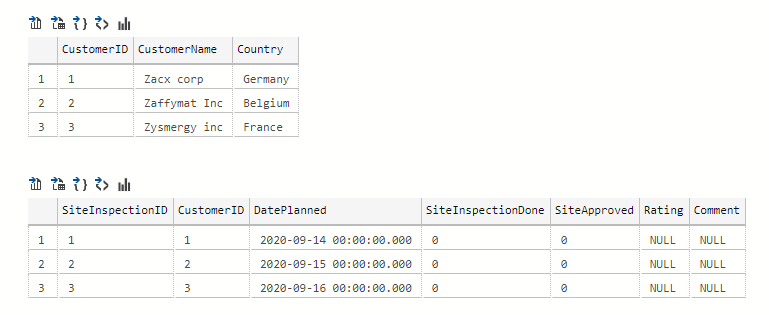
In this example we are going to use the following two tables that reside in an on-premise SQL Server:
USE PowerBIPowerAppsIntegrationBlog;
GO

CREATE TABLE dbo.Customer
(
    CustomerID INT NOT NULL IDENTITY PRIMARY KEY,
    CustomerName NVARCHAR(100) NOT NULL,
    Country NVARCHAR(50) NOT NULL
);
GO

CREATE TABLE dbo.SiteInspection
(
    SiteInspectionID INT NOT NULL IDENTITY PRIMARY KEY,
    CustomerID INT NOT NULL REFERENCES dbo.Customer(CustomerID),
    DatePlanned DATETIME NOT NULL,
    SiteInspectionDone BIT NOT NULL DEFAULT 0,
    SiteApproved BIT NULL DEFAULT 0,
    Rating INT NULL,
    Comment NVARCHAR(MAX) NULL
);
The following data was added in the two tables
Goal
The goal is to have a Power BI report that shows the site inspection data and add a Power App to it so that report users can update the data as new site inspections are performed. When the data is modified through the Power App, the report page should refresh automatically to reflect the changes.
Design of the Power BI data model and report
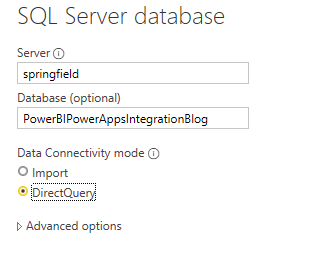
Since the changes in the site inspection table must be immediately visible in the report, this table must be loaded using Direct Query. If the data of the table is imported in Power BI, users would have to wait until the next scheduled(or manual) refresh before the updated data becomes visible.
Once the two tables exist in SQL Server, open Power BI Desktop and use the Get Data button to connect to the SQL Server data source. When prompted for the data source, make sure that DirectQuery is selected as the storage mode. From the Navigator window, select the 2 tables in the SQL Server database.
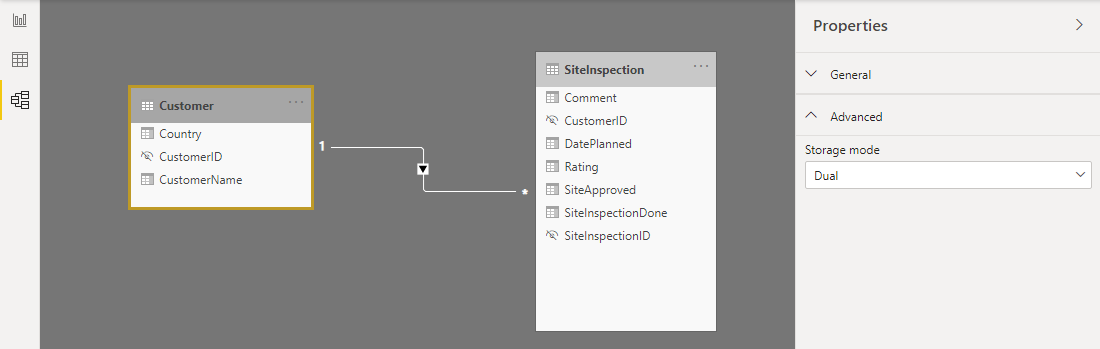
If there would be more tables in the data model and only the site inspection table would be updated through a Power App, the other tables linked to the site inspection table can use the Dual storage mode.
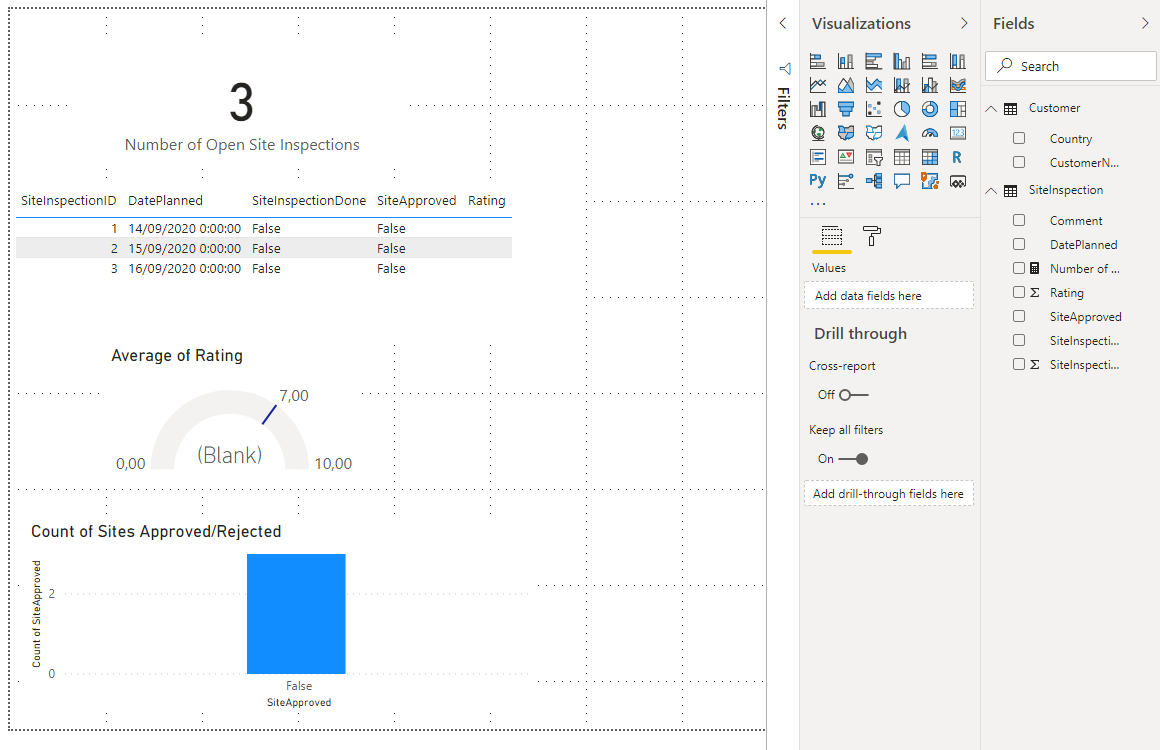
Next we can create a sample report on top of the data model.
With the report open in Power BI Desktop, you might be tempted to add the Power Apps visual in the report and start working with it. Although it is possible to use the Power Apps visual inside Power BI Desktop, you should never do this as it might lead to some strange results. You should always publish the the report to the Power BI Service first and then edit the report inside your browser.
Adding the Power Apps visual in the report
Open the report in Edit mode int the Power BI service and add the PowerApps for Power BI visual to the report.
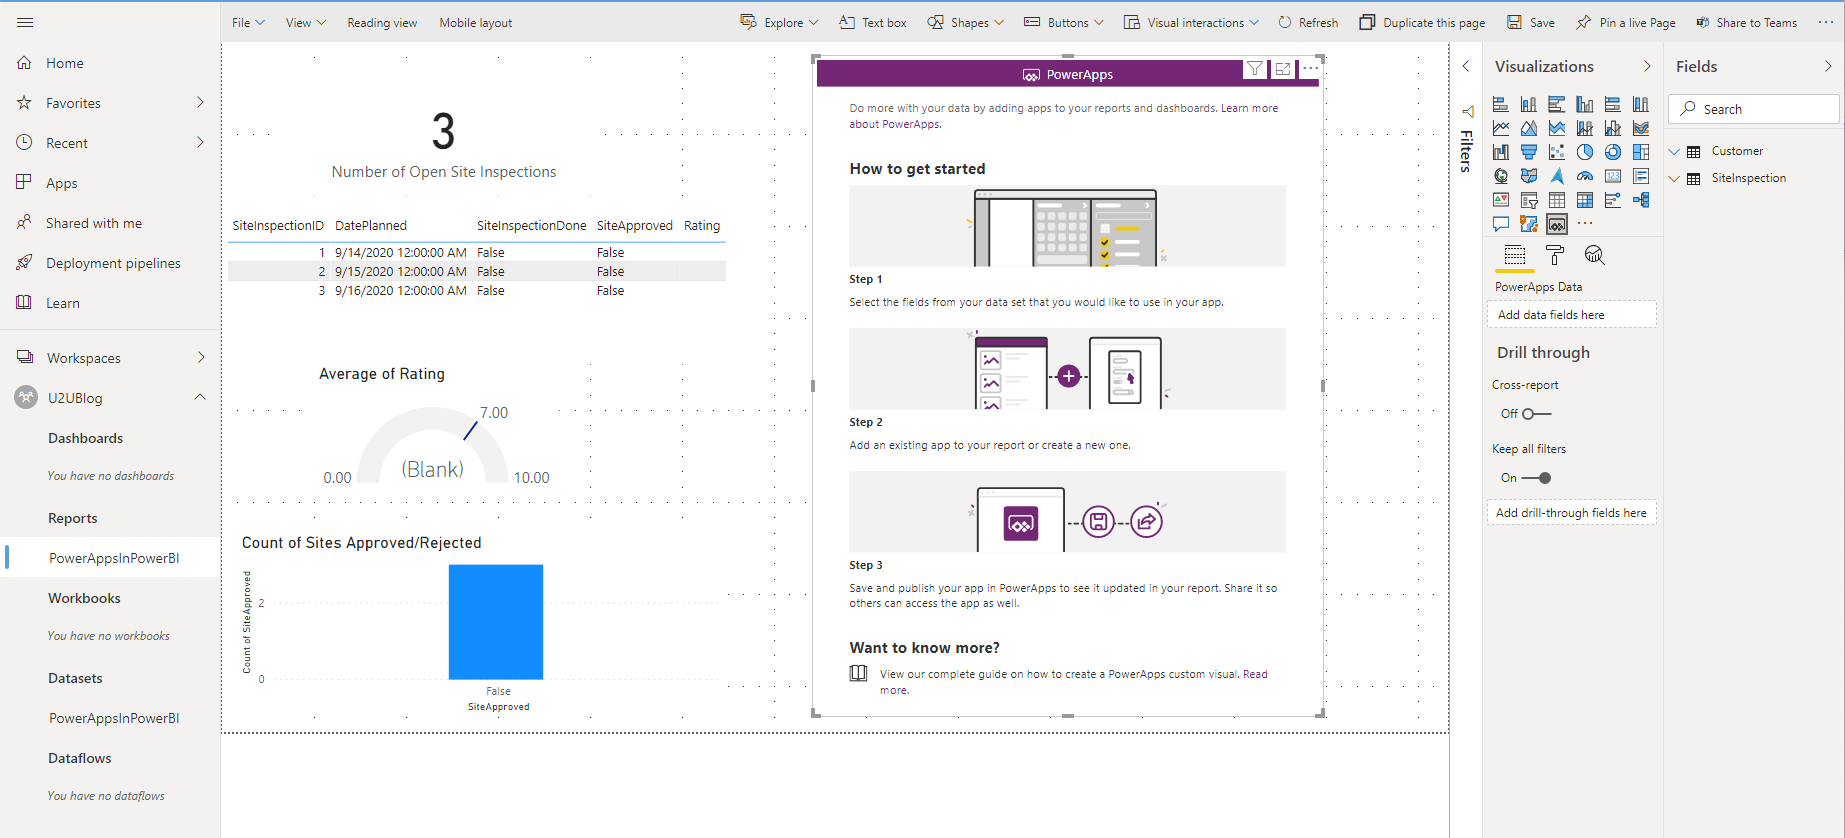
Once the visual is added, it shows you the steps you have to take to configure the visual. First you need to select the fields you want to make available in the app.
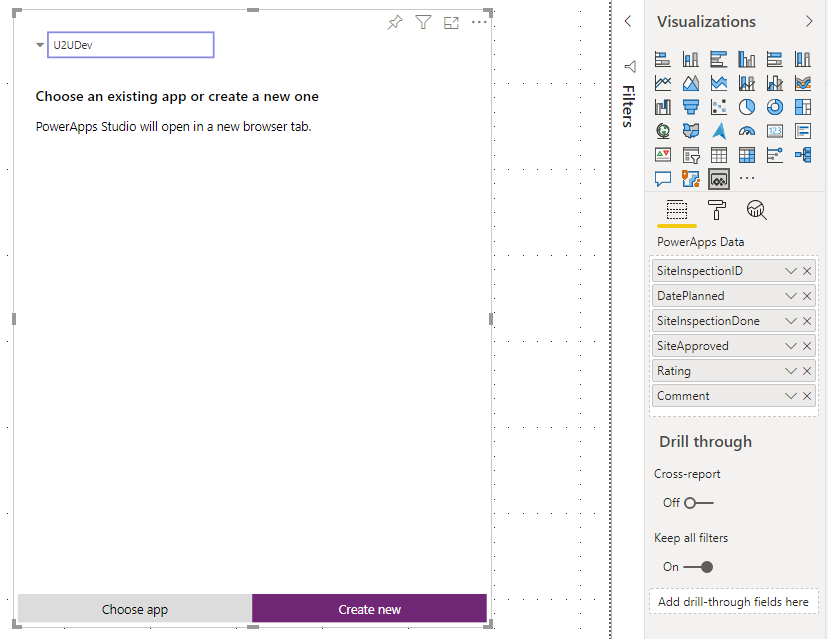
Once at least one field is added to the PowerApps Data field well, you will see that the content of the Power Apps visual changes. In the top left corner you can now select the Power Apps Environment. In the example below you can see that the U2UDev environment is selected. Next you can choose the embed an existing app in the visual or create a new one. If you want to use all the integration features between Power BI and Power Apps, you should always created the app from Power BI. If you take an existing app that was created outside the context of Power BI, some features like the automatic refresh of a report when data changes will not work.
When the Create new button is pressed, Power Apps Studio is launched with a newly created app. The app has one screen that contains a Gallery that shows one field per row you have in the source data. If you look above Screen1, you see the PowerBIIntegration control. This is the connector that makes it possible for the context to flow from Power BI to the app. It has a Data property that contains the rows of data passed from Power BI to the app. If you select the Gallery, you will see that its Items property is set to 'PowerBIIntegration'.Data. The Title1 field displays the SiteInspectionID field.
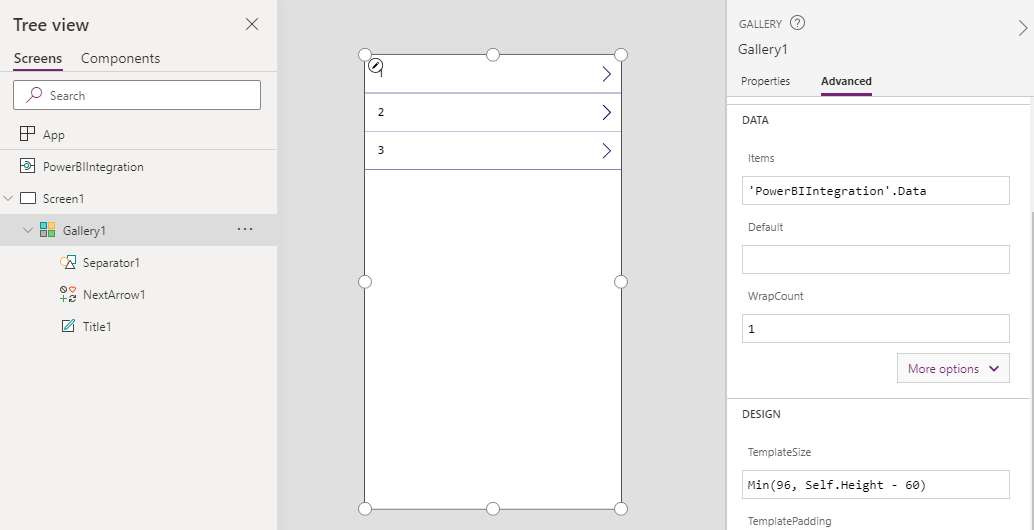
Lets first display 2 more fields in the Gallery Items to display the DatePlanned and SiteInspectionDone fields.
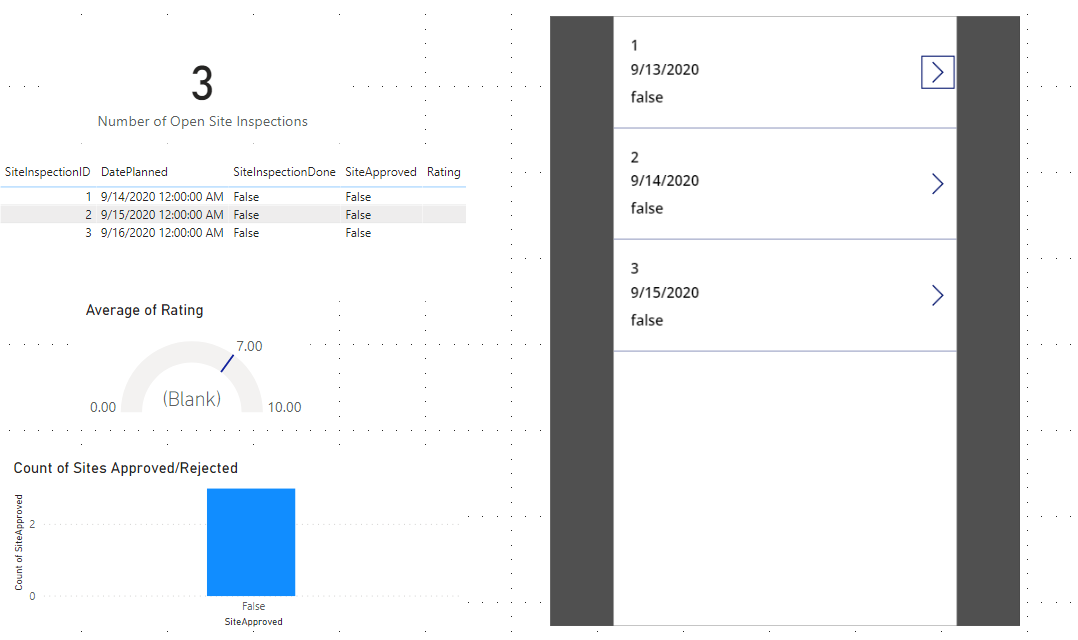
If you now save and publish the app and the the Power BI report the result looks like the image below
Edit the data in the Power App
Next we will add a second screen in which the selected item in the Gallery can be edited. To add a new screen, click on New Screen in the Home menu and choose Form.
If we want to edit the data in the newly added form, we need to add a new Data Source that points to the source SQL Server. In the View menu, click on Data Sources to define a new data source. In this example we will use the SQL Server data connector to connect to the on-premise SQL Server.
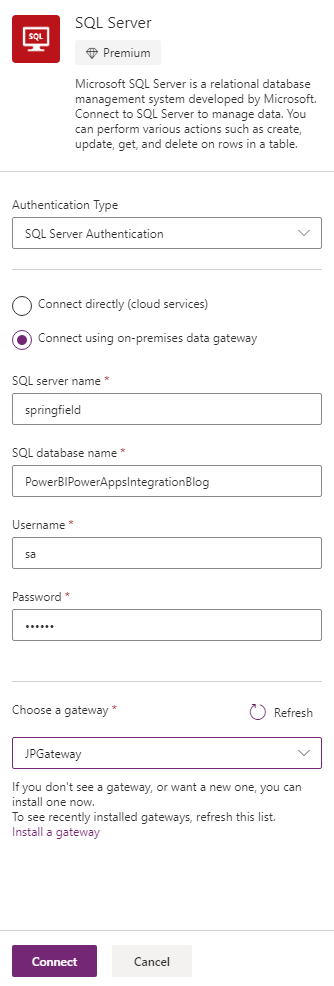
As a final step we need to select the SiteInspection table from the data source.
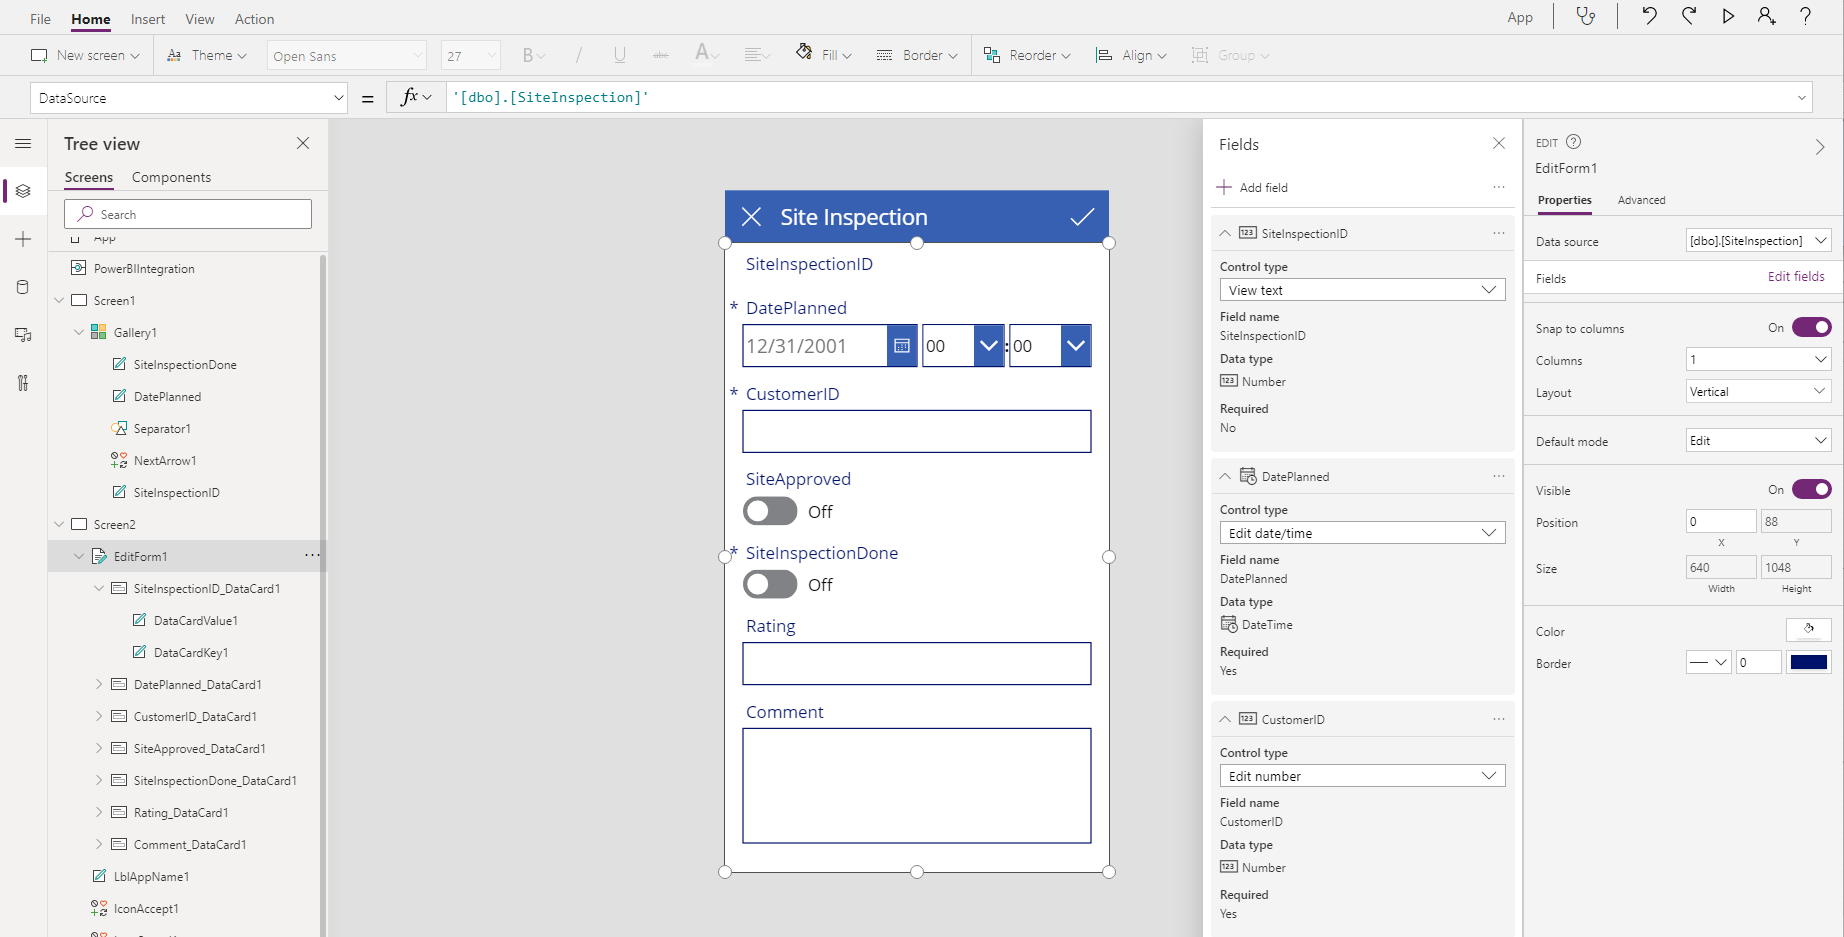
Once the data source named "[dbo].[SiteInspection]" has been defined, select it in the Data Source property of the EditForm1 form. Next click on Edit Fields and choose the fields you want to edit in the form. Have a look at the result below.
We now have the form setup but all the fields are still empty. The form must be populated with the selected item in the Gallery from the other screen. This can be done by adding the Lookup() function to the Item property of the edit form. The Lookup function takes two arguments, the data source to filter and the filter expression.

We now have the form showing the selected item from the Gallery. Next want to save the form values and let the app refresh the Power BI report. If you click on the checkmark in the top right corner of the form you will see that there is a single line of code SubmitForm(EditForm1) in the expression text box. This expression takes care of saving the data to SQL Server. Once the save is finished, the Power BI report must be refreshed. This can be done by calling the Refresh() method on the PowerBIIntegration control. When the form is saved we also want to navigate back to the first screen.
The complete expression for the checkmark thus becomes:
SubmitForm(EditForm1);PowerBIIntegration.Refresh();Navigate(Screen1);
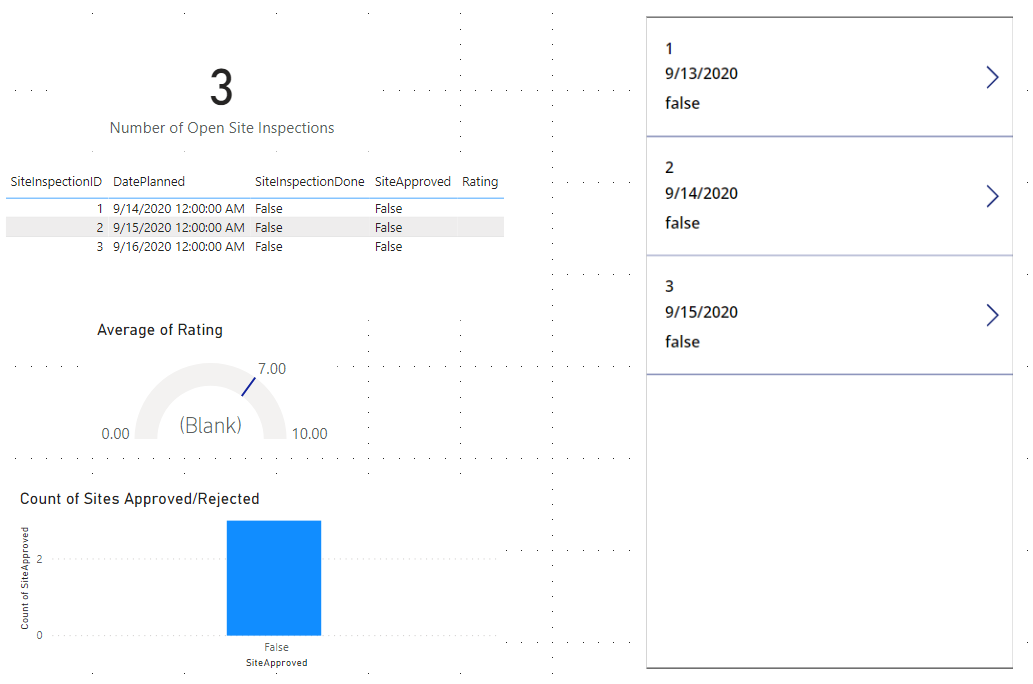
Save and share the app one more time and go back to the Power BI Report. Don't forget to save the report! Have a look at the data as it is before any changes are made.
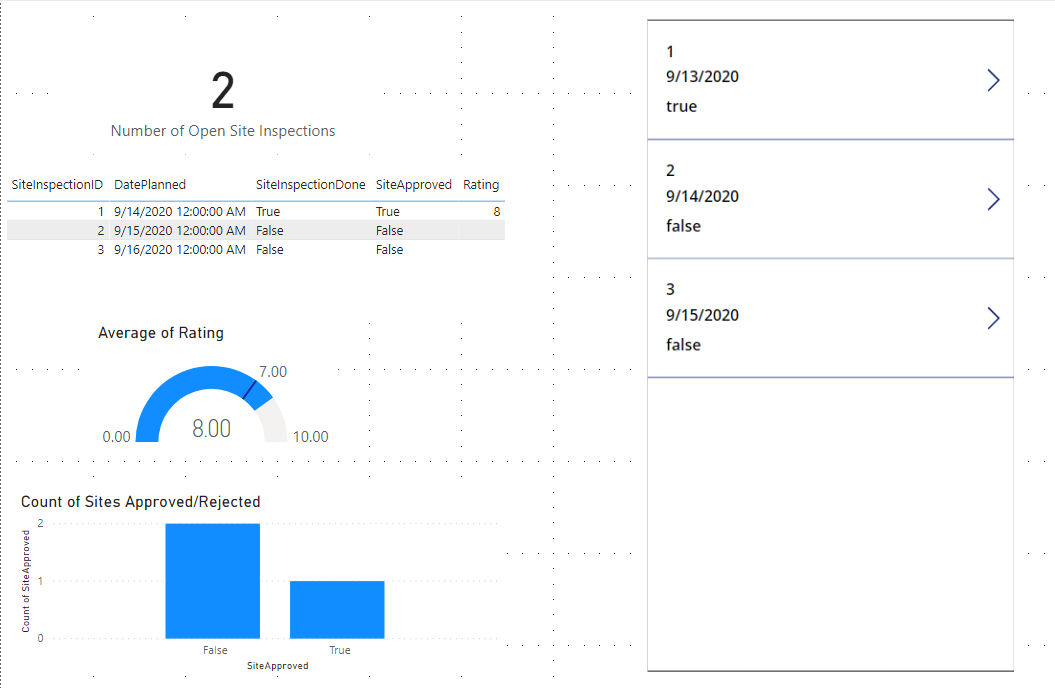
Let's edit the first site inspection record using our app. Let's set the fields SiteInspectionDone and SiteApproved to true and give the site a rating of 8. Save the changes by clicking on the checkmark icon in the top right corner of the app.
Notice how the data in the report is almost immediately refreshed!
As you can see the possibility to embed Power Apps inside a Power BI report opens up some powerful new capabilities!
Some limitations of the PowerApps for Power BI visual
- If you change the data fields associated with the visual, you must edit the app from within the Power BI service.
- The Power Apps visual can't trigger a refresh of Power BI reports and Power BI data sources from within Power BI Desktop.
- The Power Apps visual can't filter the data or send any data back to the report.
- You'll need to share the Power Apps app separately from your report.
- Following limitations apply when using the PowerBIIntegration.Refresh() function:
- You must create a new app from Power Apps visual in Power BI report for this function to be available in the app.
- You must use a source that supports DirectQuery and the data connection must be created using DirectQuery method.