Since the release of the Windows Azure SDK 1.3 it is possible to host multiple sites in one web role. In this blog post I will show you how to do this.
1. Creating the Azure project
Start by creating a new Azure Cloud project. Add a single WebRole project (call it MultiSitesWebRole) to it:
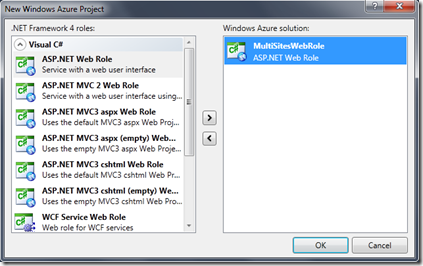
Hit Ok.
Now we just want to make sure we see each different web site, so open the default.aspx page and change the header, for example:
Code Snippet
- <%@ Page Title="Home Page" Language="C#" MasterPageFile="~/Site.master" AutoEventWireup="true"
- CodeBehind="Default.aspx.cs" Inherits="WebApplication1._Default" %>
-
- <asp:Content ID="HeaderContent" runat="server" ContentPlaceHolderID="HeadContent">
- </asp:Content>
- <asp:Content ID="BodyContent" runat="server" ContentPlaceHolderID="MainContent">
- <h2>
- This is the main site!
- </h2>
- <p>
- To learn more about ASP.NET visit <a href="http://www.asp.net" title="ASP.NET Website">www.asp.net</a>.
- </p>
- <p>
- You can also find <a href="http://go.microsoft.com/fwlink/?LinkID=152368&clcid=0x409"
- title="MSDN ASP.NET Docs">documentation on ASP.NET at MSDN</a>.
- </p>
- </asp:Content>
Make sure the cloud project is set as the start project, and then run (F5) your solution.
Your web browser should open and display the site.
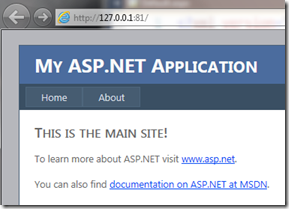
While this is still running open IIS manager. Open the list of sites, you should see the site for this solution (the name will be different):

The Windows Azure Compute emulator actually uses IIS to run your web role by creating a site on your local machine.
Stop your debugging session.
2. Adding the second site
Right-click your solution and add another ASP.NET web project.calling it “TheSecondWebSite”. Update the default.aspx again to show that this is the second site:
Code Snippet
- <%@ Page Title="Home Page" Language="C#" MasterPageFile="~/Site.master" AutoEventWireup="true"
- CodeBehind="Default.aspx.cs" Inherits="WebApplication2._Default" %>
-
- <asp:Content ID="HeaderContent" runat="server" ContentPlaceHolderID="HeadContent">
- </asp:Content>
- <asp:Content ID="BodyContent" runat="server" ContentPlaceHolderID="MainContent">
- <h2>
- The second web site!
- </h2>
- <p>
- To learn more about ASP.NET visit <a href="http://www.asp.net" title="ASP.NET Website">www.asp.net</a>.
- </p>
- <p>
- You can also find <a href="http://go.microsoft.com/fwlink/?LinkID=152368&clcid=0x409"
- title="MSDN ASP.NET Docs">documentation on ASP.NET at MSDN</a>.
- </p>
- </asp:Content>
Now open the cloud service definition file (ServiceDefinition.csdef). Look at the <Sites> element and its children. Copy the <Site> element to create another one. Modify the site name and add a physicalDirectory element set to the path of the second site. Inside the <Site> element look for the <Binding> element and add another attribute hostHeader set to www.contoso.com. Ok, I’m using www.contoso.com for testing purposes, you can use your own site url if you want. We’ll be changing the host file on your machine so you can test everything, but this won’t work for other people. If you really want to make this work you will need to make the necessary DNS entries to redirect your site url to the cloud url…
ServiceDefinition.csdef
Code Snippet
- <Sites>
- <!-- First site -->
- <Site name="Check" physicalDirectory="C:\...\FullIIS_MultipleSites\WebApplication1">
- <Bindings>
- <Binding name="Endpoint1" endpointName="Endpoint1" />
- </Bindings>
- </Site>
- <!-- Second site -->
- <Site name="Encore" physicalDirectory="C:\...\FullIIS_MultipleSites\WebApplication2">
- <Bindings>
- <Binding name="Endpoint1" endpointName="Endpoint1" hostHeader="www.contoso.com" />
- </Bindings>
- </Site>
- </Sites>
Before you run your solution we need to make sure that the hostHeader www.contoso.com is pointing to the local environment. You can do this by editing the hosts file, which can be found in <Windows>\System32\drivers\etc\hosts. You can edit this file using notepad. Make sure you have the following in this file:
127.0.0.1 www.contoso.com
Run your solution. Your browser should show the first site:
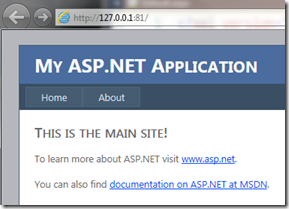
Note the port used by the first site (in this screenshot above this is port 81, the compute emulator will take the first available port above port 80).
Now you can open the second site by browsing to www.contoso.com:81 (use your own port here).
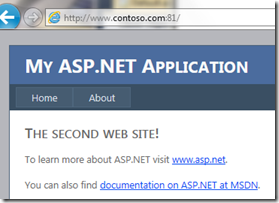
Before you stop debugging, open the IIS manager again, you should now see two sites (you may need to refresh the sites node):

3. Creating a nested virtual application
Add another web project, calling it TheThirdSite.
Change default.aspx again to reflect that this is the third site.
Open the service definition again, and add the VirtualApplication element inside the second site:
Servicedefinition.csdef
Code Snippet
- <Sites>
- <!-- First site -->
- <Site name="Check"
- physicalDirectory="C:\...\FullIIS_MultipleSites\WebApplication1">
- <Bindings>
- <Binding name="Endpoint1" endpointName="Endpoint1" />
- </Bindings>
- </Site>
- <!-- Second site -->
- <Site name="Encore"
- physicalDirectory="C:\...\FullIIS_MultipleSites\WebApplication2">
- <!-- Even a nested Virtual application -->
- <VirtualApplication name="More"
- physicalDirectory="C:\...\FullIIS_MultipleSites\MvcApplication1">
- </VirtualApplication>
- <Bindings>
- <Binding name="Endpoint1" endpointName="Endpoint1" hostHeader="www.contoso.com" />
- </Bindings>
- </Site>
- </Sites>
Run again and browse to www.contoso.com:81/More. You should see the third site.
4 Deploying and testing in the cloud
Let’s test your project in the cloud.
Deploy your solution:
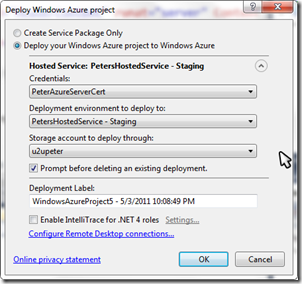
Once deployment is ready click on the link to open the first site.

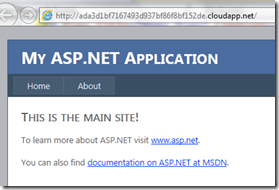
Now open a command prompt and use the ping command to retrieve the site’s IP address. Open the hosts file and modify the www.contoso.com to use the new IP address.
Browse to www.contoso.com (no need to specify a port number now). You should see the second site.
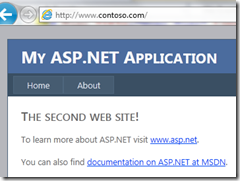
If not, you might need to clear your DNS cache using the command:
ipconfig /flushdns
net stop dnscache
net start dnscache
Browse to the nested virtual application at www.contoso.com/More:
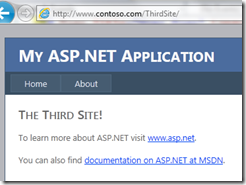
That’s it. You’ve just created your own web role in the cloud, hosting three different sites! To complete everything you now should go to your internet provider to make the necessary DNS entries to redirect your site url to the cloud url!