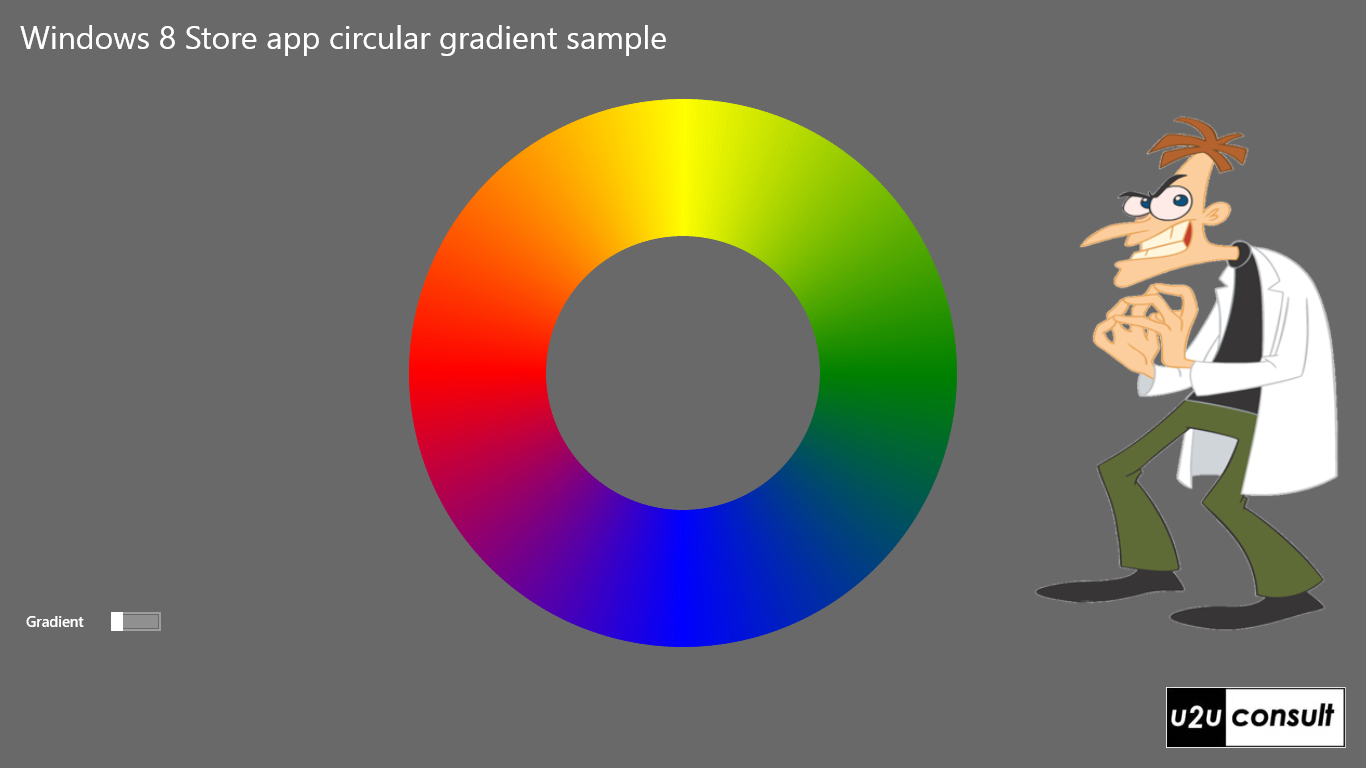
This article shows a way to easily create a circular gradient effect in a Windows Store app or a Windows Phone app. The standard linear and radial gradients are nice, but they do not allow you to draw something like this:

<Spoiler> There’s no magic involved. </Spoiler>
What we’re doing here is just drawing a bunch of arcs at the appropriate place and in the appropriate color. Fortunately we have some helper classes for each task at hand. First there is the RingSlice control from WinRT XAML Toolkit. To use it, you can reference the framework dll’s in your app, e.g. through Nuget. Alternatively, you can copy the RingSlice and PropertyChangeEventSource classes from the toolkit's source code into your app. That’s what I did for this sample, because I also wanted to build a Phone version.
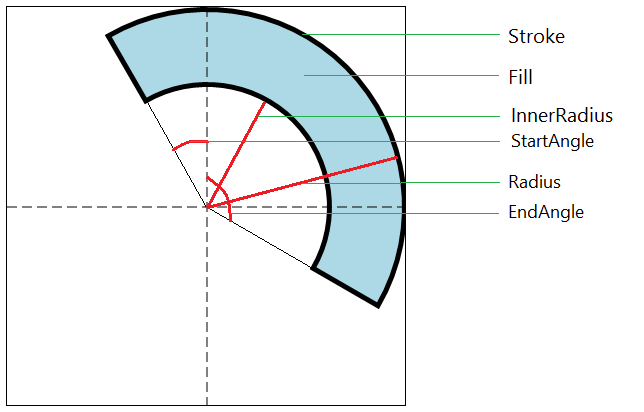
Here’s an artist impression of the RingSlice’s main characteristics:

The RingSlice control uses the center of its host container as the reference. So you don’t have to refresh your trigonometry knowledge to calculate the absolute position of the arc.
In order to simulate a circular gradient, we’re going to put a collection of such RingSlices next to each other, and give them a color variation. That color shift is calculated using an extension method of (the source) Color that takes the target color and a percentage as parameters:
// Interpolates two colors
public static Color Interpolate(this Color color1, Color color2, double fraction)
{
    if (fraction > 1)
    {
        fraction = 1;
    }

    if (fraction < 0)
    {
        fraction = 0;
    }

    Color result = new Color();
    result.A = 255;
    result.R = (byte)(color1.R * fraction + color2.R * (1 - fraction));
    result.G = (byte)(color1.G * fraction + color2.G * (1 - fraction));
    result.B = (byte)(color1.B * fraction + color2.B * (1 - fraction));

    return result;
}
Here’s the code that draws one of the quarters of the first image (Color from Yellow to Green, StartAngle from 0 to 89):
XAML
<Viewbox>
    <Grid x:Name="GradientHost"
            Height="600"
            Width="600"
            HorizontalAlignment="Center"
            VerticalAlignment="Center" />
</Viewbox>
C#
for (int i = 0; i < 90; i++)
{
    Brush brush = new SolidColorBrush(Colors.Green.Interpolate(Colors.Yellow, (double)i / 90));
    this.GradientHost.Children.Add(
        new RingSlice()
        {
            StartAngle = i,
            EndAngle = i + 1,
            Fill = brush,
            Radius = 300,
            InnerRadius = 150,
            Stroke = brush
        }
    );
}
I used this technique to draw gradient scales behind the Modern Radial Gauge for Windows 8.* and Windows Phone 8.
Just put the Gauge inside a ViewBox, together with a container to host the circular gradient, like this:
<Viewbox>
    <Grid>
        <Grid x:Name="ScaleGrid"
                Height="200"
                Width="200" />
        <controls:Gauge ScaleBrush="Transparent"
                        ScaleTickBrush="Transparent"
                        TickBrush="Transparent"
                        TrailBrush="Transparent" />
    </Grid>
</Viewbox>
… and draw the RingSlices in a little loop. For determining the Radius and InnerRadius, you consider the size of the host (200x200 in the sample, while the ViewBox will take care of scaling). For the StartAngle and EndAngle all you have to consider is the number of segments you want to draw, and the range - the main arc of the Gauge sweeps from -150° to 150°:
for (int i = 0; i < 100; i++)
{
    double startAngle = (i * 3) - 150;
    Brush brush = new SolidColorBrush(Colors.MidnightBlue.Interpolate(Colors.Lavender, (double)i / 100));
    this.ScaleGrid.Children.Add(
        new RingSlice()
            {
                StartAngle = startAngle,
                EndAngle = startAngle + 3,
                Fill = brush,
                Stroke = brush,
                Radius = 80,
                InnerRadius = 50
            });
}
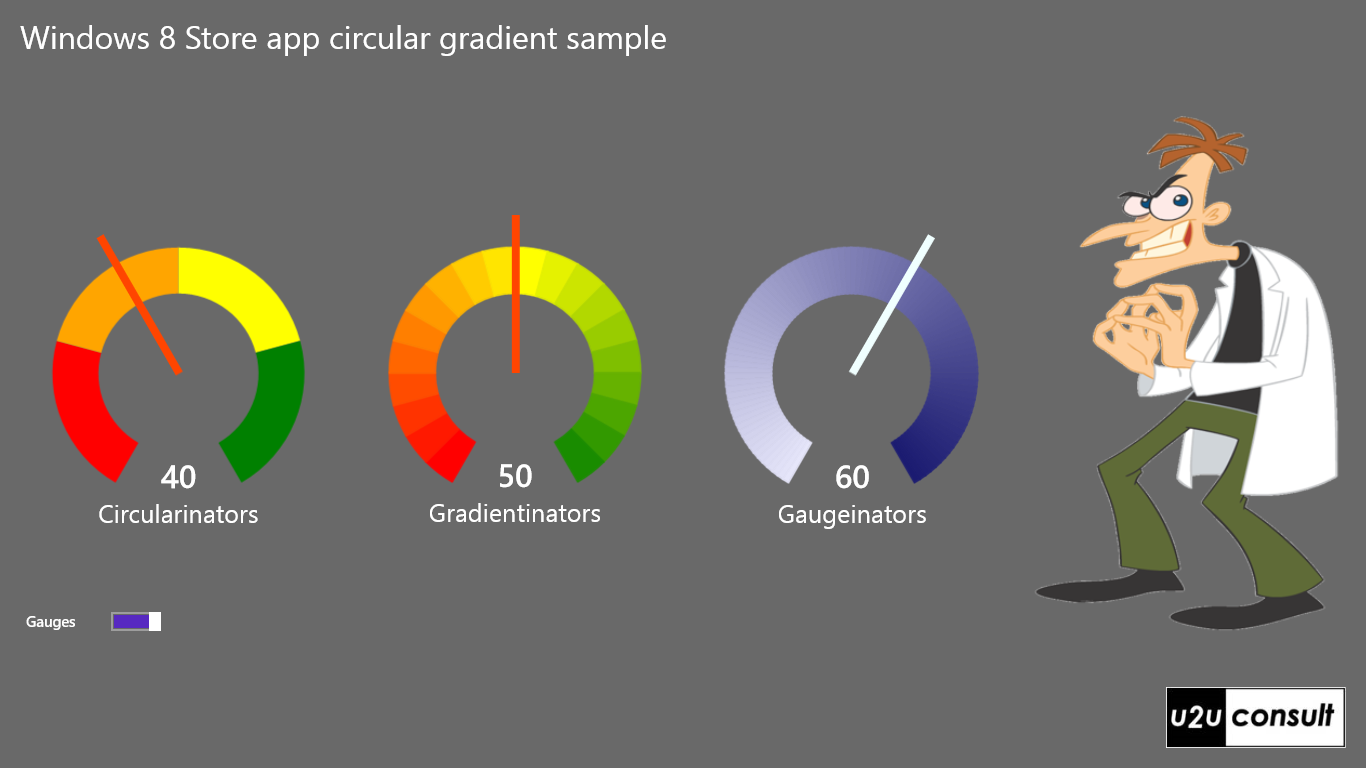
Here are some examples of the radial gauges with a circular gradient scale, on Windows 8:

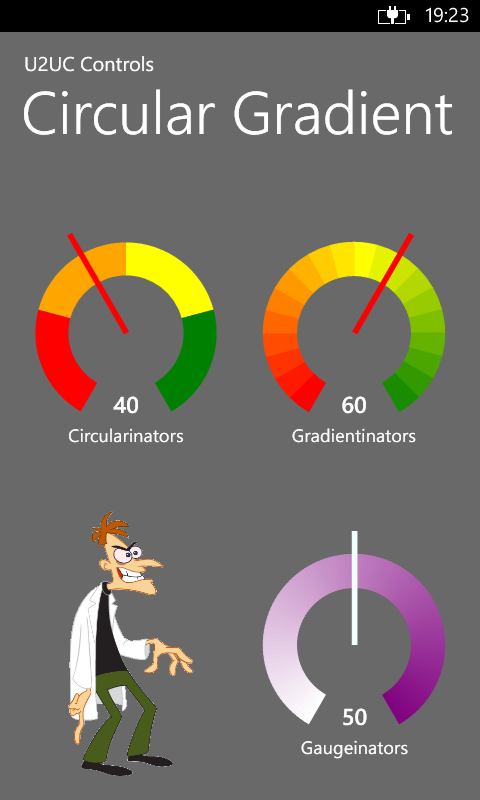
… and Windows Phone:

Here’s the source code with the helper classes. It was written in Visual Studio 2012: U2UC.WinRT.CircularGradientSample.zip (353.46 kb)
Enjoy,
Diederik