Here's the bad news: there are two very common things that should be easy, but can NOT be done in Team Foundation Server.
- You can not switch an existing team project to a new set of process templates.
- You can not rename a team project.
These are two show stoppers when you have a team project containing a couple of man years of coding, and you want to migrate to e.g. the Microsoft Visual Studio Scrum 1.0 templates.
Here's the good news: the show can go on! You cán migrate a TFS team project to an new process template in a supported way, and with just minimum loss of information. It just takes a lot more effort -and guts- than it should take.
Here's a procedure:
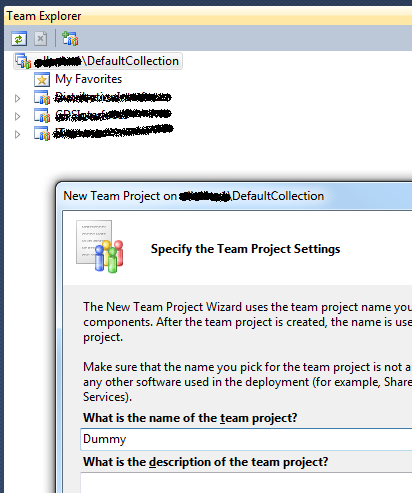
Step 1: Create a (new) backup team project.
You need a backup project to temporarily host all data. It doesn't matter what process templates you select for this project, since you're going to lose the work item tracking anyway. In most situations that's not a real problem: you probably decided to migrate to another process template because you didn't like your current work items...
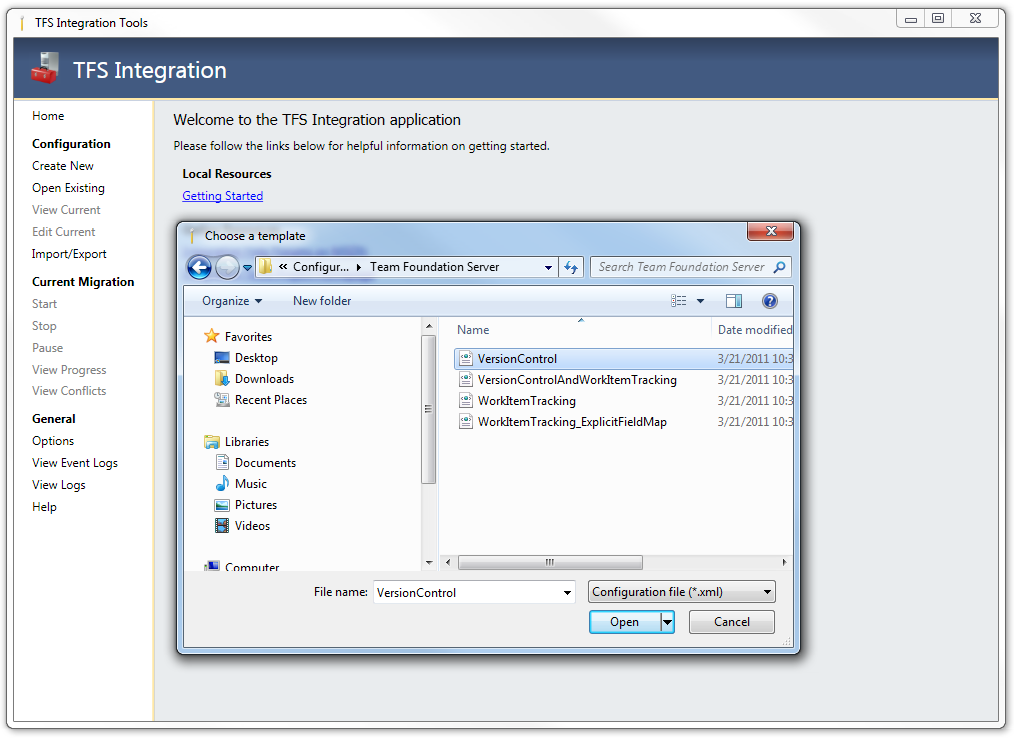
Step 2: Copy the files and their version history to this new project.
This sounds easy, but it can't be done with the standard toolset. For this task you need to download and install the Team Foundation Integration Tools, a platform developed by the Visual Studio ALM Rangers. The TFS Integration Tools come in two flavors:
For this type of TFS-to-TFS migration the March 2011 release of the non-bleeding version is OK, and it's fully supported by our friends in Redmond - you never know...
The TFS Integration Tools are not really lightweight. You'll need an extra SQL Server database -SQL Express is good enough if you don't hit the 4GB size limit- and two Windows services will be installed:
The backup project should be populated through a new migration from TFS to TFS, with VersionHistory only. Your project's work item tracking will be lost if you migrate to a project with another process template. Here are the two configuration screens. The configuration will be persisted in the database:
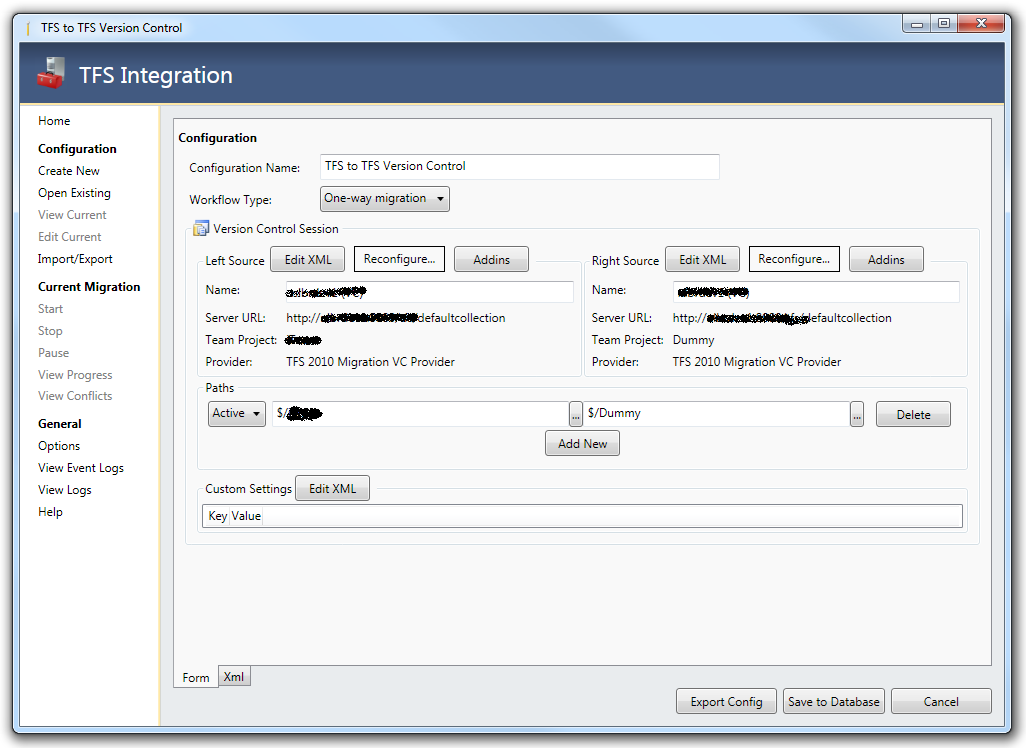
The tool will store the source project's metadata in a database. It then populates the target project by replaying all check-in activities through the API of TFS, controlled by a windows service.
During the process, you might need to solve some minor conflicts, e.g. regarding the build template xaml files:
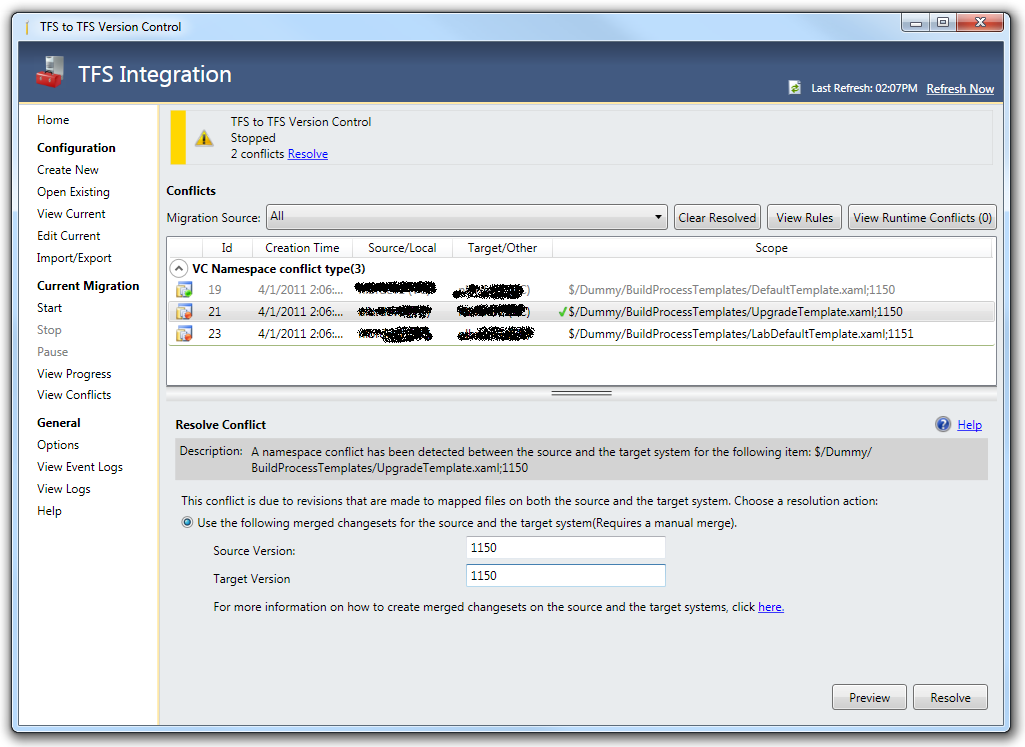
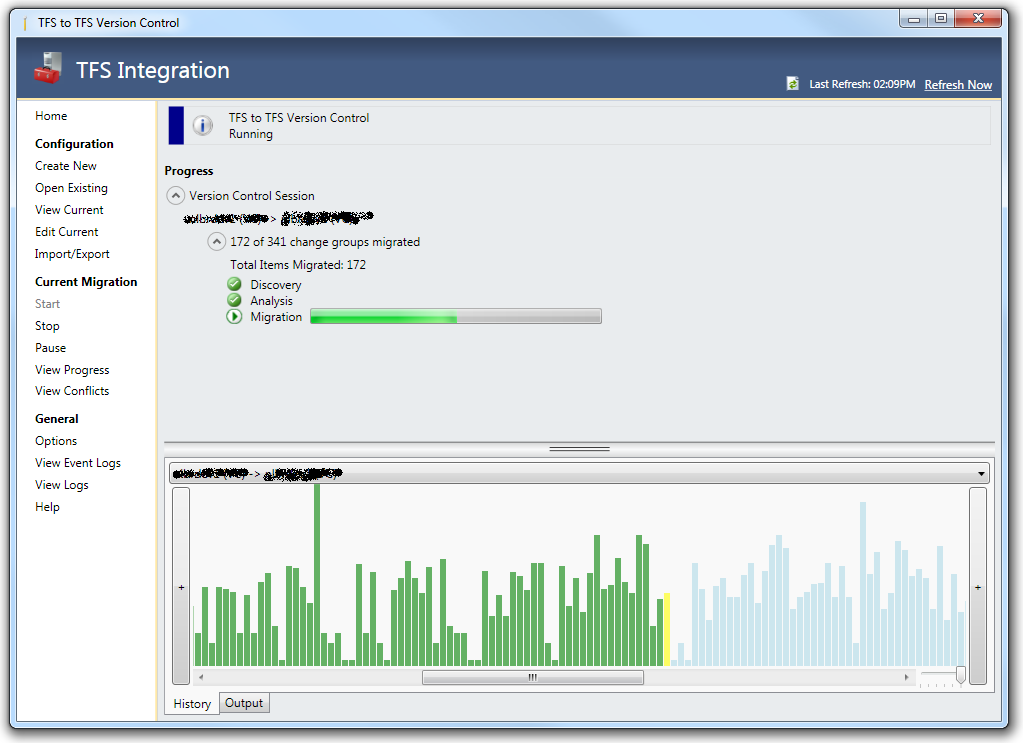
Whilst the migration is running, you can sit back and relax, and keep an eye on the process:
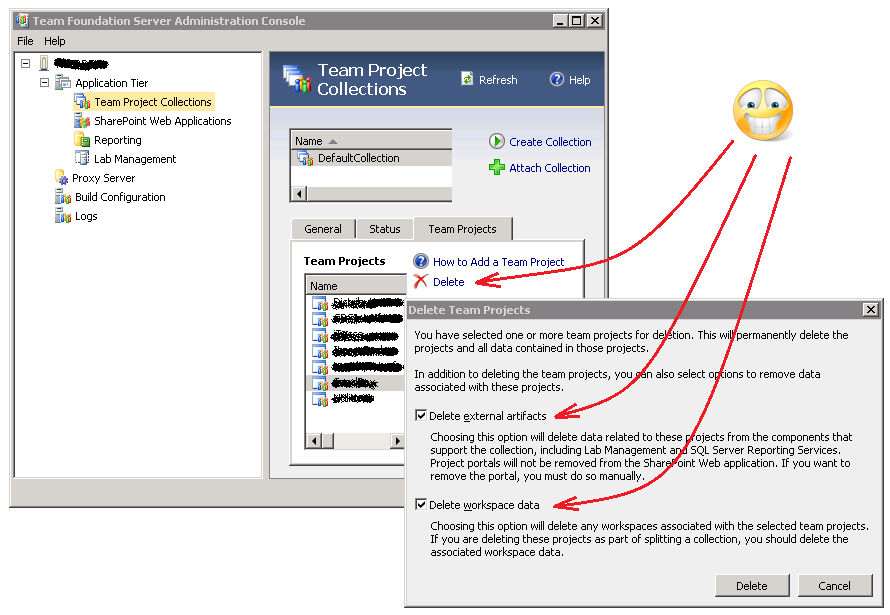
Step 3: Delete the original team project.
This is by far the most scary step, but it's necessary if you want to reuse the original project name. It's a step that can not be performed from Visual Studio: you need to do this via the TFS Administration Console. Here are the buttons and the checkboxes that will remove all traces of several man years of development in just a couple of seconds:
The rest of the story is obvious: you need to re-run everything in the opposite direction.
Step 4: Recreate the project.
Make sure to select the correct process templates.
Step 5: Repopulate the new project from the the backup project.
Reselect TFS-to-TFS, and keep VersionHistory.
And there you are!