TL;DR
If you want to use Helm, but not Azure Dev Spaces. You can do it manually following this section.
Prologue
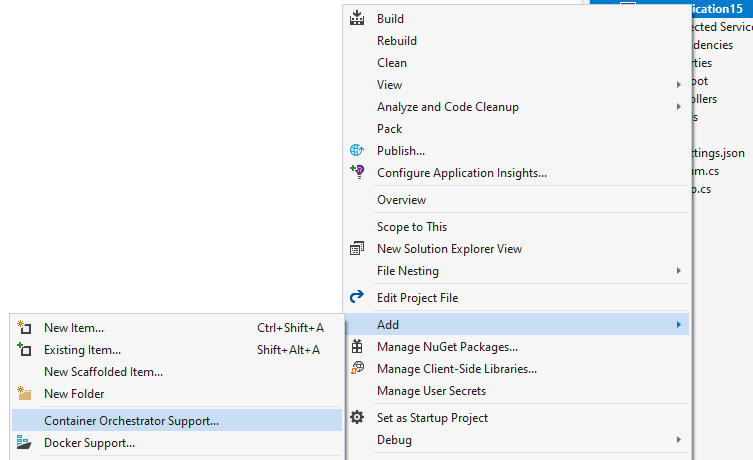
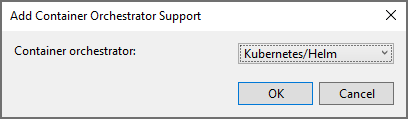
Adding a Helm chart to your ASP.NET Core project is easy. Just right-click your project, add Container Orchestrator Support and then choose Kubernetes/Helm.
This creates a Dockerfile and a helm chart for you automatically. But it also creates this azds.yaml file assuming that you want to deploy to Azure Dev Spaces.
Granted, if you want to deploy to Azure Dev Spaces, it's super easy. Just hit the Azure Dev Spaces start button and you're good to go. It will deploy your project using Helm behind the scenes and is set up for debugging automatically.

But what if you don't want to do that? What if you don't have an Azure account to set up an AKS cluster? What if you want to customize your helm chart and test it locally? Or deploy it to a completely different location. Or you just want to learn how to use a helm chart?
This blog will show you how to deploy your ASP.NET Core project to your local Kubernetes cluster using Helm manually.
Prerequisites
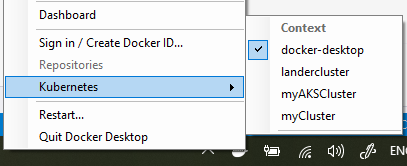
Make sure that you have your local kubernetes cluster set up, and your context is set to the local cluster, usually called docker-desktop.
You can use the following command to check if your kubernetes cluster is running:
kubectl cluster-info
Also make sure Helm (version 3+) is installed. Use the following command to verify:
helm version
Setting Up the Project
Using Visual Studio, create a new ASP.NET Core project, choose MVC. You don't need to enable Docker support. Once created, right-click your project and add Container Orchestration Support for Kubernetes/Helm.
You should now have a Dockerfile and a Helm chart.
Building the Image
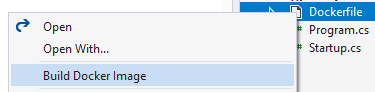
Right-click your Dockerfile and hit Build Docker Image. You can check your progress in the Output window.
Verify the existence of your image by using the following command:
docker image ls

Notice the latest tag.
Understanding the Helm Chart
When you install something with Helm, it installs a combination of deployments, services and other kubernetes resources as a single entity. This single entity can then be updated and removed just like you would manage a Package using NuGet.
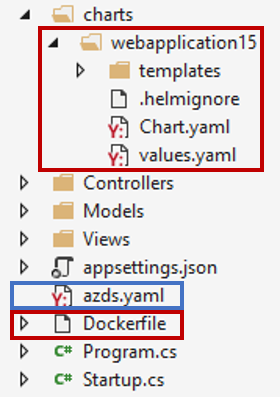
To see how this works, you can open up the charts folder:
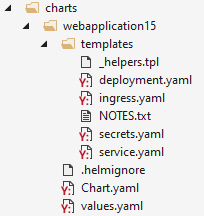
It contains Chart.yaml, values.yaml and a bunch of templates. If you open one of the templates, for example deployment.yaml, you will see something like this:
deployment.yaml
apiVersion: apps/v1
kind: Deployment
metadata:
  name: {{ template "webapplication15.fullname" . }}
  labels:
    app: {{ template "webapplication15.name" . }}
    chart: {{ template "webapplication15.chart" . }}
    draft: {{ .Values.draft | default "draft-app" }}
    release: {{ .Release.Name }}
    heritage: {{ .Release.Service }}
spec:
  revisionHistoryLimit: 0
  replicas: {{ .Values.replicaCount }}
...
On one hand it looks like a normal deployment. But on the other you see all of these placeholders specified by these curly braces {{ }}. Some of the values come from values.yaml. E.g. look for replicaCount in values.yaml.
By combining values.yaml and these templates (and some other info), you end up with a normal yaml file that you can deploy the Kubernetes cluster. Normally, you modify values.yaml and you don't change the templates.
Chart.yaml simply contains some metadata about your chart.
Updating the Helm Chart
To install this image using helm, you will have to make some modifications. Open charts\<name-of-app>\values.yaml. Locate the following part:
values.yaml
image:
  repository: name-of-app
  tag: stable
  pullPolicy: IfNotPresent
You can see it tries to deploy the stable tag of your image, which you don't have.
Change this to the latest tag, matching what you saw when building the image.
values.yaml
image:
  repository: webapplication15
  tag: latest
  pullPolicy: IfNotPresent
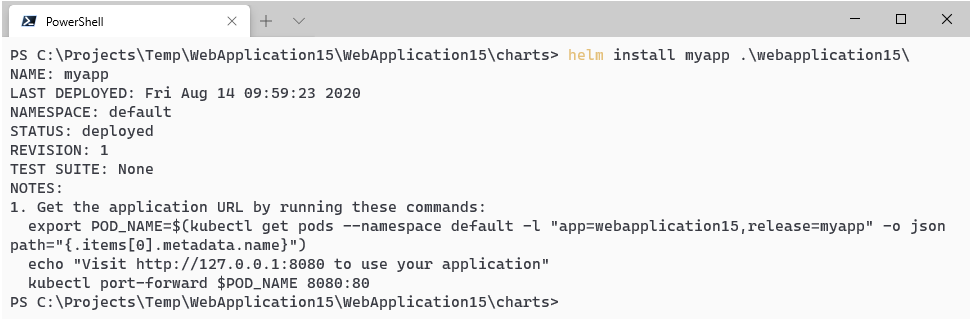
You can already install the chart. In your CLI, navigate to charts folder of your project and execute the following command:
helm install myapp .\<name-of-app>
It should give you the following output:
You can list the installed helm charts using the following command:
helm list
You can verify that the install succeeded by checking the deployments, pods and services:
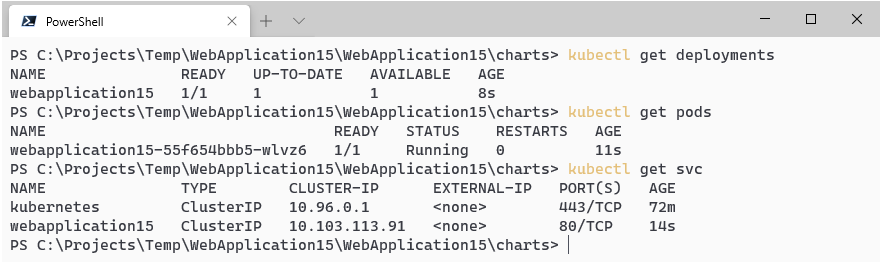
You can see it generated one pod. You can communicate to this pod by using port-forwarding to the localhost.
kubectl port-forward <name-of-pod> 8080:80

and now visit http://localhost:8080:
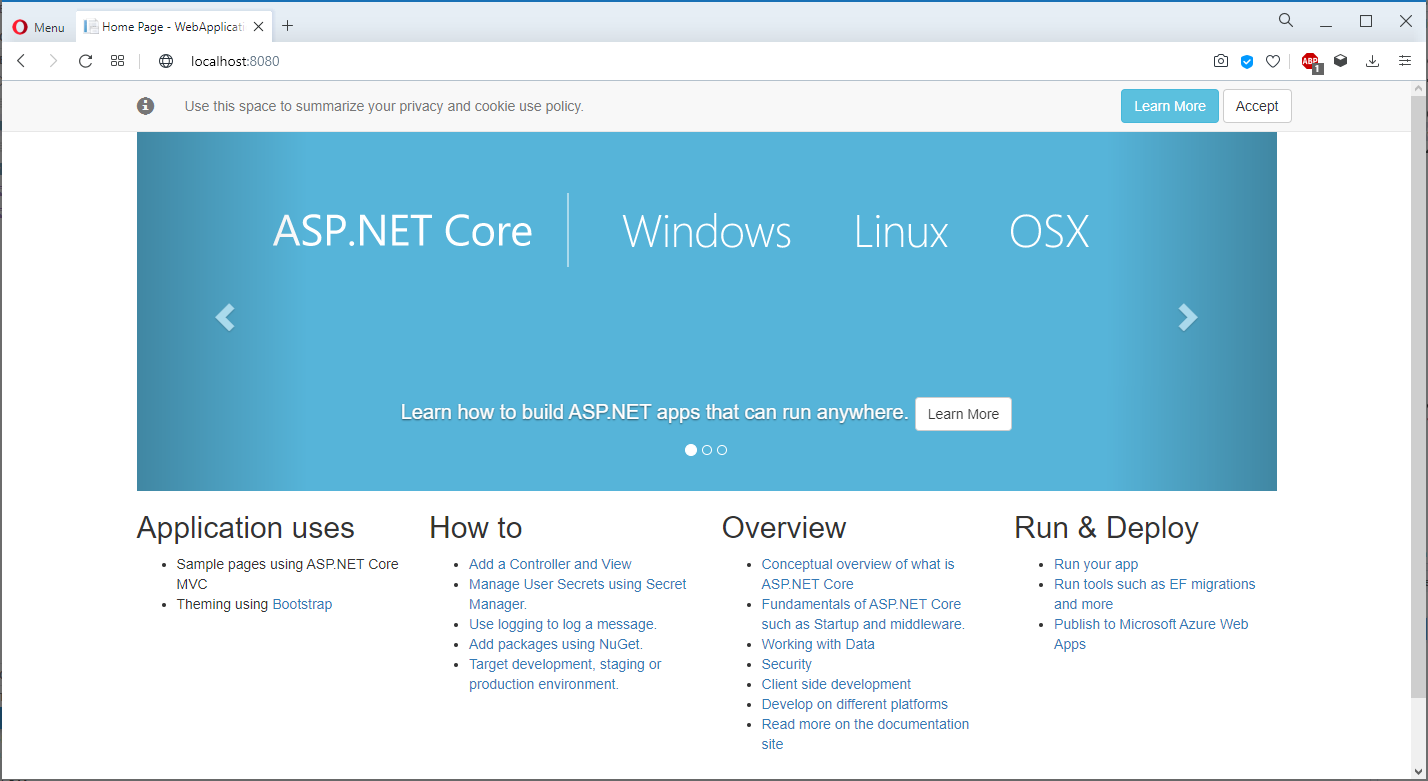
Looks great! However, using port forwarding is probably not the best way of talking to your pod. You should probably use a Service. The helm chart already specifies a service, but it's of type ClusterIP, which means that you can only access it from inside the cluster. You can change this to NodePort to allow external communication for testing.
First, uninstall the current chart.
helm uninstall myapp
Then, update values.yaml. Change
values.yaml
service:
  type: ClusterIP
  port: 80
into
values.yaml
service:
  type: NodePort
  port: 80
Now reinstall the chart:
helm install myapp .\<name-of-app>
and verify your services, notice the generated port.
kubectl get svc

visit http://localhost:<node-port>, and gander upon your beautiful app.
Epilogue
From here on, you can keep making modifications to explore/adjust your helm chart while running it locally. Helm, more often than not, is something used behind the scenes. But it's always a good idea to get some insights in what you are using.
Happy helming!