I’ve been playing with Microsoft PowerApps and Microsoft Flow since the first time it was introduced. And I must admit, I really love the way you can create mobile apps and flows in just a couple of minutes. I agree, once you really get in there, you bump into things that are still missing. But hey, that just means there is still room for improvement …
What I would like to show in this blog post is how you can extend your flows with a bit more advanced behavior by using the Workflow Definition Language. Actually, Microsoft Flow and Azure Logic Apps have a lot in common. Logic Apps allows you to use the Workflow Definition Language, containing a bunch of functions to give you logical behavior, functionality, parsing, conversion, … . The fact is that you can also use that Workflow Definition Language in Microsoft Flow, but it is not documented that well. Ohw, before I forget, the Workflow Definition Language from Logic Apps is described right here. Make sure you dig into that documentation to understand the functions you have at your disposition.
To illustrate how one can use it, I created a flow that will, starting from the PowerApp blog RSS create an email containing the new blog posts. Sounds like a simple one, but you need the Workflow Definition Language in order to make it a bit more fancy…
Starting with the trigger
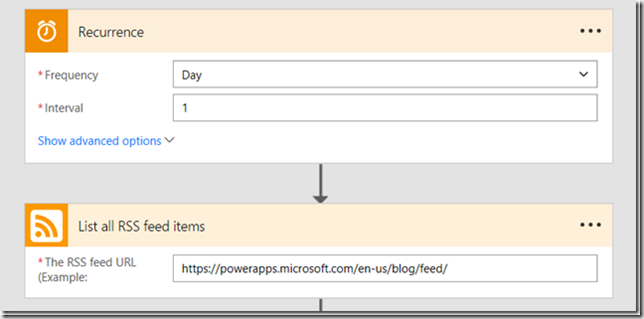
I’ve decided to go for a trigger that runs every day, so that I can fetch the most recent blog posts every day. The setup looks as follows, still quite simple:

Filtering out only the “new” ones
I’m only interested in the “new” posts. Since my flow runs on a daily basis, I’m only interested in the posts that are less than a day old. Now the RSS feed items contain a field that contains the Published Date, so I want to filter on this field. In Flow, you can use the action Filter array from Data Operations to filter a collection of items. This will give you a “Simple” condition you can configure, but there is no way you can configure there: “Has to be published in the last 24 hours”. So you switch to “Advanced”, and now it’s up to the Workflow Definition Language to kick in.

The formula
@greater(item()?['publishDate'], adddays(utcnow(),-1))
checks whether the PublishedDate is greater than right now minus 1 day, giving you the posts created in the last 24 hours.
Preparing the HTML per blog post
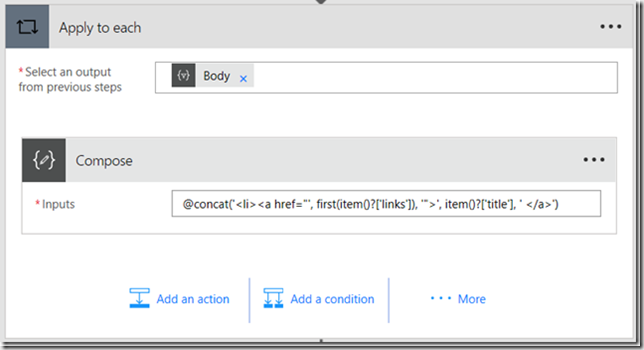
Now that I have the most recent blog posts, I can start preparing them. I mean, at the end I want to send an email containing HTML to my email address. So for every item I want to create an <li> item containing an <a> anchor tag. So I want to do an Apply to each and then Concatenate some fields and text together. You can use the Compose action from the Data Operations for this.

Make sure the formula is SURROUNDED WITH DOUBLE QUOTES or it will not work… The UI trims off the double quotes after save.
"@concat('<li><a href=\"', first(item()?['links']), '\">', item()?['title'], ' </a>')"
Only send an email if any blog post was found
This step could actually be put after the List RSS Items, but I’ve put it after the Apply to each. You can use the following:

Creating the email body
In the previous steps we already created the HTML for every item in the feed, now we just need to merge those items and surround it with some other HTML, just to make it a bit prettier. We can achieve this with another Compose action.

Again, make sure this formula is surrounded with double quotes or it will not work.
"@concat('<h1>New posts on the PowerApps blog</h1><ul>', join(outputs('Compose'),''), '</ul>')"
Sending the email
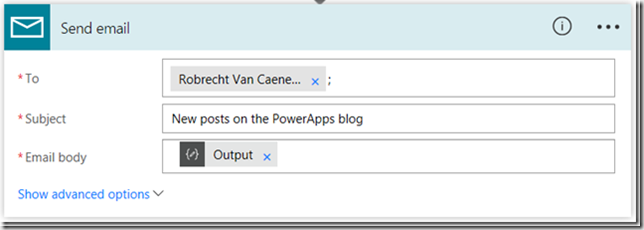
What remains is to send the email. Nothing more then passing on the output of the previous step as the email body. Since we constructed HTML as the body, the email can be sent as HTML too.

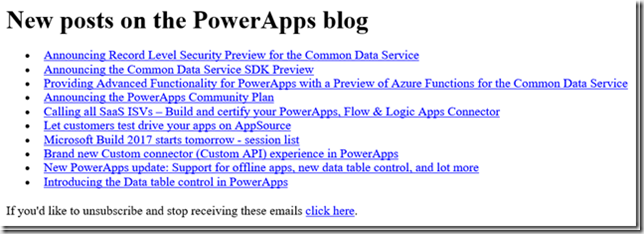
Run the flow, and there is the email:
