As promissed in the course this week I’m going to write a post how you can set a value of a field automatically in InfoPath.
The question was: “Can you automatically set the first name and email if you have selected the last name from a drop-down list box”. Well in this post I’m going to describe the steps that you need to do.
First we are going to create a list in SharePoint to retrieve the items that we want to use in InfoPath.
That is the only thing that we are going to do in SharePoint. Now let’s open up InfoPath and create a basic from with only three fields (lastname, firstname and email).
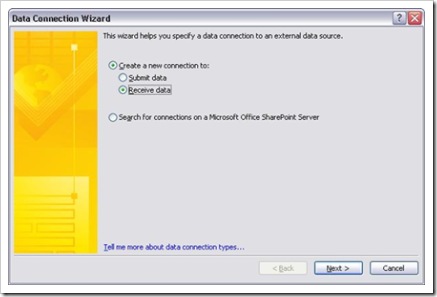
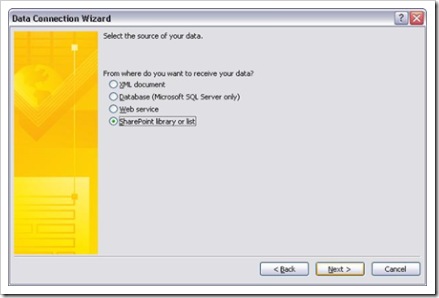
Once we have our form we need to create a connection with SharePoint to retrieve our items. Use the Tool menu to open the ‘Data connections’:
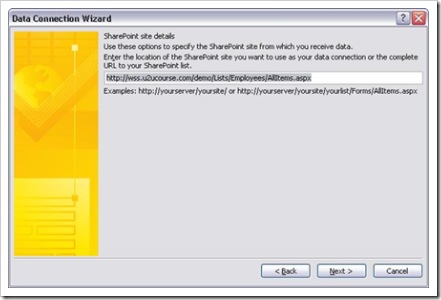
Now we are going to add a connection to retrieve data from our Employee list. The only thing that we need to provide is the URL to the list:
Once your connection is created you need to select the fields that you want to use. Select Last Name, First Name and Email. Finish your connection by naming it so we can use it on our drop-down list box.
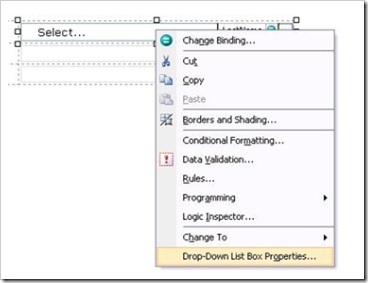
To use your connection in your drop-down list box you need to open up the properties of the control. Right-click your control and select drop-down list box properties:
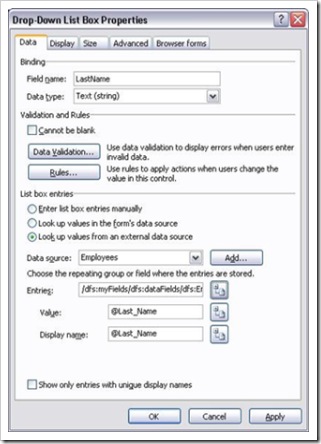
In the 'list box entries' pick the third radiobutton to get data from an external datasource (our list). Select the data source that you’ve just created and use employees as an entry:
Now you can test and see if your drop-down list box is filled up with the last names from your employees list.
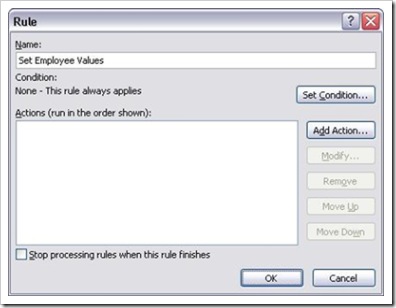
The next thing that we need to do is to make sure that when we select a name in the last name control, the firstname and email field are automatically filled in. To do this, you need to create a rule. A rule is a collection of one or more actions. In our case, the action will fill in the first name and email.
To add rules you need to open up your drop-down listbox properties and click the rules button. Click on the add button to add a rule and give it a name:
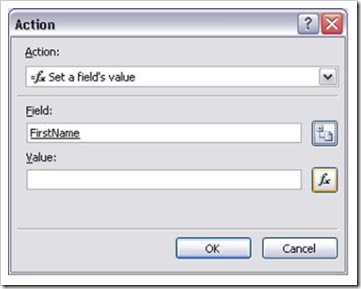
Click on the ‘Add action’ button to add 2 actions to your rule, one for the first name field and one for the email field:
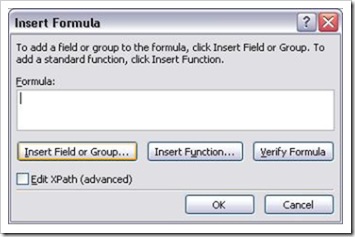
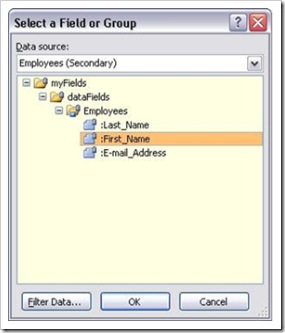
To fill in the value you need to click on the function button next to the 'Value' textbox and opt for ‘Insert a field or group’ from the dialog box. From the available data sources pick the data source that you’ve created previously:
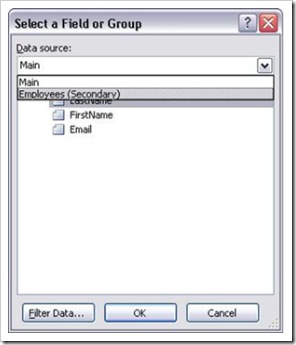
Specify that you want to use the First_Name field for our first field and Email for the email field:
That’s it, test your form.