One of the things that people are not aware of is that you can customize the search results coming from the SharePoint search engine. The results, which is XML, given by the engine are styled using XSLT. If you create your own XSLT you can customize/restyle your results page.
There is a 'Visual How To' by Patrick Tisseghem explaining the steps you need to do to customize the search page.
You can do the same trick with the Best Bets meaning, you can customize them by applying your own XSLT. Before we are going to customize the Best Bets, let me explain what they do an how you can use them.
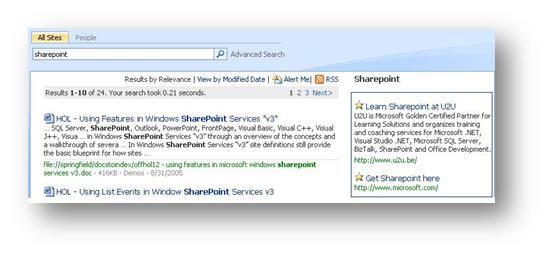
Best Bets are used to promote some results depending on your search keywords. If you look at the screenshot below you see that when I type SharePoint in the search box, U2U and Microsoft are pushed forward as results where you definitely can find something about SharePoint. So if you think about it, Best Bets is a way for an administrator to earn some extra money, the one who pays the most gets on top of the list J.
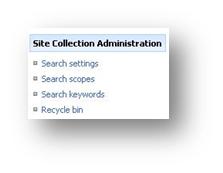
To create these Best Bets, you need to go to the settings page of your top level site and you need to click on the 'Search keywords' linkbutton where you can create the Best Bets by clicking on the create button.
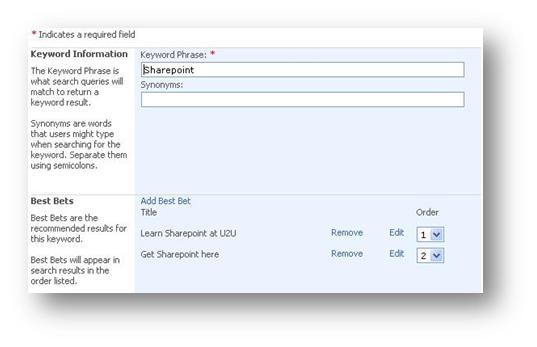
After filling in a keyword you can add Best Bets by clicking on the Add Best Bet button, type in a url, title and description for your best bet.
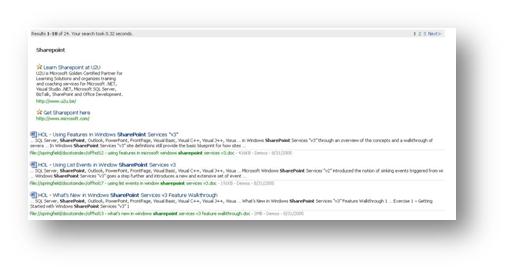
Now that the Best Bets are created we can test them by typing SharePoint in the search textbox. You will see the results at the right side of the page.
Because they are displayed in a webpart you can drag the webpart into another webpartzone to ,for example, have your best bets before the search results.
Okay, now let's customize our Best Bets. These are basically the same steps as in the 'Visual How To', so you can follow the steps there as well, the only difference is that in the video they customize the search results.
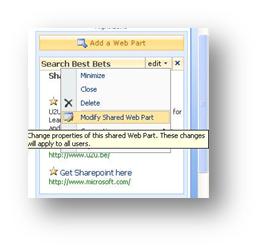
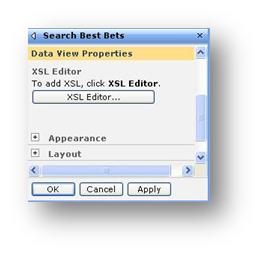
Because the Best Bets webpart is using XSLT to show the results getting from the search engine (which is XML ) we can apply our own XSLT. So if you go to the properties of the webpart you can click on the XSL Editor to replace the existing XSLT with your personal XSLT.
As said, the best bests is nothing more than XML which is styled using XSLT. Because it is not easy to create XSLT, We are going to let SharePoint Designer create the XSLT for us. The only thing that we need to do is saving the XML returned from the search engine so we can use it in the Designer.
To see the XML returned from the engine we need to use following XSLT. Copy it in the XSLT dialog box.
<xsl:stylesheet version="1.0"
xmlns:xsl="http://www.w3.org/1999/XSL/Transform" >
<xsl:output method="xml" version="1.0" encoding="UTF-8" indent="yes" />
<xsl:template match="/">
<xmp><xsl:copy-of select="*"/></xmp>
</xsl:template>
</xsl:stylesheet>
After saving your new XSLT you can copy the XML and paste it temporarily in an XML file, so we can import this file and use it as a Data Source in SharePoint Designer.
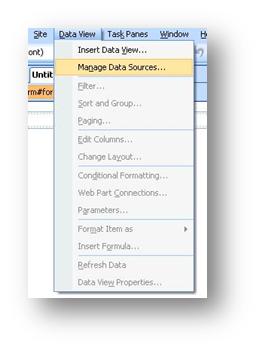
Speaking about the devil, lets open up SharePoint designer to do some customization magic. The first thing that we need to do is using our XML as a Data Source. You can manage your data sources by choosing Manage Data Sources which you can find in the Data View on the menu bar.
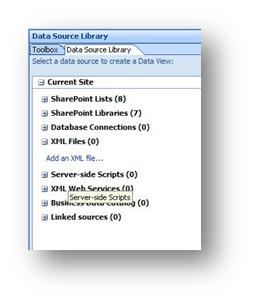
Once you've done this, you get an overview of all the available data sources in the toolbox. One of the data source categories is 'XML Files'. In that category you can click on Add an Xml File to add your XML file as a data source.
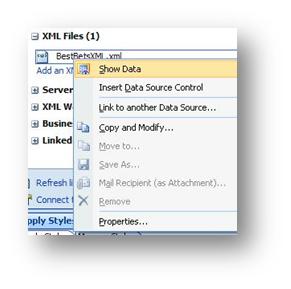
You can browse to your file and add it to your Data Sources . Once the file is added,you can see the available data by right-clicking on it and pick Show Data from the dropdownlist.
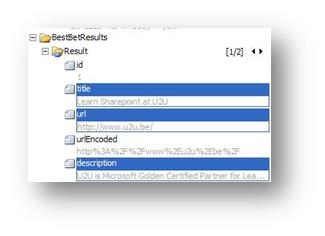
Once the data is shown you can specify what data you want to show for your best bets. Select title, url, description and drag this to your design surface.
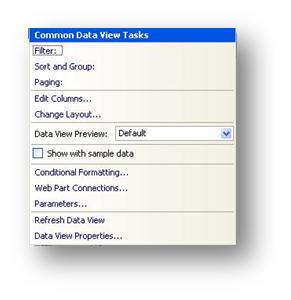
Once you've dragged your data on the design surface, you see a menu where you can do some additional settings like adding more columns, allow paging and sorting …. In our case it is more useful to apply another layout so click on change layout and pick one that fit your needs.

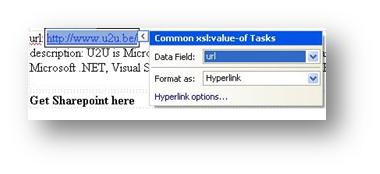
Next thing that we need to do is make sure that we can click on the url.
Okay, that's it for now (you can off course customize as much or as advanced if you want), let's go to code view and copy the generated XSLT. Make sure that you copy everything between and including the <xsl:stylesheet> tags.
Copy the XSLT in the XSL Editor in the properties of the Best Bets webpart and save it.
Publish your page and try it out.