This week, my friend and colleague Jan Tielens and I discovered the wonderful world of implementing ASP.NET AJAX in SharePoint. Imagine that you can have connectable webparts without having any roundtrip to the server, wouldn't that be cool. Well, before I'll post on how you could do that, it would be interesting if I give you some basics about ASP.NET AJAX.
First things first, AJAX is all about creating a better web user experience, a better look and feel for your website. One of the things that people talk about is the fact to you can have partial updates, meaning that not your whole page gets send to the server and back. This will reduce your network traffic and makes your webpage react faster, talking about a better web user experience.
The AJAX technology is not something that is new, it is there for a while. AJAX is nothing more or nothing less than using JavaScript to have a better experience, now let that be a problem for many webdevelopers. Well there is good news for those who do not like JavaScript but wants to use the AJAX technology, ASP.NET AJAX framework is your friend.
Before you can start building nice web applications or implementing ASP.NET AJAX in SharePoint, you need to download and install the ASP.NET AJAX extensions from the http://AJAX.asp.net/ website. In addition you could download the control toolkit. Use this toolkit to make use of some already created ASP.NET AJAX controls (think of a masked edit textbox, resizable controls, …). I will discuss the control toolkit in another post.
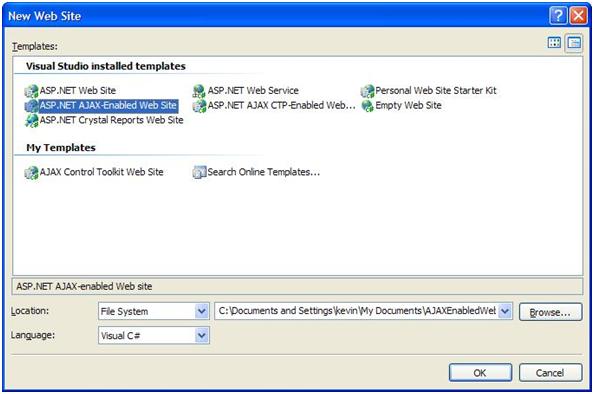
Once you have downloaded and installed the ASP.NET AJAX extensions you can open Visual Studio to create your first small ASP.NET AJAX enabled web project. If you installed the extensions correctly, a new template should be available.
In this example, I want to show how you can make use of partial updates.
When the project is created, Visual Studio creates a 'Default.aspx' webpage and places a ScriptManager control on the top of your page. This is something you need to remember, the ScriptManager is a control that you need to place above any ASP.NET AJAX control. Best thing you can do is: place the control on the top of your page. Think of the ScriptManager control as the heart of all your AJAX actions.
Another file that Visual Studio creates (thank you Visual Studio) is the 'web.config' file, this file is already prepared to work with the ASP.NET AJAX extensions, in the code below you see a reference to the ASP.NET extensions in the 'Global Assembly Cache'.
<compilation debug="false">
<assemblies>
<add assembly="System.Web.Extensions,
Version=1.0.61025.0,
Culture=neutral,
PublicKeyToken=31bf3856ad364e35"/>
</assemblies>
</compilation>
So, as I said, one of the cool things of working with the AJAX technology is the fact to we can change data without having a full roundtrip to the server. To show that to you, place following code on your 'Default.aspx' page:
Last postback occurred at <%= System.DateTime.Now.ToLongTimeString() %>
<br />
<asp:Button ID="MakePostBackButton" runat="server" Text="MakePostBack" />
This code will show us the time when the last roundtrip to server has occurred. The button is used to fire a postback to the server. Start your website by hitting 'F5', click the button a few times. You see that our timestamp gets updated. Next thing to do is creating the AJAX magic.
Drag an UpdatePanel to your page, again make sure that you place the UpdatePanel under the ScriptManager. Place the timestamp and the button control in the UpdatePanel. To check that everything works fine, we are going to place a copy of our timestamp label outside the UpdatePanel.
<asp:ScriptManager ID="ScriptManager1" runat="server" />
<div>
Last postback occured at
<%= System.DateTime.Now.ToLongTimeString() %>
<asp:UpdatePanel ID="UpdatePanel1" runat="server">
<ContentTemplate>
Last postback in the UpdatePanel occured at
<%= System.DateTime.Now.ToLongTimeString() %>
<br />
<asp:Button ID="MakePostBackButton" runat="server" Text="MakePostBack" />
</ContentTemplate>
</asp:UpdatePanel>
</div>
Restart your application and hit the button a few times. You will see that only the timestamp in the panel gets updated.
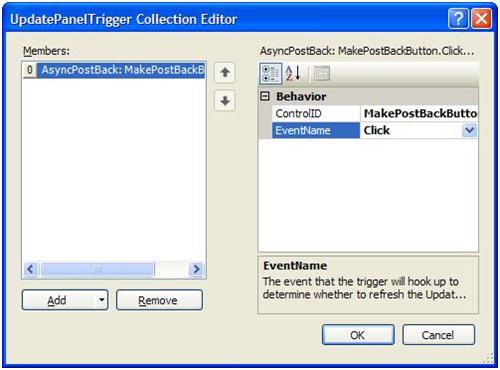
The UpdatePanel gets updated because of the fact that the button is placed inside the UpdatePanel. By default, any control in the UpdatePanel is used as a trigger to fire a postback. Now if we want to use a control outside the UpdatePanel to update it, we need to register a trigger for the panel which will point to a control that will cause a roundtrip. Go to the properties of the UpdatePanel and open the triggers dialogbox:
Restart your application and try it out.
This was a short introduction to ASP.NET AJAX, but it is more than this. If you want to learn more about this topic you can view the "How to videos" on the AJAX website.