From time to time I hear from SharePoint users that they always have to wait for their developers if they want to have a workflow that is not available 'Out Of The Box'.
As a respond I ask them which workflow they want to use or have and apparently most of the workflows can be created in SharePoint Designer without writing one line of code.
In this article I'm going to create a 'Content Approval' lookalike workflow, named the 'Holiday Request Approval' workflow (Human Resource managers can thank me later :-)).
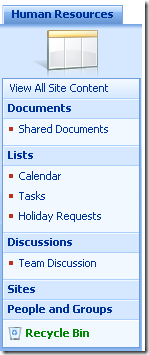
Before we open up SharePoint designer, we need a 'Task' list and a 'Holiday Requests' list, which is based on the 'Custom List' template. So the easiest way is to create a site based on a 'Team Site' and add a custom list.
In the 'Holiday Request' list we create some holiday related columns, such as 'start date' and 'end date'.

Now it's time to open up SharePoint designer and load the site where we can find these holiday requests:
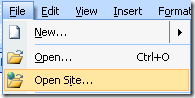
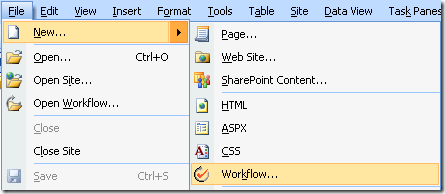
Once the site is open and loaded, we are going to add a new Workflow by clicking on File --> New --> Workflow button:
The cool thing about creating Workflows in SharePoint Designer is, that it's nothing more than running through a wizard and that you can create pretty nice Workflows without writing a line of code.
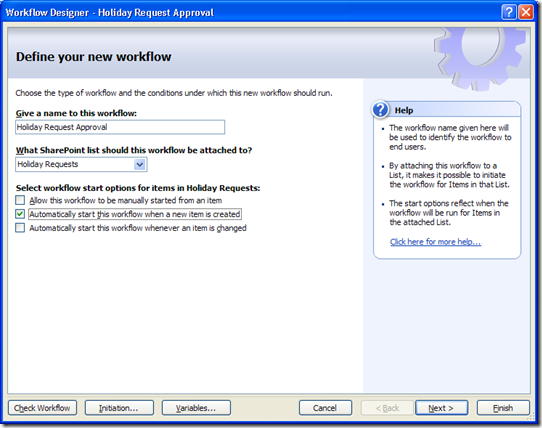
Wizard Step 1:
In this step we need to provide a title for the Workflow, in our case it is 'Holiday Request Approval'. Next you need to specify on which list or library you want to use it and when you want to start the workflow.
We are going to start it automatically when a new item is created in the 'Holiday Requests' list:
Wizard Step 2:
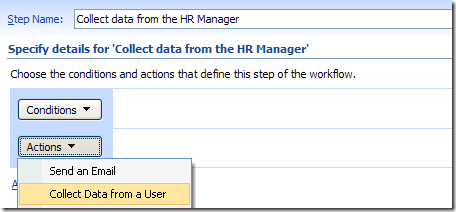
When an employee adds a request for a holiday, we need to create a task for the Human Resource manager who needs to approve or reject the request.
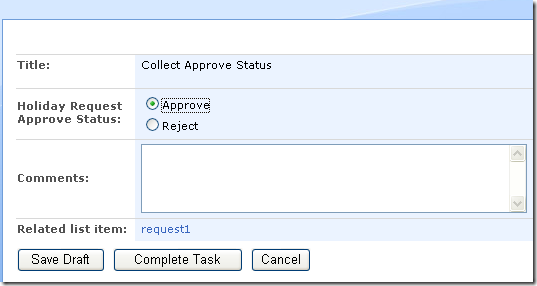
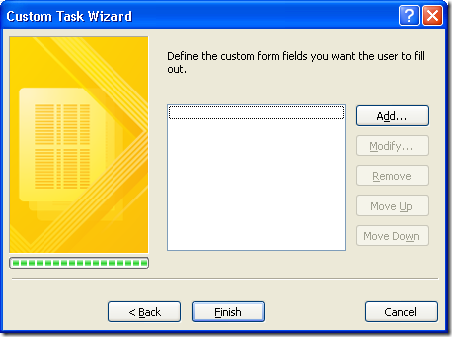
So we need to create a kind of special form where the manager can select his choice. Because I don't want to write one line of code I'm going to let SharePoint Designer create the form.
At the end, the form will look like this:
So the action that we are going to use is the 'Collect Data From User' action:

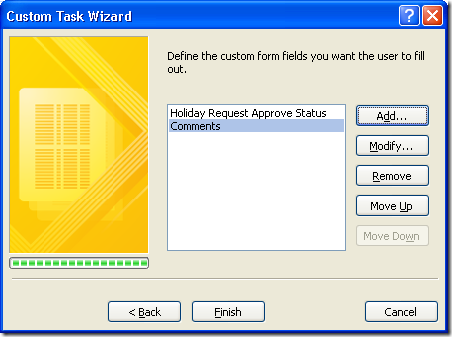
As you can see on the screen above, you need to provide three things:
- The data that needs to be collected
- The user that needs to provide the data, the human resource manager
- A variable to collect, I'm coming back on this later ...
data
First click on the data link and a new wizard will pop up:
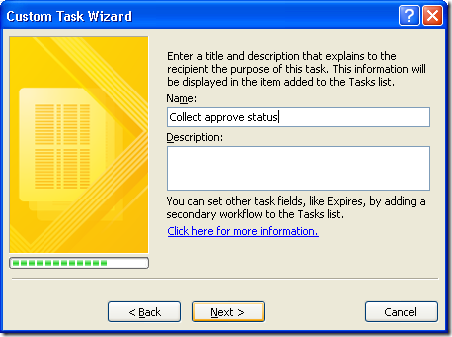
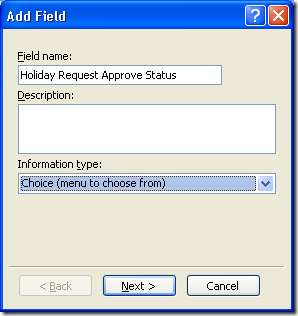
We need to collect 2 things from the human resource manager:
- Can the employee go on holiday or not?
- Some extra comments
Click on the add button to add these two questions on the page.
First question is the status where we are going to use a choice field so that the manager can choose between Approve or Reject:
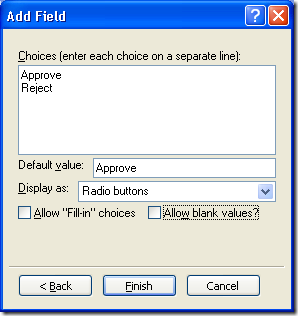
Click Finish and add another field to make it possible for the manager to add some comments:

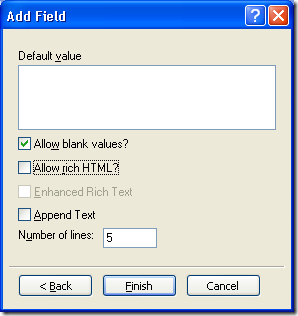
Once you've added these two fields click on the Finish button to complete the data part of the action.
User
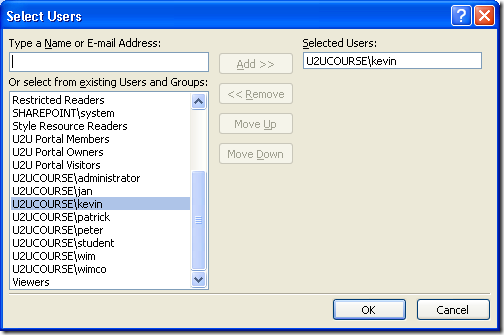
The next step we need to tell who the human resource manager is so a task can be assigned on his name
(because I always wanted to approve a holiday, I will play the manager for now):

Variable to collect:
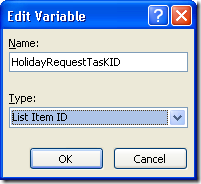
What we've actually done is, we've created a task for the human resource manager (me) to approve or reject the holiday.
Because we want to use the outcome of this task we need to save the ID of the task that we've created. This is is the variable that we want to collect.
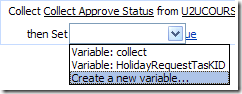
We are going to store the ID of the task in a new variable which we call HolidayRequestTaskID:

Once we've completed the first action we need to save the respond of the human resource manager. With respond I mean, what is the status and what is the comment that the manager gave.
To save these responds we need to create 2 variables and store the responds in these variables.
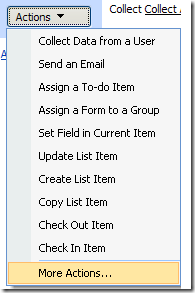
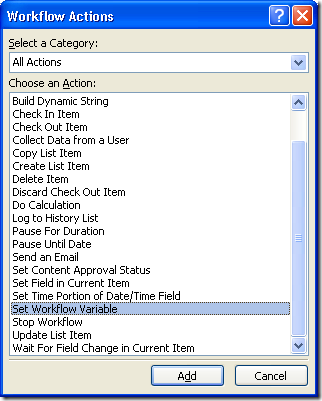
Find the Action 'Set Workflow variable'. If you don't find it click on 'More Actions...'.

We have to do this 2 times, once for the approval status and once for the comments status
Variable 1
First we are going to save the answer of the first question, which is the approval status, in a new variable:
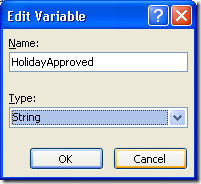
Fill in the Name of the variable and the type of content you are going to store in the variable:
Click on OK, you should be having something like this:

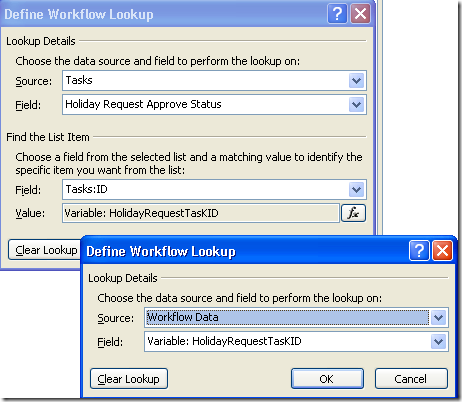
We've created the variable now, but we didn't tell the variable what he should keep. Click in the 'fx' button which will open up a new dialog:
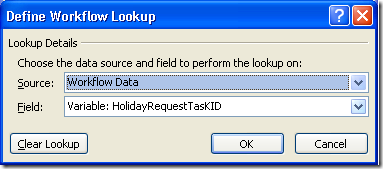
What do we want to collect? Well we want to collect the things that the human resource manager provided in the task that we've created earlier.
How do we know which Task that was, because there could be more than 1 task? Remember that we've saved the ID of the task in a variable, see 'Variable to collect'.
So in the Source drop down box pick 'Tasks' as the selected source. Once you've selected the task list, you have to look for the 'Holiday Request Approve Status' field which we've created earlier. In this field you find the answer of the first question.
Because there could be multiple tasks in that list you need to tell which task you would like to use. Get the task with the ID that you saved before.
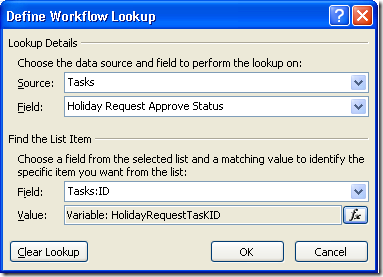
this ID is saved in the 'HolidayRequestTaskID' variable which you can load by using the 'fx' button and choose for Workflow Data.
Once you've setup all the fields click OK and do the same for the comments question.

Wizard step 3
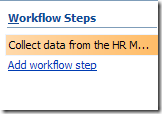
Next we are going to create a new Workflow step. You can do this by clicking on the 'Add workflow step' link on the right side of your screen.
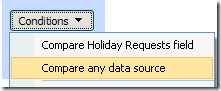
In this step we are going to check what the manager filled in. To do so we are going to compare the answer. The condition that you need to use is the 'Compare any data source':
In the first option you are going to select the variable where you stored the answer of the first question in, which is HolidayApproved:
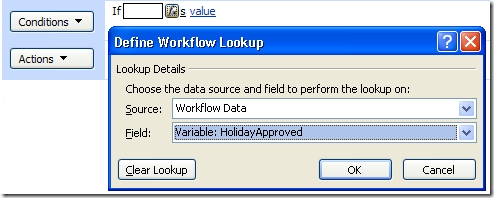
and in the value part you type 'Approve':

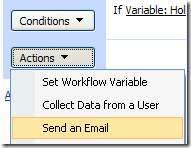
If this condition is true, you can do a lot of things:
- update a field
- add the holiday to a calendar
- ...
We are going to keep it simple and send a mail to the requester of the holiday. So use the actions button to select 'Send an Email':
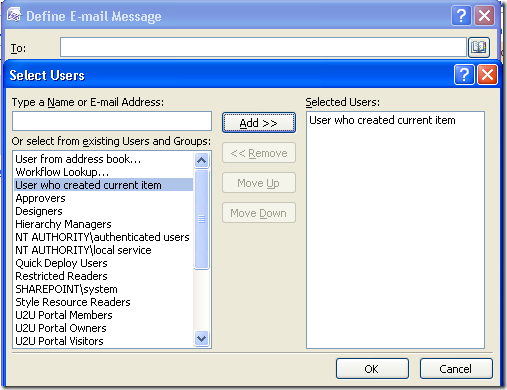
You want to send an email to the person who created the item. So next to the 'To' textbox, click the addressbook button. One of the users that you van pick is the 'User who created current item':
Complete the other fields in the send mail dialog box:
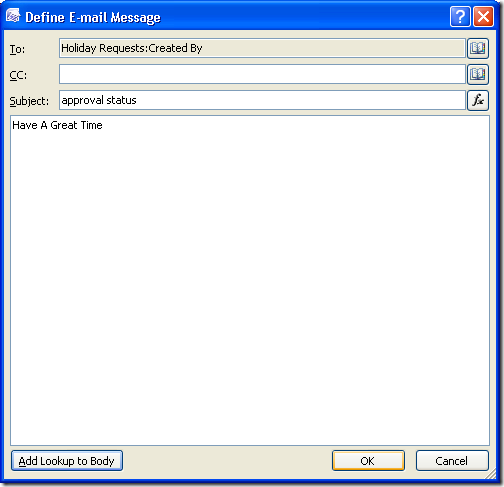
Once this is done, click OK.
Normally you will do an action if it is not approved.
Last step
Finish the creation of the Workflow and add a new item in your list, if everything went right you should have a new task created for the human resource manager that you've selected.

So, I've hope that I could show how you can create some more advanced workflows in SharePoint Designer.
K.